Castle Riverrun Part 2
Level made by Masha Frenkel
Authorized Walkthrough written by Selene
A huge thank you to Masha for being so patient
with me and helping me out whenever I got stuck. Also thank you for
providing me with that very helpful map over the wall/switch maze inside the
castle and for aiding me in finding the missing secrets.
Storyline:
Lara is searching
for the legendary sword 'Iceheart', forged of valyric steel, and it is so sharp that you can nearly see
it in the profile. It gives its wearer magical power. The owner of this sword
is invincible for all times. Castle Riverrun is said
to keep it, but the road to success is not that easy this time. Many tasks wait
for Lara, she has to be creative, fast and courageous.
IMPORTANT NOTE(as stated in the read-me):
Lara has to find a
knight's armour, made of 5 different pieces, to get
this sword. You may find sword keys near each finding location of one of these
pieces and Lara will not be able to get the sword without them. The repartition
of sword keys is as follows:
Level 1: Castle Riverrun- 1
Level 2: Dungeon- Part I- 1
Level 3: Dungeon - Part II- 2
Level 4: In the castle- 1
All these level
parts can be reached at any time. Lara may at every time come back to level 1. There
are 4 secrets to be found(one in each level), all of
which are listed in this walkthrough.
For bug notes and
further information please have a look at the read-me.
Level
1- Castle Riverrun:
Pickups: Small medipacks, flares,
torch, Cross, Little Wheel, normal shotgun ammo, large medipack, Blue Gem
Enemies: Dogs, tin knights
No
Time To Rest- Courtyard Clearance:
The moment the level begins draw guns and proceed forwards into
the Sunclock Courtyard ahead. A dog is running around here so the first thing to
do would be to get rid of it. I should mention that there are other potential
dangers in the area so we'll take an extra good look around for a start to
clean out the area. A good place to begin would be through the arches to the S.
There is a tin knight lurking around the
pillars so approach them to lure him out. My preferred way of dealing with
these is to run towards them while shooting and as she reaches them jump past
and then roll and repeat the attack while firing non-stop. Shooting them in the
chest is as known the only way of killing them and they can give off quite a
whack with their axes so be careful not to get overly close and intimate. This
one drops a small medipack
as he falls over and those are always useful to bring along. If you move
further S you will reach a beautiful garden. From there you only have two
options as to where to go: a puzzle room which is for later and a wine cellar
we'll get back to in a little bit. For now we'll stick to returning to the Sunclock Courtyard.
Enter the garden to
the E(this is to be named the Chapel Garden) and about
halfway down turn left to spot another tin knight
over by the N wall. Approach him to snap him out of the trance and deal with
him accordingly. He drops some flares so
bring them with you and turn your focus towards exploring the rest of this otherwise
tranquil garden. On top of the stairs to the N/W there is a closed gate and
there is also a closed set of double doors on top of some steps in the N/E
corner. Not much more to explore here for now so return to the Sunclock Courtyard once more.
Approach the ramp
going down to the N, then turn and shoot the dog running
in from the opposite side of the courtyard. When it's
dead go over to the ramp N once more and you'll soon find that there is a third
tin knight running around down there. In
this case the knight does not appear to be willing to go all the way up to the
top of the ramp so a nice and safe approach is to go a few steps down the ramp
with guns drawn and then shoot at him as he makes an appearance while hopping
backwards up the ramp to avoid being hit. The only thing down there though is a
closed door with a gemstone receptacle next to it(which
you will soon find to be identical to the two receptacles on each side of the
door where you first started this level) so we'll have to search elsewhere
first.
3
Things To Do In A Wine Cellar:
Go back to the Sunclock Courtyard again(taking
a mental note of the two gemstone receptacles I just mentioned, on the pillars
flanking the closed door to the W). Continue forwards through the arches S.
In the garden go through the rightmost opening first, this leads in to the Wine
Cellar. On the ledge along the S wall there is a line of barrels.The
first and third barrel from the left are breakable so whip out the pistols and
shatter them. The second barrel(the one between those
two) is moveable so push it to the left wall to uncover a torch. Bring the torch with you out to the garden
outside. Go through the arches towards the Sunclock
Courtyard and on the left there is a lit torch you can use to light your own. Now
it's time to return to the Wine Cellar and light the unlit torches there. This
causes the lid on one of the barrels along the W wall to open,
from the small hole in it you can retrieve the Cross.
You can leave the torch here, as you won't be needing
it anymore. Return to the Sunclock Courtyard and
proceed towards the N opening and the ramps leading down. In the alcove to the
right of the arched doorway you will find a jump switch nestled among the
foliage on the E wall (this would be right of the archway leading into the
Chapel Garden). Jump up and as you pull it down you'll see an iron-wrought gate
open in the garden S of the Sunclock Courtyard.
Return there and
you'll find the open gate between the Wine Cellar and the Puzzle Board (through
the leftmost arch). Go through said gate to enter a room with a beautiful and
quite inviting pool. There are two underwater gates in the pool to the S and W
and through the bars you can see the Puzzle Board on the left and the Wine Cellar
on the right. Dive into the pool and open the W door (position Lara in front
of it and press Action). At the other end of the passage behind the door
you'll find an opening, but the water level is so low that Lara can't climb
out. Return to the pool and climb out of the water onto the low block in the
N/E corner. Go over to the W wall (the wall separating Lara from the Wine
Cellar). Between the two leftmost pillars there is a switch on the right
side. Pull it and a gate opens, leading in to the Chapel.
A
Crucifix In The Church- A Challenge For A Little
Wheel:
Go back to the
Chapel Garden and enter the chapel to the left. Use the Cross to open the door
in the N wall. In the next room you will find a switch disguised as an hourglass(which is a very clever indication that
this is a timed run), a slope and a folded trapdoor opposite of it + an
opening high up on the right(S) wall. This is by far as easy as it might seem,
as the timer is almost criminally short, but it is possible. Here is how to do it:
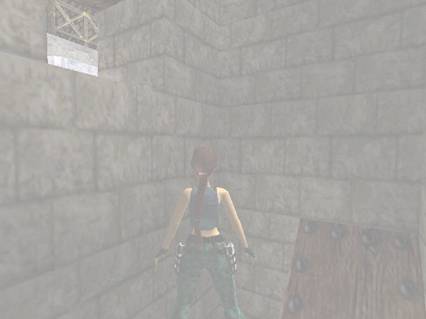
Pull
the switch and turn a tiny tad to the left-backflip-turn
a tiny tad right(Lara is supposed to be facing the rightmost part of the
slope, otherwise she will miss)-jump onto the slope-backflip/roll
to land on the platform-immediately turn sharp right-jump to grab the opening,
angling Lara right in mid-air as much as is neccessary.
Here is the entire sequence in screenshots:
PULL THE SWITCH
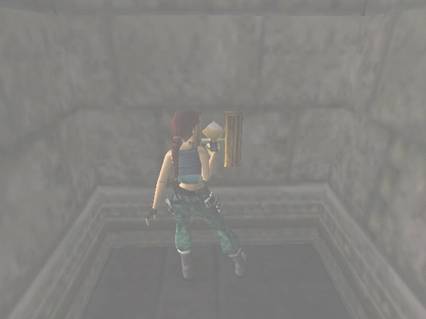
TURN SLIGHTLY LEFT AND BACKFLIP
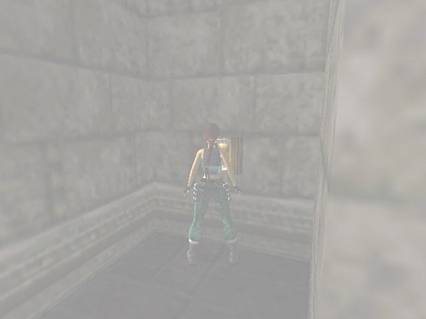
TURN SLIGHTLY RIGHT TO FACE SLOPE
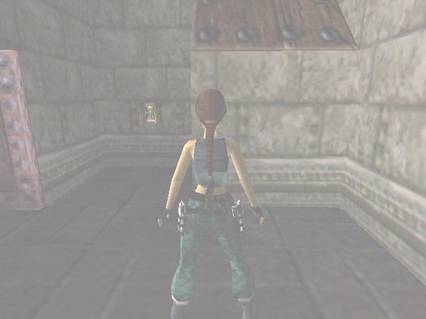
JUMP ONTO SLOPE AND BACKFLIP
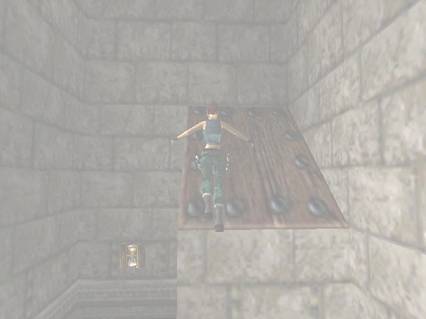
TURN LEFT TO FACE OPENING
STAND-JUMP AND GRAB
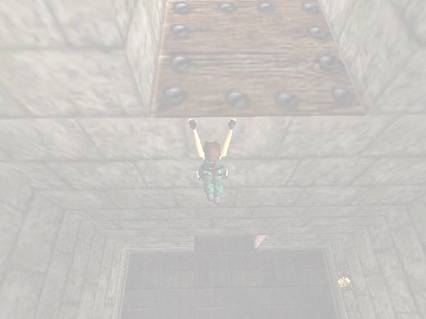
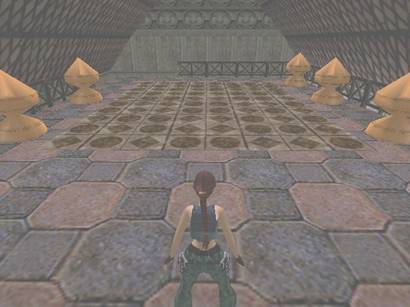
Pull up and do a standing
jump while pressing Action to grab onto the platform above the nave. Up here
you will find another puzzle board, this time with five moveable pieces. There
is a slight hint as to where the pieces go, but it might be considered very
obscure. The correct location is to line up all of them with the pedestal on
the ledge opposite.
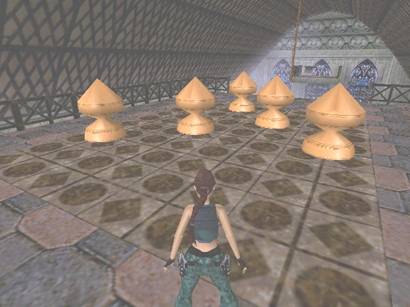
(THIS SCREENSHOT shows their location before….
and THIS ONE shows the correct location of each piece - on the puzzle board there
are five mirrored tiles and the moveables pieces go
onto each of those).
When you've done
this correctly a swinging rope will be lowered over the nave and you can now do
a running jump to grab it and swing over to the smaller platform on the other
side.
Grab the Little Wheel from the pedestal on the left and
you will see a shot of a cog wheel mechanism somewhere on the castle grounds. You're
done here in the chapel now so you can either drop down to the ground (losing
a bit of health in the progress) or if you don't mind going long ways
around to preserve health you can swing back to the puzzle board, hop down into
the opening where you came up after the timed run (stand about a hop away
from the opening and jump forwards while pressing Action) and then do a
standing jump from the left side of the edge to land on the slope and slide
down safe and sound. Leave the chapel and go back to the garden where the Wine
Cellar is.
Lara And The Bean Stalk- The Cog Wheel Mechanism:
Go through the
leftmost arch into the Puzzle Board area. Here you will find a glass board,
four moveable pieces and as a marvellous coincidence:
four ankh tiles below the glass board. There is also a wooden platform in the
S/E corner, below a switch which is currently out of our reach. Now go and have
a closer look at the setup of the puzzle board. Each moveable piece is placed
above a vertical line of tiles. There is one ankh placed on each line and the
solution is thus very simple: push/pull each piece onto the glass tile above
the ankhs on each of the lines. If you have done this correctly the wooden
platform in the corner will raise, granting you easy access to the switch. Pull
it and a gate in a currently unknown location opens. You will also notice that
a plant grows up on the green patch of grass on the puzzle board. Climb up it
and backflip onto the balcony above. Turn right and
climb over the wall and you will now see the previously unknown
location.....the gate you opened is on the right, next to a cog wheel mechanism
which obviously has one wheel missing. Of course, by now you just happen to
have one piece cog wheel in your possession, so place it on the empty peg. Doing
so the cog wheel mechanism starts turning and the gate on its left opens.
How To Flood A Pool:
Go through the gate
and you'll see a stone hammer frozen in position in front of it. Nothing will
happen with it yet though so continue on into the next room and first of all go
right to find a chest in the N/E alcove. Shoot it to find some normal shotgun ammo and a small medipack. Go
down the stairs by the W wall. In the N/E corner down here you'll find the gate
that you opened earlier on the right side of the cog wheel mechanism (so now
you have two ways out just in case). Head over to the S wall and turn right
to find a switch inside an alcove. In the alcove on the left there is a barrel
which you can shatter with the pistols. There's another barrel behind it, pull
it out of the alcove and pull it N onto the brown trapdoor. Return to the
barrel alcove, shoot a third barrel and get the large
medipack it hid. Now go back out and pull
the switch in the opposite alcove. This raises the brown block where you placed
the barrel so return up the stairs. Push it once towards the E wall, then go
around it to the left and push it once S in front of the stone hammer. A block
lowers in the S/E corner so go and pull the switch there. The stone hammer
drops and hits the barrel, it rolls down the ramp and
breaks. Water pours out of it, through the golden grate and down into the pool
below. Go back down to the ground level by doing a standing jump to grab onto
the tall plant and sliding back down.
The
Blue Gem- Next Stop Riverrun Dungeon:
Return to the pool
room and here you'll see the water pouring from the barrel down into the pool. Now
the water level is finally high enough for Lara to be able to swim through the
open door and climb onto the floor on the other side. Pick up the tiny Blue Gem from the pedestal and swim back out
where you came from. Leave the pool room and this time go back to the Sunclock Courtyard. Cross the courtyard, go down the ramps
where you killed the tin knight earlier and insert the gem you just found in
the receptacle to open the door next to it. Head through and you're on your way
to the next level.
Level
2- Dungeon Part I:
Pickups: Sword Key, Breast Plate, small medipacks,
flares, Dungeon Key + 1 Secret(a Golden Rose)
Enemies: Baby spiders, skeletons
Creepy
Dungeon And Nasty Enemies:
Start down the
stairs to the dungeon, draw guns and kill some baby
spiders crawling up towards you. Luckily they're not toxic, but they
do bite so it's best to keep your distance. More of those tiny spiders approach as you reach the bottom of
the stairs so deal with them too. Through the bars on the left you will see a
green eye symbol and there is a skeleton running against the (luckily) closed
gate on the right side ahead. Go past the bars to where the eye is painted and turn
to face the right (W)wall. It's transparent so you can
walk straight through it, around the corner to the right you'll find a switch. Pulling
it will of course let the skeleton out
of its cage, but you still have no other choice but to do so. Run out, dodge
the skellie as best you can (since you don't have
any weapons suitable for dealing with it) and head into its former cage. Grab
the Sword Key from the pedestal on the
right and your first part of the armour: the Breast Plate >from
the left pedestal. If you've taken a lot of damage from the skeleton's blows
you can run back up the stairs, out to the previous level to boost your health
and then return to the dungeon.
Into
The Spider Lair- And Out To The Boulder Ramp Chamber:
Run up the stairs
on the left side of the spider lair and continue until you reach some stairs
going down where a couple of baby spiders are
waiting. Kill them and have a look around this creepy place. There is a bronze
ball hanging from the ceiling to the immediate left of the entrance, a closed
gate in the left wall further down and two unlit torches on the wall at the
bottom of the stairs. There is also two more green eye
symbols and an urn behind some bars in the right (E) wall and an urn in the S/W
corner. I found that the skeleton from before luckily doesn't follow Lara all
the way down here so she gets some peace to do her business. Shooting the urn
in the corner to the left of the stairs doesn't appear to have any consequence
so go to the opposite side of the stairs and pull up into the opening by the
eye symbols. Shoot the urn to reveal a small medipack and also release a baby spider in the same go. Run up to the top of
the stairs and shoot the bronze ball to open the gate in the W wall.
Climb up into the
passage behind the gate and shoot a couple of baby
spiders on your way. Head up the stairs and the golden gate opens
automatically. Enter and a most impressive fly-by will show you around in a
huge room with ramps and blocks and two boulders at the bottom in front of two
gates. And of course a set of large double doors to be opened at the bottom as
well. Turn left (W) and do a running jump to grab the ramp ahead. Up above you
to the left there is another closed gate and on the wall opposite of it you'll
see a jump switch. Stand directly below the switch, jump up to grab it and let
Lara's weight pull it down. A block on her left lowers,
revealing a switch and a symbol on the wall with the cryptic message III x.
Before doing
anything else we're going to find a secret. Start going down
the main ramp until you reach the black urn on the ledge ahead. Do NOT
shoot the urn, unless you want the challenge of having a skeleton all over your
back while working (the same goes for the white and black urn further down). Run
off to the N/W to land on a ledge where you can pick up Secret 1: a Golden Rose. Walk over to the wall
where you hopped down (facing E) and climb back up onto the ramp.
The
Meaning Of Three:
Now take a close look around. In this room there are three green tiles
with golden borders (their location is outlined with red in THIS
SCREENSHOT:
Stepping onto each
of these will raise one or more blocks along the currently incomplete ramp. Once
you've stepped onto all three, return to the switch and pull it. A boulder will
drop and roll down the ramp which is now whole and complete, crash through a
gate down at the bottom and as a result the two boulders all the way down there
will do the same, shattering the gates below. You now have three open gates at
the bottom of the room (if you hadn't stepped onto the three green tiles the
floor segments along the ramp wouldn't have raised and the boulders would roll
off in all the wrong directions). Follow the ramp down to the bottom to
find one of the open gates in the W wall and two in the N wall. The large gate
is to the right of the W opening. Before choosing which one
to go through first head over to the E wall. The urn in the dark corner
on the right side is empty, but drop down into the trench by the wall and go
right where you'll find some flares.
Lesson
Number 1- Agility:
We'll start with
the rightmost doorway in the N wall. Hop over the hole in the ground, the only
thing down there is the boulder and I found that going near the boulder will
kill Lara instantly so it's best to avoid it altogether. Continue along the
hallway until Lara reaches a room with a floor above a lava pool (an indication that the floor is
indeed firetrapped).
There are some elevated tiles in the room too,
these are blue with a golden frame. You'll have to make your way across the
floor by stand-jumping onto each one. For each tile you jump to a torch is lit
on either of the walls and when you reach the other side the block in the right
corner lowers, giving you access to a switch. As you pull it you will see a
shot of the black gate in the Boulder Ramp Chamber. It is still closed, so it
seems we have a few switches left to go. Make your way back to the entrance by
jumping from tile to tile and at the end a standing jump while pressing Action
will serve you well. You can now successfully return to the Boulder Ramp
Chamber.
Lesson
Number 2- Accuracy, Speed And Aiming:
Now's a good time to find out what's behind door number 2:
the leftmost door in the N wall (note that this order is completely random
and can be done any other way with the same result). Things are getting a
bit tougher here: the skulls on the floor warn of a firetrap
and the two gates ahead are closed and with slopes going down from each of
them. Position Lara as shown in THIS SCREENSHOT…
…and backflip
to land on the leftmost slope making sure she lands as far left on it as
possible (left when she's facing the slope). Immediately jump and angle
her slightly left in mid-air so she lands straight in a small alcove with an
hourglass switch. SAVE your game here- another timed run coming right up. Flipping
the switch raises a wooden floor above the deathtrap
skull floor. It also opens the four gates in the N wall, uncovering
a shatterable urn behind each of them. Needless to
say, if you're not fast enough the wooden floortiles
will drop (sending Lara down to a miserable death if she stands on one of
them) or if she's up with one of the urns the gates will close behind her
and she's all locked up and unable to escape. As you shoot the first urn a cage
will rise around the timed switch so you can't go back there for safety. Here's one way to do it:
Pull
the switch-roll and run over to the left-jump and shoot to shatter the
urn-immediately sideflip right (this should land Lara
square in front of the next urn-jump and shoot-sideflip
right to the next one-jump and shoot-finally sideflip
right to the last one and jump/shoot-sideflip left
and dart ahead to the switch there-save the game and pull it-roll and dash
ahead out of that room.
Note that this is
my way of doing it. It worked for me, but it might not be an equally good way
for you. Feel free to try out your own techniques and see what works best for
you.
Lesson
Number 3- Stamina And Angling:
Return to the
Boulder Ramp Chamber and this time enter the last room: the one in the S/W
corner. The black and white urn by the ramp doesn't hide any surprises, neither
unpleasant nor useful ones so you don't have to break it. Go through the
doorway and do a running jump to the block ahead. Here you'll find yet another
hourglass switch. This one raises both a cage to the left of the block you're
on (S) and the wooden platform you see over by the balcony W. This time you're
in for a slope jump sequence that must be done within a certain time in order
to succeed in reaching the third and final switch. Hope you're ready for this,
here goes:
Pull
the switch, roll and immediately do a standing jump
forwards to land on the raised cage. Run and jump at the end, then jump as soon
as Lara lands on the slope and repeat the same process with the two next
slopes. After jumping from the third slope grab the edge of the fourth and
shimmy as far left as possible. Pull up and do an angled jump to the next slope
ahead and slightly left. Jump again, but this time take care not to land too
far to the left. Two slopes left to go so do two immediate jumps and instantly
press the Jump and Action keys to grab the wooden platform. Pull up and dart
forwards to get to safety on the balcony. Congratulations, you made it!!!!
Through
The Mysterious Black Gates:
Pull the switch
here and now finally you will see the black gates open. Do a standing jump from
the end of the balcony to land on the next slope, then the next one and finally
jump to land on the block with the timed switch. From there a standing jump
while pressing Action will get you nicely back to the doorway. Now you can
return to the Boulder Ramp Chamber and finally venture past the mysterious
Black Gates.
As you proceed down
the hallway the torches light. Shoot the urn at the end to retrieve a small medipack and
also deal with the two baby spiders dropping
from the ceiling to the right. Going through the cobwebbed opening N and about
halfway down the hallway, you will be made aware of an opening above you. Pull
up to the N and immediately dispose of the baby
spider residing up here, then pull the switch to open the gate down
at the end of the hallway. Another baby spider drops
from the ceiling in front of the switch, so immediately take care of that one
too. Run down to the end of the hallway, through the now open gate and it slams
shut behind Lara.
A Colour Puzzle And A Knight On His
Trusty Steed:
She now finds
herself in a puzzle room of sorts, with a firetrapped
trench running along the middle of it. There's a horse standing on
the left side, but it doesn't belong to you so the owner must be around
somewhere in the area. You'll also find some coloured
tiles in the room alongside a whole array of closed gates: three gates to the
left where the horse is and two to the right. The tiles flanking the exit
opposite are red and green and the two closest to you blue and white. You can't
escape through the gate you came from so there must be a different exit. Go
down the room along the right side and light a flare so you can see better. At the end turn left and look
up on the back of the pillar to spot a jump switch. You know what to do with it
and this will open four of the gates.
Behind each of the
now open gates you'll find a moveable globe, each set upon a coloured tile. The colours are
the same as those of the four tiles in the room itself so what you'll need to
do to solve this puzzle is to move each globe onto the matching tile(green
onto green and so on). Once you've done this the gate in the W wall opens
and a skeleton appears. It will run out
and get up onto the horse.
Usually this would
seem to be a "run for it" situation, however
you'll need to be a bit more clever here. This skeleton
is not a skeleton according to the regular raiding norms, you
actually have to kill it.....using pistols only(as
those are the only firearms you have). And this is going to take a long
time, so don't despair if it still hasn't hit the ground after some 200 rounds.
You'll also need to be very careful here, the skeleton might be sitting on a
horse, but it still has a sword in its hand and thanks to its four-legged pet
this enemy is harder to dodge than usual. My preferred way of doing it is to
stand still in one spot firing non-stop and as soon as the horse draws near
roll. Nothing more than that. Continue shooting and
when the horse approaches roll again. And fire. The point with all this is that
when Lara rolls she avoids the whacks from the skellie's
sword. Continue this way until the skellie is finally
down on the ground. But the battle isn't over yet. Now you need to continue
blasting off at it, still avoiding its sword(a bit
hard considering how fast it moves). The good news is that once the skeleton is
off the horse it won't take all that long to bring it down. Once grounded it
has the behaviour of a knight(i.e.
you must shoot it in the chest in order for it to take damage), so the regular
run-shoot-and-jump technique works well enough. The skeleton also has a
defensive stance where it will lower the shield to protect its chest. When it
does this it is completely invincible so put away your pistols and draw them
again as soon as the skellie removes its protective
shield. When it finally falls you can pick up the Dungeon
Key and leave this place through the N gate. *NOTE: In some cases
the skeleton doesn't get up on the horse at all(usually
if you start attacking right away). This way it's by far
easier to kill.*
Level
3- Dungeon Part II:
Pickups: Normal shotgun ammo, Rules Of Dungeon,
flares, shotgun, Dungeon Key, 2x Sword Keys, Left Greave, Right Greave, large medipack,
2x Castle Gems, small medipack + 1 Secret(a Golden Rose)
Enemies: Skeletons, baby spiders, undead Templar Knight,
Dark Wraith, fire wraiths, Demon demigods
If you do not have
the Dungeon Key at this point you'll have to turn back and return to the
previous level, where you must deal with the skeleton on the horse. If you don't you will be unable to proceed with the level. Follow
the hallway to the end and ahead of you there's a small room with torches that
light up as you enter, double gates to the E and a keyhole opposite(it does
look like a button, but in reality it's nothing but a keyhole). Insert your
Dungeon Key in the only place obvious and watch as the gate opens, inviting you
into the bowels of the dungeon. The gate closes behind you so now there's no
way back(and here of all places).
The
Black Gate That Had To Be Opened:
First of all head left(N) and around the corner you will run into another one
of those skeleton knights(without horse
this time----don't you just LOVE skeletons that actually fall after a few
rounds with the pistols??). Along the wall on your left you will find two
closed gates, one of them is in need of a key in order to be opened. The
breakable urn on the right is empty so there's no real need to shatter it. Behind
the top right pillar there is a switch, but before pulling it we're going to clean
out the room. Turn around and return to the gate where you came in(noticing the currently closed gate on top of
the stairs as well) and proceed S, around the corner. Another skeleton knight is waiting here so bring him down
too and pick up the normal shotgun ammo between
the two pillars on the left. You'll find a few more closed gates here, but appearantly there is no way of opening them for now.
Learning
The Rules Of The Game:
Return to the
stairs and this time we're going to head up. Kill the baby spiders you meet along the way and continue
up the stairs on either the left or right side(they
both lead to the landing above the entrance). There are more closed gates here(seems we're going to have quite a task at our hands
opening them all) so start by picking up the Rules
Of Dungeon from the pedestal. The gate behind Lara opens and the
text on the scroll reads: "You want the sword? I want my mind. Give me
mine and you can go out." Sounds fair enough, but at this point we
don't really know the rules of the deal so we'll just suffice with taking a
mental note of it for now.
Go through the
gates and notice the two switches on each side of the entrance, both currently
inaccessible due to the cages around them. Admire the skeletons hanging on each
side of the block ahead and the nice candelabras, then
go around the block to pick up some flares.
Lighting one of those(or using the
binoculars) could be very useful in locating the jump switch on back of the
block, right side(when facing the entrance). Jump up and pull it down,
with the result that one of the numerous gates here in the nearby area opens. Leave
the room and return down the stairs to the entrance.
The
Library- A Timed Climb Over Fire And A Moveable Skull:
The now open gate
is the rightmost one in the S wall(near
where you picked up the shotgun shells). That's where we're going next. As
soon as you enter you have another skeleton knight
on your back. Killing it can get a bit troublesome this time due to the table
and chairs that get in your way(as opposed
to him who can just run straight through them). Above all, be careful not
to get too close for comfort to the fire in
the S wall alcove. There's a ladder going up through an opening above the fire, but as long as it's still burning you
have no chance of getting up there. Simple solutions to simple problems though:
the switch right next to the fire will
turn it off AND open a trapdoor on top of the ladder in the same go. But there
is one catch: this sequence is timed so if you're not up on the top floor
before the trapdoor closes you're as good as fried. Pull
the switch, roll and jump over the wooden pile that was once a fire. The ladder
is located on the E wall so climb it and as soon as Lara's head sticks up above
the opening backflip to safety.
You'll now find her
located in a small library. There's a closed gate in the N wall and opposite of
it an urn in a niche between the bookshelves. Said urn is just too tempting to
leave alone so break it and watch as the entire room is bathed in a red light. Pull
the switch on the shelf right of where the urn was to open the gate, but do not
leave yet. Instead go to the S bookshelf, the second section from the right is
moveable. Pull it out once, go around it to the left and pull it once more. Behind
the shelf there is a moveable skull, but the closed gate prevents you from
reaching it. Go back to the moveable shelf and now place it in the gap in the
bookshelf where you shot the urn. The gate opens and you can drag the skull
with you out through it, onto the landing up above the main room. Remember the
room with the two cages and switches where you pulled the jump switch earlier??
Bring the skull with you in there and place it in front of the block with the
green eye symbol on the left side. This causes the left-hand cage to lower,
meaning you will still need another skull for the other eye block. That's for
way later though.
The
Burial Chamber- A Greave, A Sword Key And A Secret:
Return to the
ground floor and this time we're going to do something about the switch behind
the pillar (the one I mentioned at the very beginning of the level). Pulling
it opens the gate on her right side (N). Enter the room and you will find a
climbable pole as well as a closed gate to the N. Climb the pole and backflip onto the floor above. Pull the switch on the S
wall and drop down to find the N gate open. Enter the corridor and kill two baby spiders on your way. Note that these are
venomous though(unlike earlier), so blast them down
before they get to bite her. In the next room there are two more baby spiders. After killing them go behind the cobweb on the right to find a switch. It's
a timed one and it opens the door down the stairs to the S. Pull it, turn right and dash down through the door before
it closes.
Save your game here
and go forwards to pick up the shotgun laying on the floor. Yes, it is there for a reason. You'll
also see a pit on the middle of the floor and that will prove very useful right
now. Arm Lara with the shotgun and go over to the second grave on the right(between the two large wooden crosses), pick
up the normal shotgun ammo here. A
skeleton appears and it's not the kind you've met earlier. This one will only
stay down for a few seconds, so your best shot is to blast it into the pit in
the middle of the room. There is another box of normal
shotgun ammo by the sarcophagus. While in this room STAY AWAY from
the graves with the bone remains and do NOT shoot the white vases on top of the
graves on the left as that seems to trigger skeletal apperances
as well.
Now take a moment
to look around the place. Especially notice the three large wooden crosses(one by the left wall, two by the right
wall). Each of them are placed strategically in
front of a closed gate. Lara can neither move them nor break them with her guns
so she needs to find another way of having them removed(and
believe me, it's NOT a tempting solution). There is also a closed door to the S
and we need to figure out a way of opening it. First of all break the urn in
the S/E corner to find the Dungeon Key(for
the keyhole out in the main hall). Now save your game and concentrate on
the urn in the S/W corner. Draw pistols and shoot it to release an undead Templar Knight. Not a tempting solution
like I said, but believe it or not: you're going to need him simply because he
will shatter the large crosses for you with his sword. To make him do this
position Lara right in front of each cross and wait until he comes near(he's
a slow mover, so be patient with him). As he lifts up his
sword to strike jump out of his way. If you're lucky the cross will break
and the gate behind it open. Run through the gate,
pull the switch, return outside(still
avoiding the knight) and repeat this procedure with the remaining two
crosses.
Once you pull the
third switch the door S will open. Do not leave yet though, but position Lara
in front of the blue cross by the left wall(next to the sarcophagus) to
make the knight break it. Lure him away, then return to where the cross was and
pick up the 2nd Sword Key and the Left Greave. Now you can dash through the open
door. You're still not entirely safe though, a
whole heap of baby spiders swarm down from the doorway ahead. Kill
them, but before continuing through the doorway go for
a very concealed secret. After you run up the first flight of stairs and kill
the spiders, look for a high crawlspace up on the right side next to the
burning torch. Pull up there and crawl through, then pick up Secret 2: a Golden Rose. Climb back down and
continue up through the narrow corridor. Around the corner Lara will run into a
closed gate, but luckily it opens as she approaches. Head through it and it
closes behind her, cutting off her access to the previous room(and
good for her, it also makes the knight unable to reach her). Follow the
corridor around and in the next room light a flare(or
use the binoculars) to spot a jump switch up on the left wall(W). Pull it
down and the gate N opens. Run through it and she's now safe and sound back in
the main hall.
The
Skull That Had To Be Lifted- A Third Part Of The Armour:
This time she's got
a key in her backpack and it fits perfectly in the red keyhole left of the
middle gate in the N wall. The gate next to it opens and she can now access the
room behind it. In here you'll find a closed gate in the S wall with a moveable
skull behind it. Over by the opposite wall you will find a stepped ledge with
three switches along it: one at the bottom of the room on the right, one up to
the left and a third one further to the left(to
access this one you'll need to raise the block below it). Your goal is to
bring the moveable skull from the groundfloor up to
the top, by raising and lowering the blocks. But before
starting this climb up the ledges all the way to the top. Go to the N
end of the ledge and shoot away the cross here, this causes a ceiling hatch to
drop down below Lara. Pull yourself up into the room above and proceed to
pulling the switch here. Go to the gate you opened across the switch and pick
up the Right Greave from the pedestal. Doing
so also causes the W gate to open and in there you can pick up the 3rd Sword Key from the pedestal.
Return to the
ground floor and pull the switch at the bottom. This lowers the block below the
second switch and also reveals a fourth switch behind it. Pull the latter to
open the gate where the skull is. Push/pull the skull out of its cage and onto
the tile in front of the recently revealed switch. Go back to switch number 1
and flip it back up. The block raises again and the
skull is transported up onto the lower ledge. Climb up there and push the skull
all the way to the end as far as it goes(right below
the high switch). Now go to the second switch and pull it to raise the block
beneath the skull. Once more push the skull all the way as far as it can go,
then return to the now accessible third switch and use it to raise the skull
even further. Now all you need to do is to return to the skull and push it in
front of the closed gate on the right in order to open it.
Mind
Given Back, Now Where's The Promised Exit?:
Now push the skull
through the open gate and all the way across the top landing until you reach
the room where you left the first skull. Push the skull through the doorway and
in front of the block with the eye symbol on the right. Now that both cages are
gone, pull the switches to raise the blocks below the skulls. Climb the red
block and pull both skulls once onto the red block. The double gates on top of the stairs finally open and releases a Dark Wraith. It is of course immortal and on top
of that it also shoots out some mighty powerful bolts(in
addition to being capable of sweeping in for a close and very harmful attack).
Dodge it as best you can and dash up the stairs, through the open gates and up
the stairs(the Wraith won't follow her that
far).
Jingle
Bones- A Skeleton Cabaret:
Go through to the
end and pick up the normal shotgun ammo
next to the closed gate on the right. Go back and enter the room to the N. The
urns on each side are shatterable, they don't contain
anything of interest, but shoot them and approach the red carpet and it will
fall to reveal.....a skeleton dance show??? Luckily they pay no attention to
Lara. At the back wall of the stage(on the
right side) there is a jump switch. Pulling it you will see the gate from
before opening. The skeletons don't mind, but there is a really ticked off pair of skellies approaching
from the entrance. Run out past them and through the open gate.
Cistern
Tower- Timed Run:
You're now in a
cistern of sorts and a massive fly-by shows you the way up past a bunch of
tiles and a skeleton rising from the dust on the upper level of the middle
structure. Finally on top you will see the prize: a red gem. You can't break
the fly-by camera by pressing Look, but the skeletons
are still on your tail so I'd recommend you to have Lara run
forwards and drop into the pool(you will
notice when the blue bar appears up to the right). From the ledge where you
entered you can blast the skeletons into the water with a few well-placed
shotgun cartridges(you can also ignore them,
as you're not going to return here).
When
they're both blasted into oblivion swim over to the N/W ledge. Climb out of the water here and save your game. Stepping
on the dark blue tile triggers the rising of a trapdoor over by the E wall. It
is timed though so you'll need to hurry in order to make it past it in time.
Stand
with Lara's back to the tile and hop backwards onto it to activate the rising
tile. Run forwards and jump at the end to land on the next ledge. Steer Lara to
the right and jump to land on the timed trapdoor, then veer off to the right
and jump again. Now she'll land on
a ledge with a skeleton. You can blast
it off the ledge with a few shotgun shells from where you stand or continue
running to jump and grab the next block by the S wall. Pull up and turn, then
use the shotgun to knock the skellie off the ledge.
Turn to face the
tower N and you will see a skeleton on the top floor. Do a
running jump to reach the floor below, pressing Action to land in the
opening. Follow the tower passage around to the left and do a running jump to the
next block by the W wall. If you turn right you will see an additional two blue
trigger tiles. To make matters worse you will see another skeleton running around on the ledge ahead and to
the right. It will jump over to the ledge by the blue trigger tiles so I'd
recommend you to jump over to the first blue tile and knock it off the ledge,
this will make things a bit easier on you.
And now for more timed challenges:
Run diagonally onto
the second blue tile to raise a second trapdoor ahead. Jump to the next ledge
and continue running to the end, then jump diagonally right to the raised
trapdoor. Don't stop running, because there is a double set of raised trapdoors
ahead and you'll need to jump across to them as well before they drop. Run
across and jump at the end again to grab the overhead platform by the S wall.
Shimmy around the
corner to the left and SAVE your game. There's yet another timed challenge
coming up and this time around it's not as easy as before. Pull up onto the
blue tile to raise a timed trapdoor on the other side of the middle tower. Run forwards and jump to land on the next block, then turn
right and do a running jump and grab to land on the upper floor of the tower. I'd
recommend you to ignore the skeleton as you have a timed tile to reach. If you insist on
dealing with it now you'll have to go back to the block from which you jumped
into the tower and do a standing jump from there to
the trigger tile, pressing Action to grab the edge and shimmy around to the
left, then repeat the entire timed run/jump back to the tower. Either ways,
once you're back at the upper floor of the tower run to the end and jump to
land onto the timed trapdoor(this is a bit difficult due to the changed
camera angle). As soon as you land on it turn right and immediately standjump forwards and press Action to grab the edge.
Save your game
again, another timed run/jump is on the schedule. The platform you're hanging
from is another trigger tile so position Lara at the far left end and pull up. Run diagonally right and jump to the two timed trapdoors,
run to the edge(making sure to stick to the
wall), then do a diagonal jump to grab the left side of the ledge ahead and
above(you'll need to land straight on the corner to make it). Pull
up and save your game again.
And
Another One- For The Disputed Castle Gem:
Do a running jump
to the next ledge and a skeleton will
appear on a platform around the N/W corner. It's easiest to get rid of it to
begin with. As you can see the next tile is another blue trigger tile so guess
we'll need to save the game again here. Whether you do a standing jump to the
blue tile or a running jump over it to grab the platform by the switch a timed
door will open in the N wall. The switch opens the two gates in the tower wall
opposite and across from the timed door. My recommendation is to go and pull
the switch first, as you will need to go through the tower to reach said door. You
can also do an angled running jump to the right to grab the edge of the tower
opening and pull up to get a large medipack, then return
to the platform with the switch. And now for the final timed
run/jump:
Stand
at the edge of the switch platform(with Lara's back to
the timed tile). Backflip to land on the blue tile, triggering the opening of the timed
door. Immediately do a standing jump forwards and run with a right angle
to jump at the edge and grab the tower opposite. Pull up and run left around
the corner, jumping at the edge through the second open gate. Dash forwards
through the timed door before it opens(it
will close behind you).
The best thing is
to avoid the skeleton and run forwards
to the wall ahead(the one with the skulls on
it). It's a ladder so before the skellie reaches
Lara jump up and press Action, then quickly climb up. As
soon as you see the ledge behind Lara backflip and
turn around. Through the doorway ahead you will see the top of the tower. Now
you've got quite a few problems on your back though: there are two skeletons up there. Either ignore them or
blast them off the top. Pick up the Castle Gem from
the pedestal. An underwater gate opens and two fire
wraiths start chasing Lara so run off the top to land in the water
below, putting out the fiery company.
The
Four Skull Puzzle- Swimming, Fizz Bang And A Final
Castle Gem:
Swim through the
open gate and follow the passage around to an open pool. Climb out by the S
wall and go around to the left until you find a bed with some grass and a box
on the left-hand side. Shoot the box and pick up the small medipack. From there go N and
climb onto the central structure(taking a
mental note of the cage on the left, there is another gem hidden behind it). Continue
forwards and you will see a jump switch up on the left pillar. Pulling it down
you will see a block below a moveable skull sink into the ground somewhere
else. On the other side of the pillar opposite of the jump switch(E)
there is a ladder. Climb it to the top and you've just found out where you
lowered that block. Pull the skull with you onto the closest dark blue tile(S/W
corner). This raises a block below the switch left of the skull. Climb it and
pull the switch, then immediately draw guns and turn to run off the block
because now someone(or something) nearby is shooting
blue bolts at Lara. The culprit turns out to be a demon
demigod standing on the dark blue tile in the opposite corner S/E.
The easiest way to dispatch of him is to run as close as you can, crouch and
fire. His bolts will fly over Lara's head and do her no damage whatsoever.
Once he's down you
will notice that the block preventing you from moving the skull next to where
the demigod stood is now lowered down to ground level. This means that you can
move it over to where the demigod was. The block opposite rises and you can
access the switch there as well. Pulling it will light another torch on the
wall and lure out yet another demon demigod
so deal with it the same way. Now it shouldn't be that difficult to spot the
skull that you can move onto the blue tile in the N/E corner. Climb the block
that rose, pull the switch and kill the demigod.
Now pull the last skull onto the correct tile, climb the block and pull the
switch and you can thus kill the final demigod.
You might have
noticed that an underwater cage lowered as you pulled the final switch. After
dealing with the last demigod return to the ground floor and dive into the
water. There is a gate in the E wall and an underwater lever on the base of the
pillar S/W. Pull it to open said gate and swim through. In the next underwater room(where you can actually surface as well, even
though the ceiling is low) there is another gate in the N wall and another
lever on the wall opposite. Pulling it opens the N gate so draw a breath(you can't surface in the next room) and
swim through it. Locate the lever on the N wall and pull it to open the gate in
the W wall. You can surface in the next room as well and pull the lever on the
W wall. When you do this you will see fires burning up on the platform where
the four skulls were. The four fires move in towards the centre of the platform
and the cage in the middle lowers.
Now you'll need to
return there. You can now pick up the 2nd Castle
Gem from the pedestal in the centre of the room. As you do so you
get a camera shot of the last underwater gate opening. Swim through all the
submerged rooms and when you reach the last one go through the open gate N. As
you approach the next gate after it the level ends and you're taken back to the
garden of Castle Riverrun.
Castle
Riverrun- Part 2:
Pickups: None
Enemies: None
Entering
The Castle:
You start in the
underwater tunnel on the other side of the gate you swam through in the
previous level. Continue following the passage and the next gate opens as you
approach it. Swim out and up: lo and behold- you are back in the pool room in
the Castle Garden area!!! And this time you have two gems with you, which will
make accessing the castle itself way easier. Climb out of the pool and leave
the room, then continue straight through the archways N back to the Sunclock Courtyard. Turn left and go over to the door where
the two gemstone receptacles are. Place the two Castle Gems there to finally
open the door between them. You can now finally enter Castle Riverrun.
Level
4- Inside The Castle:
Pickups: 4x Blue Gems, lasersight, torch,
crossbow, Sword, 2x Small Wheels, Left Gauntlet, Sword Key, small medipack, flares, crossbow ammo, normal
shotgun ammo
Enemies: Tin knights
*Note that if you
go out through the gate that opens behind you as the level starts(E)
you'll be taken back to the previous level(Castle Riverrun),
from there you can return to the Sunclock Courtyard.*
Welcome
To Castle Riverrun- The Main Hall, Upper Floor And
Two Corridors:
Enter the main hall
of the castle to the right. There are two tin
knights standing guard here. One easy and harm-free way of taking
care of them is to run up the stairs either to the left or right. The knights
will not venture past the first two-three steps so you can run down to the
bottom to lure them out and then hop backwards while shooting as they come
closer. This will take a bit of time, but it's good for conserving health. When
one of them falls you can always run down the stairs and take on the other one
close-up. When they're both dead you can pick up the Blue Gem that one of them drops.
Now that there are
no enemies currently lurking down here you can spend some time looking around
the place. The door to the W between the two flights of stairs is closed(notice the two Centurion statues flanking each side
of it). There are also two closed doors N and S before the stairs, both of
these doors open as you approach them. First we'll go up the stairs though.
They both lead up to the same landing, so it doesn't matter which one you
choose. On top there is a room W with a set of double doors ahead, two massive,
spoked wheels(one on each side) and two breakable
chests(both empty). If you look down at the grate on the floor you will
see the Cog Wheel Room(this is the room
behind the red double doors down in the main hall). Now that you know what
we're up against you can return to the main hall.
We'll start with
the left(S) door first. The first thing you'll see are
two chests, one on each side. They can both be shattered and they're both
empty, so not worth spending even unlimited ammo on. If you continue forwards
you will see a red moveable piece behind some bars on the right. Further down
on the right you will find a gemstone receptacle(yes, the Blue Gem fits
perfectly into it, but as you will see if you continue down the corridor you'll
need more than just one gem). There are also two closed door opposite of
each other on the left and right, the second aforementioned gemstone receptacle
on the right and another moveable, green piece(also on the right-hand side).
At this point you will see a tin knight
coming around the corner ahead so kill him and pick up the lasersight he
drops. Continue following around the corners to find more closed doors and some
bars on the left. We're not stopping there, because around yet another corner
you will find(in order of appearance): a yellow
moveable piece to the right(also behind bars like the others of course)-closed
doors to the left and right-gemstone receptacle to the right and finally a blue
moveable piece behind bars on the right-hand side. There's a chest that you can
shatter with your pistols if you like at the end, but that one is as empty as
the others so it's not necessary. Now that we're a bit more familiar with this
place, let's return to the main hall.
All
Is Not As It Seems- The Throne Room, Torch Puzzle And Mirrors:
It's time to figure
out what's behind door number 2: down the N passage. At the end there is a tin knight waiting to be eliminated, but he
doesn't carry anything of interest. Seemingly very little to
do here, but the red door on the left opens as you approach it, allowing you to
enter the Throne Room. There is a tin knight
hiding behind the thrones ahead(you
will notice that Lara aims for him as she draws near). He doesn't drop
anything, but between the bookshelves by the right-hand wall(N)
you can climb up into an alcove. The wall section ahead is moveable so push it
in as far as it goes. There is a closed gate to the right, but it doesn't open
yet so we'll need to go back outside and find something else to do for now.
You might have
noticed the unlit torches on the N wall??? Opposite of the alcove with the moveable
block(S) there is another opening and in front of it you will find three
torches on the ground. There is also a pile of wood behind it, so it seems
we'll have to find a way to light the fireplace. Pick up one of the torches and bring it along with you. The
only way of lighting it that I could find was to return to the main hall, then
exit the castle and go back to the previous level and the Sunclock
Courtyard, then go right through the arches to find the lit torch on the right side(the one you used to light the torch for the
Wine Cellar puzzle way back at the beginning of the game). Light the torch
there and bring it back into the castle.
First of all go
through the N corridor and back to the Throne Room. Start off by lighting the
pile of wood where you found the torches. Now light the torches on the N wall(flanking the alcove with the closed gate) and
the candlesticks on each side of the thrones. An amazing fly-by will show you
the curtains moving aside on the S wall, uncovering two large mirrors. Start
off by going over to the left mirror. If you look into it you will see a crossbow laying on the
carpet. Turn around and go over to the carpet, then use the mirror to locate it
and pick it up. Locate the two shields and swords on each side of the fireplace.
These are in reality two switches so flip them and they will rotate and
disappear into the wall. Alright, but what on earth happened? We're about to
find out.
Now it's time to
move on to the right mirror. Notice the transparent line running along the
middle of the mirror? At that spot you can actually jump straight through the
mirror, shattering it. You're now in the Inverted Throne Room. Climb the alcove
between the bookshelves and push the block in once like before. Enter the
passageway behind it and pick up the Left Gauntlet
from the pedestal. A quick flash-back will show you a Sword Key on another
pedestal. We're getting that in a moment, but first for something else. Go over
to the fireplace(which is now by the N wall)
and very cautiously run past the right side of the fire.
Here you will find a Sword on a pedestal
so pick it up and go back out the same way. This time you're going to run past
the same fire again, but on the left
side. Stand facing the N wall and look up to see a fence
blocking your way. Arm Lara with the crossbow and lasersight
and stand as close to the fire as possible. Aim up towards the fence and shoot
it out. The wall below it is in reality a ladder so climb it up to the top and
crawl through. On a pedestal to the right you can pick up the first Little Wheel. Once you've gotten it you can
drop down into the actual Throne Room. Enter the passageway past the bookshelf
alcove. To the right you will find a now open gate and the previously seen 4th Sword Key on the pedestal for you to pick up.
We're done with the Throne Room now, but we still have two gemstones to
acquire, so leave and return to the main hall.
The
Quest For The 2nd Blue Gem- A Block Puzzle:
When you get there
go to the door between the two Centurion statues. You will now notice that the
shield to the right is missing a sword. Conveniently enough you have one in
your inventory so place the sword in its rightful place and the red doors open.
You now have free access to the Cog Wheel Room and as you can see two wheels
are missing to complete the mechanism. There's not much to do in this room for
now, so pick up the torch again and this time head through the S corridor. There
you can use the torch to light the ones next to the wooden doors and they will
open up. There are three doors in total and I will name them Door 1, 2 and 3(where
1 is the door closest to the main hall). We're starting by going through
door 3. There is a darker block in the left wall and it's
moveable. Pull it out once and then go around it to the right and push it away
from the opening it conceals. Go through the opening and straight ahead(E). There are three passages here: one to the left,
one straight ahead and one to the right. The left and middle passages each have
a grey tile in the middle(it looks like the
classic spike tile, but it luckily isn't). The right passage holds a closed
gate with a gemstone pedestal behind it. There are two moveable blocks here, one is the block you pulled out to find this secret
room and the second one you will find if you go through the middle passage and
all the way to the end. Pull this block out about three times or so(until Lara stands on the grey tile in the
middle passage). Now go around to the right side of the block and push it
up against the wall. Return around to the other side of the block again and
pull it once onto the grey tile in the left passage. Return out to the room
where you found the first block and pull it so that it will once more block the
opening. Go around it to the left and push it forwards through the opening and
continue pushing until the block is positioned on top of the grey tile in the
middle passage. Having done this correctly the gate in the right passage is now
open and you can retrieve the 2nd Blue Gem.
The
Quest For 2 Remaining Blue Gems- A Block And Switch
Maze:
It's time to check
out door number 1. As you enter here you will see two switches in the corners,
both in an upright position. There is one opening on your left and one on the
right plus one blocked opening straight ahead. Now this puzzle is pretty
complicated and it's very easy to get lost. The main goal is to find five
regular switches(not the corner ones) hidden
behind the blocks. There are two blocks below cog wheel paintings and behind
these you will find the two missing gemstones. You will have to find the first
one of them in order to gain access to the second.For
each corner switch you pull some blocks will lower and others will rise. Behind
some of the blocks there will be nothing but empty alcoves, behind five of them
there are(as mentioned) switches and the rest will
lead into new rooms with new corner switches and new blocks. Ready? Let's go.
First of all leave the torch in this room(the
main room). I've tried writing down the progress, but the result becomes a
tad confusing so to aid you I have added a map drawn by Masha
which helped me a lot when I got stuck at this part. Use the map provided below
to locate the five switches and the gemstone rooms. Remember that you need to
go to Gem Room 1 to pick up the gemstone BEFORE being able to access Gem Room
2.
SWITCH MAZE MAP
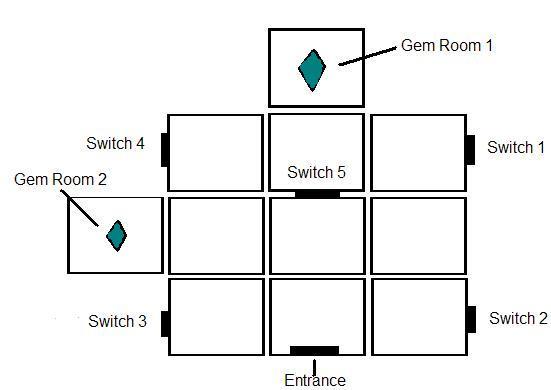
Pick up the 3rd Blue Gem from the pedestal in Gem Room 1(see
map) and you will see another door lower(provided you have lowered the
block below the second cog wheel painting already, if you haven't you will need
to go back to it and do so). Shatter the chest and pick up a small medipack. Return
to Gem Room 2(see map) and lower the block below the cog wheel painting
if necessary(using the near-by switch). Go
in there and grab the 4th and final Blue Gem,
then shoot away the three chests to acquire flares,
normal crossbow ammo and normal shotgun shells. You can now make your way
back to where you entered, it's time to put the blue
gems to good use.
The
Ordeal Of The Colour Cages- Moveable Pieces, Timed
Runs And A Wheel:
Return to the
hallway outside and insert the four blue gems in each of the four receptacles
along the opposite wall(note that you'll
need to follow the hallway around to the end to locate all four of them). Once
you have inserted the last one a wooden door opens in the E wall, between the
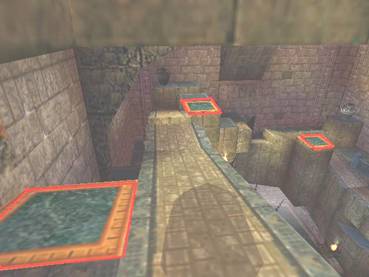
last two receptacles. What you'll see as you enter is a huge hall. Ahead(E) and above there is an iron-wrought ledge with a
pedestal(supposedly one we'll eventually need to reach). Around the room
you will also find switches on the various columns, all inaccessible due to the
cages surrounding them. You should also notice four differently coloured tiles(red/brown,
green, blue and yellow) and matching moveable pieces. It's not as
straight-forward as it looks though, because there are matching tiles on the
floor inside the cages too and if you look closely you will see that the ones
inside said cages can be raised. There are also sets of tiles in the same colours on the floor up by the pedestal, indicating that
you'll need to move the pieces up there.
First begin with
moving all the pieces onto the matching accessible tiles. Part of a column near
the red/brown piece will lower, revealing a timed hourglass switch. Said switch
opens one gate in one of the four iron-wrought cages. Once inside the mentioned
cage you will need to pull the switch here to reveal another timed hourglass
switch behind one of the other pillars in the same room. This procedure must
then be repeated three times. As a final result you will be able to move all
the pieces onto their coloured tiles inside the four
cages and access the switches there, lowering the N cage so that you can reach
the final switch.
Pull
the hourglass switch and dash down through the hall to the yellow cage(S/W
corner). The open gate is located on the W left-hand side. Dash through it and
pull the switch on the pillar ahead to the left to reveal a second hourglass
switch behind the pillar next to the gate near the yellow piece.To make things easier you can move the yellow piece onto the yellow tile
inside the cage now(this is so that you won't have to
crash in it during the following timed runs. When you do so
you will see a shot of the cage by the N wall. Now go to the second
hourglass switch and get ready for another timed run.
Pull
the switch and this time dash over to the E right-hand section of the red/brown
cage where the second timed gate is located. Pull the switch here to reveal a third timed hourglass and like earlier
pull the red/brown piece into the cage and onto its tiled equivalent. The third switch is located by the E wall near the green
cage, meaning that the gate it opens is in the blue cage, diagonally across the
room. Despite the distance it's actually easier this time around, simply roll
and sprint diagonally N/W straight through the open gate. The
final hourglass switch is obviously located near the blue cage, in the W wall. It's
also fairly obvious that it opens one of the gates in the green cage this time(as it's the only one we have left). Pull the switch, roll and run right, then dart diagonally
S/E through the green cage gate. Pull the switch and you can now finally
pull the green piece onto its rightful place and watch as the cage surrounding
the switch on the N wall lowers, leaving you free access to it.
Pulling the latter
one raises the cages below the four moveable pieces,
sending them up to the level above where the pedestal is. On the S side of the
yellow cage there is a ladder on the leftmost pillar. Climb it and go around
the corner to the right. Now I guess I hardly need to tell you what to do:
simply place each of the moveable pieces onto their rightful tile surrounding
the pedestal. That done you can pick up the 2nd
Little Wheel from the pedestal. You can now return to the main hall
and enter the Cog Wheel Room. Since you have the two missing cog wheels feel
free to place them in their correct positions to complete the mechanism. The
cog wheels start moving, causing the large wheels to do the same and the double
doors on the second floor open. Leave the cog wheel room and go up there to
explore the new area.
New
Areas, New Challenges:
To the right(N) as you enter there is a door which opens as you
approach it. On the other side you'll find a long hallway which eventually
leads to a currently dead end in shape of closed double doors. Around the
corner left(S) there is nothing at all apart from a set of similar double
doors, also closed. Because of this we're going down the right hallway first. Proceed
until Lara reaches the first set of windows(where
the sun rays stream in) and take a look at the left window. There is a
bronze ball hanging above it so shoot it using the crossbow and lasersight and the door at the end of that same hallway opens.
Continue up the stairs and the door at the end opens automatically so head
through it to move on to the next level.
Castle
Riverrun Part 3:
Pickups: Large medipack, Right Gauntlet, 5th Sword
Key, torch + Secret 4(a Golden Rose)
Enemies: None
The
Wine Cellar- Retrieving The Final Armour
Piece And Sword Key:
As you go along the
hallway you will see windows on the right side overlooking the Sunclock Courtyard. You should also be able to spot a
Golden Rose laying on the roof opposite, so we'll remember
to pick that one up along the way. As you round the left corner be careful with
the large windows on the left as they're open and if Lara gets too close she
might be unfortunate enough to drop down into the Chapel Garden. Shoot the
chest on the right side to pick up a large medipack. Go to the S end and shoot away the
barrel on the right next to the stairs to uncover a switch. This opens a
trapdoor behind her by the E wall so drop down through it and from there drop
down to the ground floor of a wine cellar. In the S/W alcove behind the three
barrels you can pick up the Right Gauntlet and
the 5th Sword Key will appear on the
pedestal in the middle of the room.
Torches
To Light, Doors To Open And A Secret To Find:
Leave the room
through the S door and you're back in the garden from before. Run back out
across the Sunclock Courtyard, then re-enter the
castle and go right through the hallway and into the Throne Room where you can
find a torch by the fireplace(and
light it on the fire there). Go back to the main hall and up the stairs, then
head through the large doors and right and continue through to the next level
again. Make your way back up to where you dropped through the trapdoor and this time go right up the stairs. Here you'll find rows of
unlit torches on both sides, just what we needed. Light them all and the door W
opens. Through that door you will find a set of double doors to the right. But
before going there for the grand finale we're going for a secret.
Turn to face the N
wall. The fence in the second window sill(counting
>from the recently opened door) is breakable, so use the pistols to
remove it. Hang from the edge and shimmy right, where Lara can climb the
greeneries up to the roof. Here you can retrieve Secret
4: a Golden Rose. Climb back down and shimmy across to the window
again, then get back inside and you can now head through the W doors. Approach
the doors on the right and you're in for an explosive final.
In
The Castle Part 2:
Pickups: The Iceheart, Golden Rose Gift + 1 Secret(a Golden Rose)
Enemies: Roman Warrior
A
Final Battle To Win The Heart Of Ice:
So here you are: in
the same room as the legendary Iceheart and the quest
is nearly at its end. There is however one slight problem: the sword is
surrounded by a cage. Locate the five receptacles around the room that have no
keys in them and insert the five Sword Keys there. Now the cage lowers and you
can at last pick up your prize: the Iceheart itself.
Don't think that you can just waltz in and claim the sword for your own though,
the owner has just appeared. He is a Roman warrior,
he's big and nasty and has a sharp sword which also shoots out very harmful
bolts. The best possible way is to run up on the ramp next to him while dodging
the blue bolts and then fire off at him with the shotgun until he falls(I
found that this took exactly 29 shotgun shells, which was all I had left
actually). He drops a Golden Rose Gift as
he falls(this is NOT counted as a secret
though) and the 5th Secret: the final Golden
Rose can be picked up from the other pedestal at this point.
Look up at the
ceiling to see a turquoise sphere dangling back and forth way up there. Arm
Lara with the crossbow and lasersight and shoot it. The
door N opens, so head up the ramp and go through the door. You're now back in the hallway from before. Go right and around the
corner. As soon as you reach the blue doors E go through them
to see a short fly-by and thus ends a beautiful adventure.