A TIME ODYSSEY
A CUSTOM LEVEL ADVENTURE MADE BY TRIX
AUTHORIZED WALKTHROUGH WRITTEN
BY SELENE
A SHORT NOTE ON THE LEVELS:
There are six playable levels altogether. Some of them are pieced
together and need to be played in order. When the time machine stops the first
time you have three choices: the city levels, Pompeii or Dayport. Pompeii is
the only stand-alone level of the lot. If you choose to begin with Dayport
you’ll have no choice but to play Dayport Sunset and Dayport Sunset- Castle in
succession. If you choose to leave the time machine you’ll need to play
Somewhere Sometime and Museum of Fine Arts before heading back to the time
machine. No Man’s Land is a bonus level attached to Somewhere Sometime and it
only becomes accessible once you find the three bonus objects that have been
scattered about in the city. So for now your choices are: Somewhere
Sometime/(No Man’s Land)/Museum of Fine Arts, Shadow of Vesuvius(Pompeii, A.D.
79) or Dayport Sunset/Dayport Sunset- Castle(Dayport A.D. 1381).
My recommended order is to begin with the city (since that‘s actually
where you end up when the game starts), then move on to Pompeii and finally
visit Dayport. Because of that the walkthrough below is set up in that
particular order, but as mentioned you can play the City- Pompeii- Dayport in
any order you choose. Note that these areas are rather large and might be a bit
overwhelming at first and there are also many different paths leading to the
same place. Also remember that the readme-file contains some maps that will be
very useful in preventing you from getting lost.
There are altogether 8 secrets and they can be found in the following
locations:
Somewhere: 3 Secrets (Somewhere Sometime: 2/No Man’s Land: 1)
Museum of Fine Arts: 1 Secret
Shadow of Vesuvius: 2 Secrets
Dayport: 2 Secrets (Dayport Sunset: 1/Castle: 1)
PRELUDE:
The game begins where Aegean Legends ended. After finding the Energy
Source in the temple of Thera we remember seeing Lara stranded on a rock in the
middle of the vast ocean. A plane comes to pick her up and she sets off to
England. The story continues:
“2007:
After three years of research on the mysterious power sphere Prof. Wells
is constructing a time travelling device.”
“2008:
The device is ready for testing phase.
The main button has been prepared
for a very short travel back in time.
Emergency coordinates for the other two
buttons have been set too, just in case.”
As we see Professor Wells is still working on the time machine out in
the garden. Go over towards him.
Prof. Wells: The watcher is ready and
operational.
Enter the time machine and press the only green button here, which says Test:
1 hour back. There’s a puff of smoke and something seems to be burning,
Lara gasps in pain and outside you hear the Professor shouting about not being
able to keep anything working. The lights go out and Lara is teleported through
time and space to some unknown location.
Somewhere Sometime
Pickups: Prof. Wells’
Handy Encyclopedia, 50 % health kits, revolver bullets, matchboxes, 3x
Bonus Objects, Lost Key, poker/crowbar/pickaxe, JF’s
Housedoor Key, Museum Key, 100 % health kits, Barrel with Crude
Oil, Key for Industrial District Gate, Vial with Oil Distillate,
Empty Aluminum Canister(=Canister with Fuel) + 2
Secrets (fireworks + 50 and 100 % health kits/revolver bullets/Blast Furnace
Key)
Enemies: Guards, dobermans,
crocodile, rats, workers
How to produce home-made fuel:
Apparently something has gone wrong, because when the door opens we see
that she has been taken to an unknown city still sound asleep. First of all
notice the buttons in the time machine. There are three of them: one that will
take Lara to Pompeii in 79 A.D., one that will lead her to Dayport 1381 A.D.
and one Undo/Back-button. Ignore these for now and leave the time machine
through the open door nearby. Enjoy the beautiful fly-by showing you some of
the sights in this lovely city (these are places you’ll need to visit, so
pay close attention) and when it ends pick up Prof.
Wells’ Handy Encyclopedia laying at your feet. Examine it to find
the following text:
“Encyclopedia, Page 97 (Fuel Production)
First the crude oil needs distillation to produce
light/heavy petrol or gas oil, depending on temperature.
To refine the result the distillate has
to undergo a second step, the so called “Cracking”.
(…additional information….)
(…)thermic cracking: The distillate is heated at very
high temperatures(…). Depending on this, the result is
fuel of different qualities”
Going down:
Not that this makes much sense at this point, but we’ll find out what it
means all in due time. Shimmy left past the machine to reach the other side of
the roof. Walk over to the S/E corner of the roof and look around the
corner to find a slanted block. Hop over to it and look around. There’s a
ladder on the S wall and a lowered platform directly below it. Do a
running jump to grab the ladder, which seems to be a bit on the loose side.
Luckily the aforementioned platform raises as the ladder drops, ensuring that
Lara’s fall is softened (a bit anyways, she’ll still lose some health).
The moment she lands immediately roll, run to the edge and jump- landing her in
an alcove where she can pick up a package of 50 %
health. You have to hurry a bit, as the platform will give in
shortly after she lands on it.
Drop down from the alcove, landing softly on a wooden crate below.
Notice the lever and the closed door nearby. These are part of a sequence that
will take you back up to the time machine on the roof, but there’s no need to
go there yet. We still have some exploring to do elsewhere.
Turn left and go W towards the gilded gate. It opens as you
approach so head through and dispose of the guard that
comes sneaking up on you from the left-hand side, he drops a revolver that will surely come in handy at some
point during the journey. Again: if you ever get lost wandering around the
streets the maps provided in the readme-file are very useful.
Getting oriented:
The street you’re standing on now is called Murkbell Avenue. The
left part of the street is a dead-end, but go down there anyways to pick up a 50 % health kit in the
alcove near the street café. Return to where you shot the guard and go
right (N). At the end of Murkbell Avenue you’ll reach a
junction- one branch leading N/W towards the Park Square and Bell
Tower and one branch going right (E) along Fibonacci
Road. Also notice the poster that is on display to the left. It says:
“Get the most astounding
Magical and Occult items
James Fax.
1618 Fibonacci Road”
A choice of paths:
For now follow the E branch down Fibonacci Road. When you
reach the bridge crossing the channel stop for a moment. Here you have two
different paths leading into the same building. Both paths will lead you to the
same place, but you will find different pickups on both routes. It’s up to you
if you would like to explore both routes to get all the pickups or simply
ignore one of them. I will list both paths below, so that you can make your
choice. The paragraph marked with * is what you need to do once you have reached
the building and the two paths merge.
Path 1: Turn left (N) on the bridge and dive into the
water. Swim ahead and around the first corner, here you’ll find a platform near
the right wall. Pull up there and climb the ladder onto a small balcony with a
door you can open. Pull the switch left of the door and run onto the grey
platform ahead, this is an elevator so just wait patiently until it reaches the
next floor. Vault up onto the wooden ledge to the right, turn left and vault
down onto the floor below. Go right and on the small desk you will find a 50 % health kit. Turn left and vault up onto the
higher ledge, then turn around and look up to spot another alcove. Climb up
there and pull down the ceiling hatch, climb up onto the roof.
Turn left and look down to find a clothesline. Reaching it isn’t going
to be as easy as it looks though. Face N/W and backflip onto the slanted
roof behind and right. It is important to do it this way because you need to
land on the roof facing upwards, this is so that you can grab the edge of the
roof on your way down. Shimmy around the corner left and pull up at the flat
spot near the clothesline. Hang onto it and ride down through a window to land
inside the nearby building.
Pick up the matchbox left behind
at the S/E window sill before heading down the stairs. At the bottom
you’ll find a closed door. Open it carefully (you’ll hear a door opening
elsewhere) and turn right, grabbing the matchbox
from underneath the stairs. Push the wooden crate forwards (through
the door that you just heard opening) until you can walk past it into the
main entry hall with stairways leading upstairs and downstairs.
OR:
Path 2: From the bridge dive into the water and swim underneath the bridge. In
the W wall you’ll find an underwater door, pull it open and swim through
the tunnel. Surface at the junction and swim towards the platform by the W
wall, climb onto it and jump to grab the ladder at the back of the pillar E.
Doing so causes the ladder to drop, the second platform to raise and a door
opening somewhere nearby. Climb onto the platform, locate the handle of the
overhead ceiling hatch and pull it down. Climb up into the building (which
is the same building you’ll gain access to by following Path 1), shoot the
small crate for a matchbox and revolver bullets, then go straight forwards through the green door that you
heard opening before. Go upstairs and in the S/E corner you’ll
find a crate behind a closed gate: this is the small room underneath the stairs
where you would have come through if you had chosen the 1st route.
It’s of no use to you now, so just ignore it.
Bonus Object # 1- the Antique Clock:
* Continue upstairs and push open the N/W double doors to enter a
small living room. Walk over to the antique bureau in the S/W corner.
Here you can pick up the 1st Bonus
Object (looks a bit like an antique
clock). Doing so you see a door
opening somewhere, this is the first out of three doors that can be opened. We
need to find the remaining two bonus objects in order to unlock the final two
doors leading to the bonus quest.
Back to Park Square:
Walk up the steps by the W wall and open the blue door. You’re
now standing at a balcony overlooking Park Square. Turn right, climb
onto the leftmost pillar and go around the right corner. Climb down to the
bottom and drop down onto the lower balcony. Remember picking up the 50 % health kit left of the ladder. From here you
have to jump down onto the ground. Normally that would cost you some health,
but I found one way of doing it without any health loss. Stand with the pillar
you climbed on Lara’s right-hand side and do a right-angled running jump to
land on the higher part of the ground below (right by the tiled part of the
ground near the wooden bench). This way it should be a no-health-loss
situation.
If you chose to enter the building via Path 2 and you’re just dying to
get a hold of those pickups you missed you’ll have to go on a small detour. If
you already have it or if you’re not interested simply skip down to the
paragraph marked with **.
Go S/E towards the corner of Fibonacci Road and Murkbell
Avenue, then head right down Fibonacci. When you reach the bridge
turn left (N) and dive into the water. Swim around the
right corner and pull up onto the platform. Climb the ladder, open the door and
pull the switch to activate the elevator. Hop on the elevator, ride it to the
top and climb up onto the wooden ledge right. Vault down to the right, grab the
50 % health kit on the desk and climb up to the
left. Vault up into the top alcove and pull down the hatch. Climb out onto the
roof and sideflip onto the slanted roof W, grab the edge on your way down and
shimmy left around the corner. Pull up when you reach the flat part and ride
the clothesline across the channel and through the window with the yellow
curtains. Go left and pick up the matchbox from
the window sill S/E, go through the door at the end of the hallway to
grab the matchbox from underneath the stairs.
Now return to the window with the yellow curtains and drop down onto the ledge
below the window. From here you can runjump over to the bridge crossing the
channel and return to Park Square the way you came.
**The Crystal Palace-finding the entrance:
Near the S/E corner of Park Square you’ll find a note that
has been nailed up on a tree. It reads:
“REWARD
Lost Key
Somewhere in
the Crystal Palace
Please return to
J. Fax
1618 Fibonacci Road.”
Maybe it’s time to go looking for the lost key? Return S/E to the
corner of Murkbell and Fibonacci and go left down the latter.
When you reach the bridge crossing the channel again turn right (S)
and dive once more dive into the water. This time swim along the S side
to the very end. You’ll find a slanting ledge located alongside the W
wall. Pull up onto the flat part and run up to the top.
First of all let’s have a closer look around. Go straight ahead (W)
and turn left to find a switch. Pulling this opens a nearby gate, this one
leads out to Murkbell Avenue. It will stay open and so you can easily
access this area later without going for another swim in the channel. Also
notice the manhole behind the closed gate N/W, we’ll be getting back to
that later on.
Ok, we’re done looking around. Go back towards where you first entered
this small courtyard and look up to the right for a slanted roof. Pull up onto
said roof and backflip/roll to land on the ledge running along the building
behind. Follow the ledge around to the
left and do a running jump to the W balcony. Turn right and grab the
lower part of the sloping grey roof N. Shimmy left around the corners,
continue going and ignore the grey roof below. Just keep going to the very end,
Lara will now be hanging directly above a sloped roof. Drop down, slide and
grab the edge, pull up and backflip/roll + grab the balcony behind.
Pull up and walk ahead- the magnificent view of the Crystal Palace greets
you here. Shoot the grate blocking your way and do a long running jump with a
last-minute-grab to reach the wall surrounding this incredible building. Drop
down into the Palace Courtyard and you might notice that Mr. Fax has
left a note hanging on a nearby tree here as well, this one also pleading some
kind soul to return his lost key.
The Crystal Palace Part 2- searching for the Lost Key
The right side is blocked by the Palace so go around to the left
past the frozen pond. At the back you’ll find a doberman
guarding the premises. He’s locked up behind the fence, but that
won’t help you much as you’ll need to find a way of crossing it. Stand on the
right side of the small hill and runjump over the fence. Start by dealing with
the pesky dog and the gun-toting guard hiding behind the bushes N. Directly
opposite of the wooden box there is a sliding door blocking the entrance. Stand
in front of it facing S (the fence you jumped over) and push it
out of the way. You might find that Lara won’t enter though, this is because
the entrance is blocked by a glass pane. Stand on the wooden box and jump
straight through the glass- you’re now free to explore the Crystal Palace.
Head over to the N/E corner and look up to locate a ladder above
the potted plant. Stand directly below the ladder, jump up and press Action to
grab hold of it. The ladder gives in, but now you can climb it up to the floor
above. Go to the far S side, turn right and do a long running jump to
grab the chain of the chandelier furthest away from you. Slide down to the
bottom of the chain, turn around and backflip onto the floor. Go around to the
right and on the floor near the second palm tree you’ll find the Lost Key. We’re done with our business in the Crystal
Palace now so drop down to the floor and leave the same way you came in.
The crowbar at Lampfire Street:
Stand on top of the wooden box and jump over the fence, go around left
to the courtyard. Near the N/E corner of the wall there’s a small mound
that you can stand on, enabling you to climb back up onto the wall. Do not drop
down onto the street just yet though. Instead turn left and walk N along
the wall. At the end of the wall pull up on the higher wall and here you’ll
find a ladder. Climb it to the top and go along the ledge running between the
buildings.
At the end you find Lara overlooking a small courtyard (which we will
be getting back to later, by the way). For now turn to face the wall where
you came from, drop and grab the edge. Drop again and Lara will start sliding
down the grey roof, grab the edge and shimmy right to the end. Pull up,
backflip/roll and angle her sharply left so that she lands on the balcony
behind. Pick up the matchbox and turn
around to face the grey roof you came from. Shoot the grate in front of you and
also the grate in the building opposite. Do a running jump towards the
crawlspace, pull up and crawl through to a junction.
The left side is a dead-end, so crawl right and drop down into the duct
below. Follow it to the end, shoot a grate and safety-drop down onto the sloped
roof. Grab the edge and drop down into the small courtyard below. In the S/W
corner you can pick up the poker/crowbar/pickaxe
and a 50
% health kit. Walk up to the wooden gate at the far end of the
courtyard and use the crowbar to pry it open.
A street sign shows you that you’re now located at the Lampfire
Street (refer to the map for further information). To the N
you’ll see the Bell Tower behind a fence. Walk up to it and have a look
around. At the end of the E alley you will find a gate that opens as you
approach, this leaves you with an easy access between Park Square and
the Bell Tower (so technically you could have accessed the Bell
Tower directly from Park Square as well).
NOTE: There are at least two different
ways of reaching the top of the Bell Tower. One of them is listed in the
paragraph below, to access the other route you have to go to the train station.
THE BELL TOWER- FINDING THE 2ND BONUS OBJECT:
Go left (W) and climb up into the alcove in the
brick wall. Face N/E and hop up to the next block, then turn back
towards where you came from and hop up to the higher alcove. Pull up onto the
block left and pick up the matchbox,
then face N and standjump + grab to the next block. Turn left, vault up
onto higher grounds and here you’ll find a crevice in the right wall. Shimmy
along it to the end, drop down and turn right, then runjump onto the top of the
scaffolding (this is the only part of the scaffolding that is actually safe
to stand on). Go left and turn to face the tower, there’s a gap in the
fence here through which you can do a standing jump.
Pick up the 50 % health kit and
the 2nd Bonus Object causing
the second door to open. Standjump back to the scaffolding and from there down
to the previous block. Shimmy back where you came from and drop down. Now make
your way back down to the ground the same way you came up and head out to Park
Square through the open gate.
Looting stores:
Head S/E and once more follow Fibonacci Road, this time
continue past the bridge and go to the far end of the street. Here you’ll find
a closed store. At the very end, right of the store window, you’ll find a
keyhole. Use the key found in the Palace to raise the bars in front of
the window. There’s only one way to enter the store though and that is by
breaking and entering. Use your trusty pistols to shatter the windows and enter
the strange store.
Shoot the glass pyramid on the counter and pick up JF’s Housedoor Key, in the same instant you’ll
get to see a locked door with a keyhole next to it. A lot of fascinating items
are on display on the shelves, but nothing that is of any use to you. There’s a
door in the left wall that you can open, it leads into a small storeroom of
sorts. Rummage through the drawers of the nearby cabinet to find some revolver bullets. At the back right corner you’ll
find a shelf filled with bottles and baubles. The bottles are in the way so
shatter them before pulling the shelf out from the wall (poor Mr. F, imagine
how he’ll feel when he arrives at the store in the morning). Pulling away the shelf uncovered a
crawlspace, crawl through the yellow curtain to a hidden passage.
Climbing for the first secret:
Turn around to find a ladder, climb up onto the moonlit roof. Nearby
you’ll find Secret # 1: a keg of fireworks.
This is ammo for a weapon you’ll obtain in a later level. Face S/E and
walk up onto the flat corner of the roof. If you want all the pickups you’re
going to have to suffice with quite a health loss. If you’re not prepared to
sacrifice this you can skip directly to where you jump to the grey sloped roof.
A Key to the Museum:
Shatter the window in the S wall and do a running jump with an
arch (by pressing Action while in mid-air) to land on the balcony with a
matchbox you
can pick up. Open the double doors and pick up the kit with 50 % health. There’s a hatch in the ceiling
above, stand directly below the handle facing S and jump up while
pressing Action to pull it down. Climb up, turn right and shoot the grate. Pull
up and in this room you’ll come to face a window you can shatter- you’re now
facing the roof you jumped from earlier.
Turn right to face the grey, sloped roof S, drop down onto it (if
you chose to skip going for the pickups you can do a running jump directly from
the grey flat block to land on the sloped roof). Slide and grab the edge,
shimmy left to the end (but do not turn the corner), pull up and
backflip to a flat block behind. Turn left and pull up onto the higher block,
ride the clothesline down onto a small balcony. Push the left-hand door open
and enter the building. Go behind the yellow curtain right and look through the
drawers to find the Museum Key. There
are two windows here that can be broken, walk out onto the right sill, turn
around and safety-drop down onto a sloped ledge. Slide down to the ground,
right outside the Museum of Fine Arts.
Action in the Sewers- the 3rd Bonus Object:
Technically we could enter the Museum already now, but I prefer to
finish exploring the city first. Head left (E) to find a
manhole. Open it (standing in front of it facing W and pressing Action),
drop down onto the duct below and slide down to the bottom. Before exploring
any further pick up the matchbox in the
alcove straight ahead.
Follow the passage into the sewers, dive in and swim to the far end
where you can open an underwater door.
The next room is a bit large, but swim directly to the W wall,
directly between the two adjacent slopes. You have to hurry, because you’ll
soon be having a hungry crocodile on your
back. Turn right to face the lower slope, pull up onto it and backflip.
Immediately jump forwards again and grab the pipe sticking out of the low
slope. Climb up about halfway and backflip to the platform behind (if you
like you can kill the croc from here, to compensate for the damage it caused),
turn left and shoot the grate, then crawl into the duct, shooting another grate
on your way. Snatch the 100 % health kit,
go right, climb up and pull down the ceiling hatch. Climb up onto the streets
and near the N/W corner you’ll find the 3rd
Bonus Object (looks like an antique compass). Picking it up
we see the third and final door leading to the bonus level opening.
Back to Park Square:
Walk up to the wall, turn right and pull the switch, raising the
platform that will help you get across the channel. Jump to the platform, shoot
the grate opposite and runjump + grab to the other side. Head forwards and
you’re now by the entrance of the railway station (the long tube with the
stairs going up), but you can’t enter yet. Go S down Main Street and
right before the arch turn right and head down the alley back to Park Square.
JF’s Apartment- fuel ingredient number 1:
Head through the arch at the middle of the S wall. To the right
you’ll find a door you can open, go up the stairs left and turn right. At the
corner where you come up you will find something that looks a bit familiar: a
closed door with a keyhole next to it. Exactly: this is the apartment of the
mysterious J. Fax (you saw this door when picking up his apartment key in
the store). Unlock the door and proceed to open the blue door in the entry
hall. Apparently J. Fax has made sure his place is well guarded against
burglars: a doberman comes charging out
of the otherwise abandoned apartment. When it’s dead go over to the blackboard
and pick up the Barrel with Crude Oil.
Leave the apartment and continue down the hallway and up the stairs. On
the top floor you’ll find a matchbox on
the window sill, but apart from that there’s nothing more to do in here. Go all
the way down the stairs again and leave the building. Return to Park Square and
head over to the N wall. Locate a ladder here, climb it up to the top
and onto the window sill left. Shoot out the window, enter and push the lever.
You’ll see a camera shot of the door to the railway station opening.
The Train Station- first visit:
Drop down from the window sill and go right, head up the stairs inside
the chute up to the door you just opened. Head around to the right, killing three rats on your way and push the lever to move
the train car, revealing a trapdoor on the tracks. You can open the trapdoor if
you like, but it only leads to a ladder that will take you down to the other
side of the railway station (nearby the distillery and furnace, but we‘ll be
taking a short detour for a secret first). Just ignore the trapdoor and
climb up onto the train car.
At the E side you’ll find a ceiling hatch, pull it down and climb
up onto the roof. Now, if you absolutely want all the pickups (and/or you
haven’t gotten a hold of the second Bonus Object from the Bell Tower yet)
you will have to go for a detour (or two actually, if you want both the
Bonus Object AND the pickups). If you choose to ignore these two routes you
can pick up the walkthrough at the paragraph marked with ***.
DETOUR- THE TRAIN STATION COURTYARD:
Go over to the W side of the roof and position Lara in the S/W
corner (so that she’s looking down onto Park Square and
the stairs leading up to the station). Do a standing jump to the train roof
and grab the edge on the way down. Start shimmying left and go around the first
two corners. Stop just as you turn the second corner, pull up and backflip onto
the roof behind.
Facing N you will be looking down at the Train Station Courtyard.
Walk to the W wall, turn left (so that Lara has her back to the
courtyard below) and hop backwards, grabbing the edge of the roof on the
way down. There should be a ladder here, climb it all the way down to the
ground. Go over to the Pharmacy in the N/W corner and shoot out
the window, climb inside to find a 100 % health kit.
You’ll also find some revolver bullets by
shooting the small box on the left side of the station stairs (when facing
the station).
DETOUR 2- THE BELL TOWER BONUS OBJECT:
Go S/W towards the wooden scaffolding. Climb onto the
scaffolding, walk past the barrel to the left and stand at the very edge
looking up at a ladder. Jump up to grab the ladder and it will drop as soon as
Lara touches it. Climb back up onto the scaffolding and this time climb the
ladder up to the top. Enter the brick building, climb the small block W,
turn left and jump over the wooden slope. You will now find Lara on the other
side of the Bell Tower.
NOTE: If you HAVEN’T already found the
Bonus Object in the tower and you really want to get it (which I’d
recommend, seeing as how finding all these bonus items will enable you to
access a secret level) look further up in the walkthrough to find the
paragraph that is named “”. Here you will find a detailed description on how to
reach the top of the tower from where Lara is standing now. Remember the
pickups you’ll find along the way!
To get back to the station from the Bell Tower make
your way down to the ground and go through the open gate E back to Park
Square. From here go N/E and you will see the stairs leading up to
the station ahead. Go back up those stairs, climb onto the train car again and
pull up onto the roof.
THIS IS FOR THOSE WHO HAVE ALREADY FOUND THE 2ND BONUS OBJECT
AND/OR WHO HAVE NO INTEREST IN THE PICKUPS FOUND IN THE TRAIN STATION
COURTYARD:
***Make your choice- Secret # 2:
Head over to the N/W side and look down onto the chute leading up
to the station. Beyond that you should spot a slope leading into the brick
building ahead. It’s a long jump and a high fall and it will cost you some
health, but it’s worth it: it is leading to Secret
# 2. See the screenshot below if you’re having problems locating the
slope:

Do a running jump to land on the slope and slide down into the building.
There’s a sign on the wall saying “Make your choice: 1 door only!” Here
you have to ponder upon your choices. There are three alcoves in the wall, each
containing a pickup. You can only retrieve ONE of these pickups. As soon
as you pick up one of them gates will lower in front of the remaining two
alcoves and you will not be able to access them. This is what you’ll get from
each alcove (from left to right):
Alcove # 1: one kit 50 % health and one kit
100 %
Alcove # 2: two boxes of revolver bullet
Alcove # 3: Blast Furnace Key
The key is a bit special: it will enable you to gain easy access to the Central
Blast Furnace. You can also enter the furnace without the key, but in that
case you’ll have to face a line of rather difficult traps including pistons,
axes and flame emitters. If you feel that you’d prefer to avoid these traps you
should really pick up the key. If you’re up for it and would rather have one of
the other pickups it’s a good idea to consider whether you find ammo or health
items to be the most useful.
Crate Puzzle 1- the Industrial District Gate:
When you’ve made your choice you have to drop down to the street below.
If you’re looking to conserve health you should face S/E and hop down
onto the higher wall. Make your way over to the S/W corner. You might
want to save the game here in case you mess up while moving the crates. Face W
and pull the leftmost crate in the back towards you once. Go around to the
left, climb the large, static crates and go around to the first moveable crate
right. Push it up against the sidewalk. Turn left and pull the E crate
towards you once. Climb the static crates again and go around left to the front
of the crates. This time pull the N/E corner crate towards you once. Go
behind it and you’ll find the Key for Industrial
District Gate. Said gate is located at the middle of the S
wall in this very area, unlock the gate so that you have a direct connection
between both sides of the railway station.
Crate Puzzle 2- the Distillery:
It’s time to take a closer look at the N/E side of the area. Here
you’ll find four crates and three levers. For each lever you push a crate is
dropped down from one of the three windows high up in the building N.
Each crate will land on top of one of the crates down on the ground and your
goal is to raise stacks that are so high that you can reach the metal pillar in
the N/E corner.
I’ve chosen to number the levers from 1 to 3, with number 1 being
closest to the E wall and channel.
Lever # 1: push it back and forth 3 times (so 3 times back and
3 times forth)
Lever # 2: push it 2 times back and 2 times forth
Lever # 3: push it 1 time only
Now climb onto the wall right by the levers and stand at the highest
spot in front of the stack containing two crates. Do a running jump and grab the
edge of the two-crate-stack, turn right and standjump + grab to the
three-crate-stack. Finally do another jump + grab to the four-crate-stack and
from there do a long running jump and press Action in the last moment to grab
the edge of the metal pillar. Finally runjump into the open window of the Distillery.
Inside the Distillery- fuel ingredient # 2:
Drop down onto the wooden crate to the left and whip out guns to kill
the cranky worker running around on the
floor. When he’s dead slide down to the ground and walk over to the machine
next to the lever and place your oil barrel into the free slot. Push the lever
to activate the machine and a cutscene shows the hours flying by and drops of
oil dripping into a small container. As the cutscene ends go to the opposite
side of the room and pick up the Vial with Oil
Distillate.
Run back to the crate where you came down, turn Lara so that her back is
up against the slope adjacent of the crate. Backflip onto the slope, jump
forwards and grab hold of the crate. Pull up and jump back to the window sill,
then dive into the water and climb back up to the stack of crates.
Kosse’s Finest Whiskey- the Aluminum Canister:
Go past the crates and levers, around to the left and head over to the S/E
side where you can climb onto the wall. The channel is running past down
below and across on the far side you see a building with a sign hanging above
the door. The sign reads “Kosse’s Finest Whiskey”, this is the front
entrance of the Distillery. When standing on the wall turn left and
shoot the nearby grate. Vault down from the wall into the lower alcove and push
the lever. This causes a platform to start lowering and raising at an even
level over by the S wall. Stand facing the platform, at the very edge of
the wall. Hop backwards and watch as the platform raises and lowers. Right
before it raises you have to start running. Jump at the edge and you should
land on the platform and be able to jump into the corner alcove before the
platform drops underneath her feet.
Climb up onto the wall left and drop down in front of the Distillery.
You can shoot some barrels if you like, but they’re empty. Head over to the
crates in the back, climb up and grab the Empty Aluminum
Canister (fireproof). Climb back onto the wall and dive into the
channel, swim right and climb onto the platform, then up onto the wall.
This time head over to the N/E corner of the area- here you’ll
find the Central Blast Furnace. If you picked the Blast Furnace Key when
finding the secret earlier you can simply use it to unlock the door at the
front and skip down to the paragraph marked with ****.
The Central Blast Furnace- doing it the hard way:
If you don’t have the key you’ll have to go about it the hard way. Go
around to the left, pull up onto the grey roof left and backflip to land on a
platform. From here you can head through the open doorway leading into the Blast
Furnace.
Oh dear. As soon as you head through the entrance the axes ahead start chopping. These can be a bit
hard to get past, but it’s definitely possible if you take your time and save
often (whenever Lara reaches a safe spot, that is). Stick to the side
where the blade comes down, run when
the axe reaches the upright position
and try to stop just at the centre between each blade.
When you’re sure that you’ve hit a right spot (that is, whenever she comes
to a halt without losing health) I’d recommend you to save the game.
Finally remember to use the Look key often in order to estimate how far you can
walk up to each axe without being
hit. This should be all you need to get past them. Obviously stay away from the
burner floor at all times and at the far end of the walkway there’s an inactive
piston up in the ceiling to the left,
make sure you stay away from this too (if Lara gets close to it she’ll die
right away).
Once you’ve reached the end safely you have two choices. The easiest way
by far is to approach the flame emitter ahead
and then walk through the narrow passage to the left. Alternatively you can
stand in front of the entrance, turn left and run towards the wall, quickly
climbing up into the hallway right to avoid the pistons
pounding down on poor Lara. Be careful as you move forwards: a flame emitter is activated in the alcove to
your right. Time a run past it as the flame stops
and focus all your attention towards the final alcove. Here you have a flame emitter mounted in the floor and this is
by far the hardest part.
Face the passage with the final flame
emitter and stick to the right-hand side. Wait for the flame to cease, then immediately go ahead and
out to the right before it comes back on. Here you’ll find a crate and now you
have to find some way of pulling it towards the flame
emitter without catching fire yourself. As the flame emitter behind you starts spewing out fire wait for about a second or so before
starting to pull. This way you should reach the flame
emitter while the fire is
out. Immediately turn right and move backwards into the back corner between the
wall and the crate, she‘s perfectly safe there. See the screenshot below if you
need further assistance finding the correct spot:
Wait for the flame emitter to
stop again and quickly go through the crawlspace. Time your way past the second
flame emitter. Go through the alcove
closest to the exit, sticking as far to the left as possible to avoid being
roasted by the flame emitter. Turn
left to face the second crate and enter the ready-to-push-stance (standing
in front of the crate while pressing Action, do not press the Up arrow key yet).
Wait for the flame to subside, then
push the crate forwards once (note that if you start pushing while the flame
is on Lara will stick her foot backwards and step into the fire- clever girl!),
you have now uncovered a trapdoor to the right. In addition you will get some revolver bullets for the trouble. Open the
trapdoor and drop down into the passage below.
****The Central Blast Furnace- easy as pie:
The open main door is at the E end of the passage (if you had
the key this is where you enter the furnace), W you’ll find the furnace
itself as well as a worker and a rat you
need to kill. First of all follow along the right-hand wall past the pipes
until you find a matchbox. Return to the
other side, go up the steps by the furnace and climb the ladder up. Drop down
onto the top platform (you will have to climb all the way to the top of the
ladder before you can move left far enough to land on the platform) and
combine the oil distillate with the empty canister if you haven’t already.
Stand in front of the furnace, press Action and Lara will drop the oil-filled canister
into the furnace.
Fuel Production for Dummies:
Stand at the corner facing the ladder, jump to grab it and climb down to
the bottom. Push the nearby lever to turn the fire on and wait for things to
happen. Push the lever back into its original position to shut off the fire
again, then climb onto the ledge that protruded from the furnace. It’s now safe
for you to pick up the Canister with Fuel (well,
sort of!). Now that you have the fuel you are actually free to leave the
city, but we’re not quite done here yet. At least we’re done at the furnace so
leave through the main entrance.
Back to the Sewers:
Head S through the gate to the Industrial District, right (W)
when you reach the entrance to the railway station. Once you’re back at Park
Square go S/E to the corner of Murkbell Avenue and Fibonacci
Road, head down Murkbell and through the second open gate to the
left (the first one leads back to where you started the level, that’s not where
we’re going yet). You should now be back at the small courtyard from before (when
you came here the first time you came from the channel, but since you opened
the gate connecting this place with Murkbell Avenue you now have
a handy shortcut and won‘t have to go for a swim to get back here).
Head over to the N wall and open the manhole (the now open
gate in front of the manhole was one of the three doors that opened when you
picked up the bonus objects- the other two doors are down in the sewer).
Pick up the matchbox and climb down into
the murky underground. All real sewers must have rats in them and this one is
no exception. Head through the second open gate, kill the rat and proceed through the third and final open
door.
The Mirror Room- unlocking hidden gateways:
Go up the stairs, down the hallway and through the yellow curtains to
the left to enter a beautiful mirror room. In this room there are two pickups
that are only visible when you look into the mirror: a 100 % health kit and revolver
bullets. Note that if you want both pickups you have to retrieve the
ammo first, because picking up the health kit will send you straight off to the
bonus level, with or without the revolver bullets.
BONUS LEVEL- NO MAN’S LAND
Pickups: Poker/crowbar/pickaxe,
Ruby + Emerald (= Ruberald), Diamond + Sapphire (= Diapphire),
small medipack, Juicy Moth + 1 Secret
(flares, small medipack and Treasure Hunter Diploma)
Enemies: Moth
The first thing that greets us as Lara lands is the sight of a beautiful
cave. Walk down towards the shallow pool where a steady stream of water sends
the boulder flying up towards the ceiling, something which momentarily raises
the water level in the pool. Stick to the left side of the pool since the right
side is blocked by streams of lava
running down the rocky surface.
A very useful pickaxe:
Continue up towards the block with the pillar stretching towards the
cave ceiling- there are two receptacles attached to the pillar, but we’re still
missing some bits and pieces. Walk up to the skeleton laying on the ground right
of the pillar and pick up the Poker/Crowbar/Pickaxe.
Now look up towards the right wall. Notice that vivid, greenish glow up in the
wall alcove? You’ll need to reach it somehow, but it can’t be done from down
here so we’ll get back to that later.
Digging for Sapphires…:
Go on towards the N back of the cave, following the glowing light
to a Sapphire that you can pry off the
wall. Return down to the pool with the boulder and this time start climbing W
across the rocks. At the far back of the cave you will see some green foliage
in the ceiling, you need to reach the ledge underneath the foliage. You might
also notice a faint, greenish glow coloring the rocky walls surrounding the
ledge. Clamber across the rocks, jumping over the sloped parts whenever necessary,
until you’ve reached the top ledge (the hanging foliage should be on your
left-hand side when facing the back wall- N).
….and Emeralds:
A good indication that you’re in the right spot is that you see a small,
triangular-shaped gemstone stuck in the ground here. Since the stone is stuck
the pickaxe will come in handy for pulling it loose (note that you need to
stand in front of the gemstone facing E in order for this to work).
Pick up the now loose Emerald.
The Water Chute Puzzle:
Look down towards the boulder pool and you’ll see a slightly deeper pool
down to the right. Slide down to it and dive into the water. Take a deep breath
and save the game here. There’s an underwater opening N/W, swim through
it and continue along the diamond-shaped passage into the next room. Go up
towards the ceiling and look for a hole you can swim through.
You’re now facing a large water chute going directly up to the ceiling,
with horizontal chutes stretching out from the sides of it. Remember that when
Lara is swimming along the horizontal chutes she can surface (very useful if
you‘re running out of air), but not while staying inside the centre chute.
The centre chute is supposed to help you reaching the horizontal chutes.
Also note that when Lara is located in a horizontal chute she can swim
off the edge and drop down to whatever is located below it, whether it’s
another horizontal water chute or the bare rocks (the latter will either
kill her or cost her some health). I know it sounds a bit confusing (it’s a
bit difficult to explain), but it gets easier once you’re there and can see
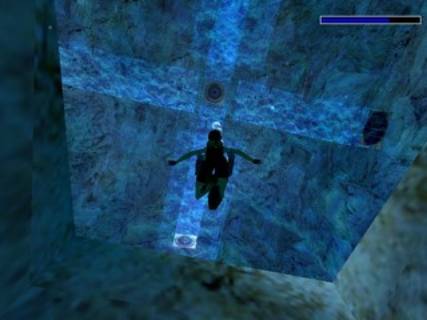
with your own eyes what needs to be done. I have made a small series of
screenshots that should be able to help you understand the process if you
absolutely can‘t figure it out
SCREENSHOT 1: Lara is facing upwards into the centre chute after
swimming through the hole in the floor. Turn her so that she’s facing N
and go upwards a little bit.
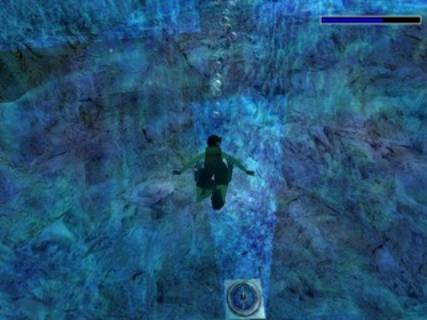
SCREENSHOT 2: She is now facing the first lever, which is located on the
first level of the horizontal chutes. The hole in the floor is behind her and
below. Notice that you can surface for air whenever Lara is inside a horizontal
chute, but naturally you have to be under water while pulling the lever.
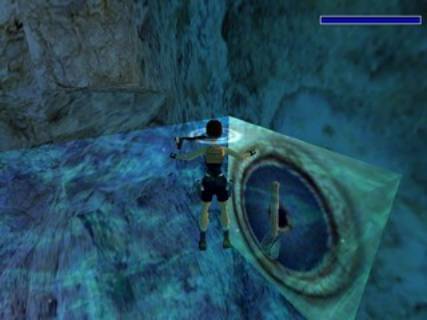
SCREENSHOT 3: Once you have pulled the first lever surface for air, swim
towards the wall and drop off the edge of the water chute. Lara will hopefully
land on the slopes below (losing less health than she would otherwise).
Now go over to the skeleton lying on the ground near the S/E corner and retrieve
the 50 % health kit. You have to do this
now, because you won’t be able to go back for it later.
SCREENSHOT 4: Jump back into the central chute. When you do this Lara
will be automatically teleported up to the ceiling of the cave. Turn her to
face S so that she’s facing the lever on the third level. Repeat the
process of pulling the lever and surfacing for air.

SCREENSHOT 5: Return to the central chute and swim downwards facing E.
Swim out onto the second level of the horizontal chutes and pull the final
lever.
Once this is done correctly the circular door in the room below opens,
partially draining the cave below (this is why you can‘t go back up and get
the health kit once all three levers have been pulled- there‘s no way for you
to reach the upper cave at that point).
Add a Diamond and a Ruby to an Emerald and a Sapphire:
The water chutes are dissolved, dropping Lara down through the hole in
the floor and into the pool below. Climb up onto the block left of the circular
door and use the pickaxe to pry the Diamond off
the wall.
Dive into the water, swim up to the open door and climb out. Go up the
stairs and continue climbing up the rocky steps all the way up to the top.
Well, what do you know: you‘re now standing in a small alcove overlooking the
cave where you started the level and the Ruby is
laying at your feet. Grab it and slide down to the cave floor.
The result- a Diapphire and a Ruberald:
Now climb up to the central pillar (facing the boulder pool) and
combine the Diamond/Sapphire and Ruby/Emerald to create a Diapphire and
a Ruberald.
Place the two newly created gemstones in each their receptacle. This done we
see the boulder in the pool getting stuck in the floor and two hammers crushing
it. Wade down to the pool and step onto the centre tile- Lara is now teleported
up through the opening in the ceiling.
Feeding the predator:
Climb out of the water and make your way up to the ruins E. Take
a mental note of the huge spider webs, then head over to the left side. Those are
some odd-looking plants and they even move. Draw guns and shoot down the moth that comes flying down from the ceiling. Walk
over to it and pick up the Juicy Moth.
Return to the large spider web and stick the dead moth in there. Watch as a
spider comes down from the ceiling ahead,
spins a web across the gap as it runs past and starts munching on the dead
moth.
NOTE: Some people (myself included)
have encountered a bug here, causing Lara to die when she places the moth on
the spider web. As far as I know there are two ways of solving this. Saving and
reloading while standing in front of the web should do the trick. If that
doesn’t work you can try to place the moth and immediately draw guns. Both ways
worked for me. If all else fails the third alternative is to ask for a savegame
;)
Claiming the prize:
This is good news indeed, as the newly spun web will enable Lara to
reach the other side (by simply walking or running across). Use the
funny-looking zip line to the left, but let go and immediately press Action
when you’re nearly halfway across- this to grab the swinging rope. Move
slightly to the left and swing towards the broken bridge, jump off when Lara
reaches the highest point. Hop over to the other fragment of the bridge and
climb onto the large central platform. You have finally reached your goal and
can now pick up Secret # 3: flares, a small
medipack and the Treasure Hunter Diploma. Wait for a second and
you’re transported directly back to the mirror room from the previous level.
SOMEWHERE SOMETIME REVISITED:
Pickups: None
Enemies: None
There’s not much for us to do here, we’ll simply move onwards to the
next location. In this case that would be the Museum of Fine Arts. Leave
the mirror room through the yellow curtains, go down the hallway, down the
stairs and back to the sewer. Climb the ladder up to the streets again and go
through the open gate out to Murkbell Avenue. Head down the street and
turn right onto Fibonacci Road. This time go across the bridge and on
the other side go on through the archway on the right-hand side of the road.
Climb onto the wall ahead and jump around the left corner onto a walkway.
Follow it to the end, down the stairs and you’re now right in front of the Museum.
Head through the open gate and use the key you found earlier to open the main
entrance.
THE MUSEUM OF FINE ARTS:
Pickups: 50 % health
kits, revolver bullets, crossbow bolts, Upper Floor Key, Scribbled
Note, Key2 to Safety Door, matchboxes, Key1 to Safety Door, Trophy
2: the Moonlight Sonata Score, Award for NOT
triggering any alarms + 1 Secret (fireworks and set of
lockpicks)
Enemies: Guards
If you have not yet had a single look at the readme file that came along
with this level I’d advise you to do so now. At the end of the readme there’s a
passage about the Museum, its layout and some important information on what
needs to be done here. It’s not very long and (according to Trix herself) mainly
for show. It’s a little bit of a treasure hunt and the main goal is to obtain
the quest item that you can bring back to the trophy room at Lara’s mansion.
There will be three of these items scattered about: one in the city (here in
the Museum in other words), one in Pompeii and finally one in
Dayport.
A word of warning:
It seems simple enough, but it isn’t really so. The Museum is
very well guarded and if these guards become aware of Lara’s presence they will
activate the alarm system. This done you will not be able to retrieve the quest
item as a safety cage lowers around it. In other words the best way is to sneak
about while trying to avoid catching anyone’s attention. If you try to draw
guns while close to a guard he will automatically become attentive and alert
the others. Also it appears that they sometime become more aware of intruders
the second time she passes them by. The best way of getting through this level
is to be very careful, trying to find the best ways of avoiding unwanted
attention and finally saving the game often in different slots.
Gathering some stuff:
The main entry hall is empty (for now). Begin by going over to
the door straight ahead and push it open. The gate behind can be opened with
the crowbar and the room contains a lot of props and furniture you can shoot (this
frankly isn’t necessary though), a 50 % health
kit underneath the bowl in the top right corner and revolver bullets behind the shelf to the left.
When you’re done looting you can head back to the main entry hall.
The Hall of Gratitude:
Go up the stairs on either side to reach the 1st floor. Walk
left towards the stairs and turn left onto the balcony. Here you’ll find the Hall
of Gratitude. Push the doors open (by standing in front of them while
pressing Action) and enter. If you wish to fully enjoy the artworks in this
room it’s a good idea to turn towards the entrance and press the Light button
to the left. The sights in this hall are a way of thanking the people that are
somehow involved in the process of creating A Time Odyssey (i.e. the
creators of Lara’s outfit, helpful tools, objects/items/puzzles etc. and also
those involved in the beta-testing process). Look at the paintings and grab
the crossbow bolts from the left corner
of the inner room. Apart from that there’s nothing else to do in here, so leave
the room and cross the 1st floor over to the other balcony. Open the
double doors here and enter the Hall of Worship.
The Hall of Worship- the Upper Floor Key:
This hall is separated into three chambers. Each of them house beautiful
paintings (again taken from various custom levels) and swinging burners. Have a look at the artwork and
proceed through to the N room. There’s a depression in the floor holding
what appears to be a bowl on a stand. Underneath the bowl you’ll spot a key,
but thanks to the swinging burners you
can’t reach it. Go back to where you came in, stand with Lara’s back to the
entrance and climb the nearby pole about 8-9 notches. Backflip onto a small
platform behind, turn around and stand-jump towards the jump switch above the
entrance, pressing Action to grab hold of it. Back on the floor you can
re-enter the N chamber and you’ll find that the floor underneath the
bowl has lowered. Drop down into the hole, pull the bowl away and pick up the Upper Floor Key. Climb back up and leave the
hall.
The Atrium- the art of stealth:
When you come back out to the centre of the 1st floor
continue walking S towards the stairs (this is on the same side of
the room as the Hall of Gratitude). There’s a small sign on
the wall next to the stairs- it reads “Tour” and is pointing downstairs. Guess
we’ll go that way first then. In the next room you’re shown a fly-by of a large
atrium with a pool. There are at least four guards scattered
about on the different floors- we see two on the ground floor by the pool, one
on the 1st floor and one on the 2nd floor. In addition
we’re shown a ladder going up along one pillar as well as a shimmy-crack in the
same pillar and some ropes, making it slightly easier to reach higher grounds.
You’re shown the so-called “Safety door”, which is one step closer to the quest
item, but we’ll need no less than two keys in order to open it. Finally we’ve
been given the path to a room containing some useful pickups, this is on the
other side of the atrium down on the ground floor.
I would especially advise you to save the game OFTEN and in different
slots in this area, just in case you get caught by the guards. Also remember
what I mentioned about them being somewhat more attentive when you pass by for
the second time. Carefully walk towards the right-hand opening and crouch down.
Crawl right, hurrying past the opening and continue crawling right along the
perimeter of the room. There’s a major chance you might get caught here, if
you’re shown a screenshot of the room with the quest item and a cage lowering
around it this means that the guards have spotted you. You can leave the museum
without it and this also means you can shoot down all those guards as you
please, but what’s the fun in leaving without the main prize?
The second key and a scribbled note:
Continue crawling around the right side of the room, as long as Lara
stays down behind the ledge she should be able to go by unnoticed. Go on
through a small crawlspace at the corner and crawl up to the stairs going into
the next room right. Walk up the stairs and in the next room crawl around the
right side, sticking to the wall. Go on until Lara is located behind the wooden
counter- now you’ll notice that there’s a guard in
this room too. You need to grab those items on the counter without catching his
eye- easier said than done! Getting past without him noticing it is absolutely
possible, but oh so difficult. What I did was the following:
Stand up at the edge of the counter and vault up onto it. Crawl forwards
a couple of times and when you’re close to the items quickly let go of the
crouch-key and immediately press it again, she’ll sit up just like she would if
she were to draw weapons. This movement should scoot you so close that you can
pick up a Scribbled Note and the Key2 to Safety Door. He shouldn’t have noticed
Lara yet, if he has I’d recommend you to reload a previous savegame. The
difficult part comes in leaving unnoticed. Most of the time he’ll react and
rush out of the room to press the Alarm button. What I did at this point was to
simply stand straight up and take one cautious step backwards. Turn around and
if the guard stays put simply walk towards the edge where you came from, drop
off the counter and crawl back out the same way as before. Once you’re out of
that room you can examine the scribbled note. It reads:
“Benny lost the other one somewhere in the Pleasure Halls. Get it back
immediately!”
Moving on up to the first floor- the Hall of Pleasure:
For further reference: “the other one” refers to the first key to the
safety door. We just got the second one and now that we know of the whereabouts
of the first one it’s time to go look for it. Crawl left, through the
crawlspace and around the perimeter until you see a dark ladder on the ledge to
the right. Carefully stand up, vault onto the ledge and start climbing the
ladder. Climb around the right corner and up until you reach the shimmy-crack.
Release Action and immediately press it again, then quickly shimmy left and
around the corner before she tucks her legs back up onto the ladder. Drop down
onto the ledge and now you have to be a bit careful: there’s another guard around the right corner. Hop down from the
ledge and enter the Hall of Pleasure.
The light button is on the left side of the door (left when Lara
comes in from the balcony), apparently the lights being turned on doesn’t
seem to disturb the guards. There are some paintings to look at, in particular
notice the left-most painting on the wall W. It shows a horror-like room
with a templar knight, this room is one we’ll actually visit in due time. For
that reason it’s essential to notice the location of the bright crawlspace on
the right wall of the painting. Head over to the bench at the middle of the
back wall and pull it out to grab the 50 % health
kit hidden behind it. Well, this is the Hall of Pleasure and
no sign of a key yet, so crawl out of the room and head right along the
balcony.
Third time lucky:
There’s a guard standing further
down on the balcony as you turn the corner, so be extra careful here. Crawl
along the floor and duck into the doorway right behind his back. Open the doors
to the second room belonging to the Hall of Pleasure. All you’ll find in
here (apart from the paintings that is) is a matchbox
tucked away at the right side of the room. Leave the room and
CAREFULLY walk towards the guard who’s standing with his back to you. There’s a
crack going around the pillar next to him, so vault up onto the ledge and
shimmy left around the pillar. Drop down on the other side, hang from the edge
and shimmy left around the corner. Pull up onto the ledge there, drop down onto
the floor and crawl over to the entrance of the third room in the Hall of
Pleasure exhibition. Phew!
You can turn on the lights if you like, but it’s not really necessary.
Shoot the wooden bench with the red seats at the far side of the room and pull
the marble table away from the dark crawlspace (are those guards wearing ear
plugs or something? How can they NOT notice the sound of someone pulling a
heavy table across the floor?). Crawl in and retrieve Key1 to Safety Door…..at last! Now to get out
of here.
Back down to the ground floor:
You’ll have to go the same way you came: up onto the ledge on the
balcony, shimmy around the corner and use the crack in the pillar to go around
to the other side. Drop down from the ledge and crawl as fast as you can away
from the guard and out of sight around
the corner. Continue crawling until you reach the other pillar with the crack,
climb onto the ledge and now comes another hard part. Shimmy right around the
corner, climb down and around the left corner.
Drop down onto the ledge, down to the floor and crawl ahead, turn the
corner and crawl straight out through the first doorway ahead. At this point
you have to be lucky as well as careful, because there’s a guard watching over the stairways to the left.
Occasionally he takes a few rounds into the room you’re in right now, but if
you’re extremely lucky he’ll stay away. Make your way over to the right wall,
pull down the jump switch to open the gate next to you and move through to the
other antechamber (that’s where you came down to begin with). It should
now be safe for you to head up the stairs back to the main entrance hall.
Guards galore:
We now have both of the keys needed to reach the innermost treasure
chamber where the quest item is located. First of all we need to get there
though, preferably unseen. The stairs leading up left and right lead to
opposite sides of the same room, but one of these ways are out of the question-
if you try to go that way it will be incredibly difficult (perhaps even
impossible) to sneak past the guard
patrolling the room. For that reason I’d recommend you to go up the stairs on
the right side of the room (Lara should now be facing N).
On top of the stairs climb over the ledge left and drop down on the
other side. At the far end you’ll find a keyhole, here you can use the key for
the upper floor that you found earlier. The gate on top of the stairs opens,
return there and crawl along the right side of the room. When you reach the
table crawl carefully out to the left, but only so much that you can duck into
the doorway to the right to avoid being seen by the guard
on the other side of the doorway. You’re still not completely off
the hook though: out on the balcony to the right there’s a guard standing with his back to you as well.
The Little House of Horrors- stopping by for a secret:
Crawl left and around the corner, when you reach the poster turn left
and open the door to the little house of horror. Recognize this scenery from
somewhere? One of the paintings in the Hall of Pleasure perhaps (which,
if you‘ve paid attention, should have noticed in several of the other Halls as
well)? Go to the right side of the room and shoot the cardboard templar
knight to get a matchbox, then turn your
focus towards the painting to the right. See that greenish glow coming out of
his eyes? Walk over to the painting and pull up into a hidden crawlspace, in
the storeroom you can pick up Secret # 4:
lockpicks and a keg of fireworks.
Entering the treasure chamber:
Crawl past the poster and climb onto the nearby ledge. Standing on the
left-hand side you'll see a rope hanging from the ceiling. Runjump + grab to
the rope, turn left and start swinging towards a second rope. Leap off the rope
and grab the second one. Swing over to the balcony straight across. Here you'll
find two keyholes where you can use the keys you've found to open the safety
door. There’s also a closed gate here and a jump switch that will open it. This
can be helpful in case you have forgotten one of the safety keys- you’ll be
able to go back and look for them without being spotted.
NOTE: In some cases people might
encounter a bug here, causing an invisible block to appear when you open the
gate. This will naturally prevent Lara from being able to go through it. This
hasn’t happened to me personally, but from what I’ve heard simply saving the
game and reloading should fix the issue.
Once you have opened the safety door, enter
cautiously, there are two guards in this
room. Luckily both are standing with their backs to you. Now crawl left along
the perimeter of the room until you reach a chain in an alcove. Pull it once to
close a second safety door. Get up, crawl over to the counter and past it to
the left. Crawl straight ahead through the crawlspace in the corner where
you'll find a second chain. Pull this one too in order to raise two gates out
in the room with the guards. Leave the
crawlspace and crawl left along the wall to the end. There's a crawlspace up to
the right- climb up there and drop down on the other side.
Your first trophy- the Moonlight Sonata Score:
You're now free to head through the gate leading
to the treasure chamber and if the quest item is still accessible you can give
yourself a big pat on the back. Pick up the revolver
ammo and runjump over the railing, pressing Action to grab the
centre block. Congratulations: you are free to pick up the first quest item for
your trophy room- Trophy 2- the Moonlight Sonata
Score.
Sneaking back out:
There's nothing else of interest in the Museum
so we're now free to leave. This time around it doesn't really matter if you
attract the attention of the guards, as you can just outrun them, but beware
that you will miss a final trophy if you do this. If you manage to get to the
Museum entrance without being seen you will find the trophy laying on the floor
there. This is not as easy as it seems. Thanks to your meandering around the
Museum the guards will be extremely alert and active by now and you’re lucky if
you avoid catching their attention. Some say that it is possible to kill the
three guards in the pool area without getting caught, but I managed to sneak
out without a single kill. The prize
for getting to the entrance without setting off the alarms is the Award for not triggering ANY alarms (this will appear
at your feet when you reach the main doors). Now give yourself a
huge pat on the back and leave the Museum through the main entrance.
SOMEWHERE SOMETIME REVISITED- AGAIN:
Pickups: 50 % health
kit,(revolver ammo), [optional- Bonus Object # 3], matches/pinewood
sticks
Enemies: None
Head out to the Museum courtyard and through the
open gate. Turn left, go up the stairs and across the walkway above the
channel. Hop around the right corner and follow straight through the archway
ahead. Turn left, cross the bridge and follow the winding street back to Park
Square.
A detour for some pickups:
Once there go straight ahead (N)
and past the statue. You will find that a small part near the building is
surrounded by a tall fence. On the left side there’s a gate with a padlock. If
you are to use the lockpicks from the Museum for anything, this would be
a good start. Pick the lock open, walk up to the ladder and jump straight up
while pressing Action. Lara will grab hold of the ladder, but her weight pulls
it further down. Climb up onto the platform above and do the same thing with
the ladder there.
Runjump to the next platform, grab the 50 % health kit and another two running jumps
will take you back to a balcony where you’ve been before. There’s nothing else
to do up here, so just hop back down to the square.
There is one other door that can be opened with
the lockpicks, but this is ONLY an alternative route leading to one of
the bonus objects (the compass found at the street after going through the
sewer with the crocodile). In addition there SHOULD BE some ammo to be found there, so if you insist on looking
for it be my guest. From Park Square you can go N/E towards the
stairs leading up into the train station. At the end of the stairs (keeping
them on your left-hand side) turn right and you’ll find a green door with a
padlock that you can open with the lockpicks.
Enter the building and head up the stairs.
According to Trix there should be some revolver ammo
on the top floor, but when I played the game I couldn’t find any at all. You
can go up and try to see if you can find them, go for the second bonus object (if
you haven’t already) or just leave the building as there’s nothing else up
here. If you’re done with the bonus level you can head back to the time machine
and skip down to the paragraph below named “Leaving the city behind”.
To reach the bonus object (again, if you’re not
already done with that part) go halfway up the top flight of stairs and
turn left to find a window you can shoot. Do a running jump with a left angle
to land on the ledge running around the building opposite. Walk out onto the
top of the archway and shoot out the window in the nearby building. Enter and
head up the ramps to the top (there’s nothing down on the ground floor),
open the door and walk out onto the bridge with the glass windows. Go to the
far end, shoot out the glass and drop down to the ground on the left-hand side.
Near the switch in the corner you will find Bonus
Object # 3.
Leaving the city behind:
Go S/E and head down Murkbell Avenue.
About halfway turn left through the gate where you came out at the very
beginning of the game (where you shot the first guard to get the revolver).
Pull the nearby lever to open a door in the E building. Enter a
small storeroom and shoot a barrel and a couple of crates to find some matches/pinewood sticks. Head over to the ladder
right of the entrance and jump straight up while pressing Action. Lara grabs
hold of it, pulling it down to its full length and at the same time enabling
you to climb up to the top. Turn around and a long running jump with a
last-moment-grab is in order here to reach the walkway opposite.
Go up the stairs and do a running jump to grab the rope hanging there.
Behind the pipes straight across there is a crawlspace high up on the wall. You
have to reach said crawlspace directly, because it’s too high up for you to
reach it from the ledge with the pipes. Make sure you gain a good momentum,
then leap off the rope at the highest peak and press Action to grab the edge.
Pull up and shoot out the grate preventing you from moving ahead, then crawl
out onto the sloped block.
Turn around and pull up onto the ledge with the pipes. You need to reach
the stack of crates opposite of where you entered, to do this stand between the
two sets of pipes and do a running jump with a sharp right angle. Angle Lara
slightly left so that she lands on top of the topmost crate. Pull up, turn left
and use the overhead grating as a monkeyswing in order to reach the lever on
the other side. Pulling this opens the door you see on the ledge above and
you’ll barely get a glimpse of the time machine beyond the doorway. Return to
the floor and use the nearby ladder to climb up to the roof where the time
machine is waiting.
Turn right and walk over to the edge of the roof. Turn around, drop and
grab the edge, then shimmy right past the machine (over to the spot where
you found the encyclopedia at the beginning of the level). Pull up, turn
left and pour the contents of the fuel canister into the open slot. That done
the door of the time machine opens.
Destination X:
You now have two choices: Pompeii prior to the eruption in 79 AD or the
medieval village Dayport at the brink of revolution in 1381 AD. It doesn’t
matter which one you do first or last, but you will have to do both anyways. As
mentioned before I personally prefer to start with Pompeii. Once you’ve made
your choice press the button to be whisked off to the next level.
SHADOW OF VESUVIUS:
Pickups: Latin
Dictionary Excerpt, Prof. Wells’ Handy Encyclopedia, torch, large
waterskin, Sun Disk, Scroll with Philosophical Treatment,
matches/pinewood sticks, Bottle with Seductive Perfume, Lyre, small
waterskin, Amphora with Falernian Wine, Bloody Dagger, Golden
Skull, 50 % health kits, Trophy # 1: the Silver Gladiator
Helmet, God Statuette, Energy Sphere + 2
Secrets (50 % health kit + poker/crowbar/pickaxe)
Enemies: Stray
dogs, gladiators, bear
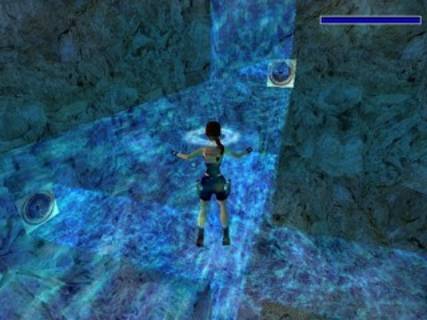
The time machine lands in a pool of all places, so Lara starts this
level under water. Pick up the Latin Dictionary
Excerpt and Prof. Well’s Handy Encyclopedia that seem to
have fallen out of your pockets as you landed. Surface and climb out of the
water, now would be a good time to examine the items you just picked up. The
page from the Latin dictionary reads:
“Dictionary
Latin- English
(excerpt)
Decretum- decision
-
Punire- punish”
If you open the encyclopedia you’ll find some interesting information on
local mythology:
“Encyclopedia, Page 144 (Roman/Greek Gods)
Apollo, God of Prophecies and Arts
Bacchus (Dionysus), God of Wine and Fertility
Mars (Ares), God of War
Minerva (Athene), Goddess of Wisdom and Knowledge
Pluto (Hades), God of Underworld and Death
Venus (Aphrodite), Goddess of Beauty and Love
Vesta (Hestia), Goddess of Home and Hearth”
There’s a doorway straight ahead (N), but turn
right first and head towards the doorway E. In here you’ll find a shrine
of some sort, with offering bowls dedicated to the gods and goddesses mentioned
in the encyclopedia. All the bowls are empty, apart from the wooden sticks in
the bowl dedicated to Vesta at the far wall. Also notice the closed door on the
right side of the back wall. Leave the shrine and go back to the time machine
and pool.
This time head through the N doorway. The room to the left is
empty so go right underneath the burning chandelier and left past the torn red
curtain. Marvel at the beautiful interior of this room, then head over to the
wall N and open the door leading out to the street.
Turn right and you’ll find a large gate. It is currently closed, but
we’ll get back to that later. Head left down the street, past the small
fountain and around the left corner. A stray dog
is enjoying the sunshine outside a door in the right wall. You can’t shoot it
while it’s sleeping, so approach it in order to wake it up and do what you have
to do.
Open the door that the dog was guarding and about halfway down the next
room turn right and open the door here. This room is empty, but you’ll have to
take a mental note of the tapestry hanging on the wall as it will give you a
major hint in regards to later activities.
Leave the room and cross over to the garden right. As you enter a dog will awaken and come charging in from the
right so kill it before proceeding. In the centre you’ll find a moveable statue
of Minerva (the goddess of knowledge and wisdom and the Roman equivalent to
Athena). This statue is small enough for you to move so stand next to it
facing N and pull it twice towards you. There is an open doorway near
the top left corner of the garden; you need to move the statue through that
doorway and into the next room.
Once there Lara will have to place the statue in the correct spot. The
correct spot was shown on the tapestry that I told you to notice earlier: one
tile away from the large gate, on the left-hand side (left when facing the
gate). Turn to face the entrance and the two gilded bowls flanking it. The
bowl in the right corner holds some wooden sticks and it goes in the top right
corner of the carpet on the floor. When you place it in the correct location
the floor tile it stands on will sink and the door in the wall behind opens.
Just to get things done quickly move the second bowl into its correct spot as
well: directly before the carpet on the left-hand side. When you have set up
the statue and the two bowls correctly it should look like this:
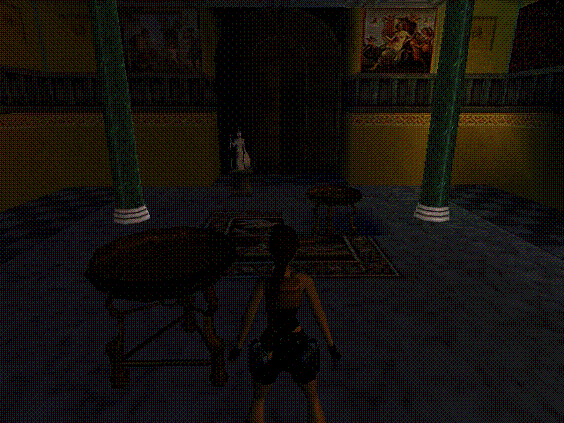
Now turn and head through the door you just recently opened, this leads
you into a room with a climbable pole. Start climbing up towards the top,
backflip onto the floor, hop over the fence blocking the nearby doorway and
head through the right-hand doorway. Immediately turn right again and go out
onto the balcony. Walk past the fence in the centre and over by the beanstalk
growing in the corner you’ll find a torch
amidst the flowers (there are three torches here in case you happen to lose
the first one). You will also be presented with a camera shot showing you
where to light the torch later on. Return to the climbable pole, drop the torch
down into the hole and climb down after it (note that you might want to save
the game before attempting to drop the torch in case it disappears).
Leave the room, go back through the garden and cross the first room
again. Once you reach the street continue going along around the corner and
proceed carefully through the archway. The ground quakes and debris falls from above, so be very careful
here. On top of the small hill head left (we’ll deal with the right side
later) and advance carefully through the archway going downwards.
Follow the street, pause for a moment to pick up the large waterskin near the fountain and bring the
torch with you down to the end of the street. The door here opens as you
approach; walk up the steps to enter the Roman baths. Debris falls as you approach the doorway to
the left so be careful (you can try sprinting and perform a dive-roll
through the doorway to avoid the falling rocks). Cross the room over to the
doorway opposite and head out to the left, you’ll now find Lara at a different
section of the city. At the corner you’ll find a statue of Minerva and a bowl
with a fire burning brightly in it. Walk carefully up to the bowl, making sure
you walk behind the statue as more debris
will drop from the ceiling on the right-hand side of the bowl. Once the torch
is lit return to the baths the way you came and leave the torch there.
From the main room of the baths dive into the pool to the left and
you’ll find a narrow opening N. Swim through there, go left and continue
swimming along the tunnel until you can surface. Climb up to the right and
you’re met with the sight of flame emitters
and steam hissing out of the floor.
Stick to the middle of the room (it is in other words easier to avoid
the flames than the steam) and crawl towards the flame emitter and the pickup placed on the floor underneath
the scorching flame. I found it
easiest to crawl past the pickup, get up on the other side and then turn to
face the flame emitter again. Wait
for it to subside, run forwards and snatch the Sun
Disk, then hop backwards to avoid being toasted.
Return to the water the same way you came and swim back to the baths.
Climb out of the pool and remember bringing the torch with you when leaving
through the debris-covered doorway. Follow the street through the archway, left
and down through the second archway and finally head left back to the garden
with the Minerva statue you moved earlier. Cross said room into the garden,
enter the room with the bowls and statue and now use the torch to light the
wooden sticks in the lowered bowl. The large gates open, granting you access to
the wine cellar. Head up the stairs to the right and pick up the Scroll with Philosophical Treatment from the
back shelf left. Leave the room the same way, remembering to bring the torch
with you. Cross the garden through the right room and follow the street down to
the left.
Go all the way back to the garden with the pool and time machine, now
you can enter the shrine with the offering bowls. Walk over to Vesta’s bowl and
use the torch to light the wooden sticks in the bowl. You’re done with the
torch so leave it behind and return to the streets.
Go along and through the archway cluttered with debris. On top of the
hill turn right and go to the end of the street. Up in the left corner you’ll
find a crawlspace partially covered in foliage. Pull up there and drop down on
the other side. Go E past the bowl and pick up the matches/pinewood sticks, then turn right and
climb up into the opening. Standjump to grab the grating running along the
ceiling and shimmy left towards the crawlspace. Drop, grab and pull up, then
crawl through to the other side.
As you are soon to find out there’s a flame
emitter below the crawlspace, so don’t drop down just yet. From here
you can either shimmy left around the crack and drop down on the ground or you
can drop down by the flame emitter,
roll and climb over the top of the small slope, then slide to the ground.
Either way is fine, but you’ll run the risk of being ambushed by the dog guarding the area if you choose the first way.
Stand with Lara’s back to the slope, a few steps away, and backflip onto
it. Immediately standjump forwards and press Action to grab the grated wall
ahead. Climb up to the top and enter the room to the right, pick up the Bottle with Seductive Perfume from the table.
Doing so a trapdoor drops in one of the other rooms so head back to where you
climbed up and through to the next room E. The trapdoor is located in
the back left corner of the room so head over there and drop down to the floor
below.
Follow the hallway to the end, a door opens and you’re back out on the
street outside the baths. Re-enter the baths and head left, straight across the
room through the doorway opposite and out onto the streets left. You’re now
back where you lit the torch earlier, this time continue following the street
to the end and through a tunnel. Be careful as you cross through the latter,
near the end you’ll find more debris
dropping from the ceiling.
On the other side go right first, following the street around two
corners and as you approach the third corner the ground starts rumbling again.
Look up ahead to spot a slab of rock perched on top of a column near the corner
wall. Approach it carefully, backflipping immediately as the rock drops. Go
past it and immediately look to the right: the arena you see here is the Theatre
(or Theatrum as it’s called in the map accompanying the readme file) and
you should also find a wooden door that you can open.
Pull the chain on the other side to open a door at the far E side
of the street. Return outside, go right alongside the Theatre and at the
end you’ll find the now open door, which will grant you access to the
Theatre. Enter the temple through the S doorway and follow the hall around
to a room with some decorative masks scattered about on the tables. Pick up the
Lyre from
the table on the left and leave the room the same way you came in (there’s
nothing of interest in the other room, so you can just ignore that unless
you’re really keen to have a look around). Leave the Theatre and
head down the street to the left, back towards the debris-cluttered tunnel you
came through before.
This time approach the double gates at the far end and they’ll open
automatically. Head straight down the street and at the corner near the basin
you’ll find a small waterskin. Look N
across the street from the basin to find a building with a red roof above the
entrance and a foliage-covered opening up to the right. Grab the edge of the
red roof, shimmy around to the right, pull up and backflip/roll/grab. Shimmy
left around the corner and pull up into the building. Locate a moveable block
inside the alcove in the back left corner. Push the block in as far as it goes,
head left and cross the bridge running across the street. Continue following the
small terrace around to the right and in the next room you can pick up Secret # 5: 50 % health. Pull the nearby chain
to open a gate down below, this will provide you with a very useful shortcut
later on.
Return down to the street the same way you came up. Go over to the basin
and look E across the counter of the Taverna. There’s a crawlspace up in
the left corner, go through there and drop down into a beautiful garden. At the
far end there’s a closed door and a scale mechanism next to it. Along the left
side of the garden you’ll also find a water-filled hole. It’s time to put those
waterskins to good use.
The first thing you should know is that the scale is attached to a trap.
You need to fill the waterskins and pour water onto the scale, but if the amount
of water is incorrect Lara will be facing certain death. Look closely at the
symbol carved into the surface of the closed door. It is the Roman numeral
equivalent to 4. Aha, so you need to pour 4 litres of water onto the scale.
Hopefully you’re good at math, because now’s a good time to test your skills.
The small waterskin carries up to 3 litres of water and the large one can take
as much as 5 litres. Your task is to get exactly 4 litres into one of them (that
would be the large waterskin as it’s the only one big enough to hold that
amount of water).
Surely there’s more than one way to perform the task, but this is how I
solved it:
Drop into the water hole and fill up the large waterskin only. Now
scramble through the inventory and combine the large waterskin with the small
one. You should now have a small waterskin containing 3 litres and a large one
holding 2 litres. Pour out the contents of the small waterskin and once more
combine the two; now you have 2 litres in the small one and the large is empty.
Finally fill up the large waterskin, combine the two and voila: you have 3
litres in the small one and 4 litres in the large. Head over to the scale, pour
the contents of the large waterskin onto it. The door below opens and Lara
escapes unharmed. Enter the room and in the back left corner pick up the Amphora with Falernian Wine. Go back to the
garden and leave through the crawlspace.
Back outside return towards the gates you came through, but instead of
going all the way turn left and head through the archway. In the back N/E
corner you’ll find a doorway covered by a red and yellow flag, go through there
and you’ll find her standing outside the Amphi Theatrum (a Colosseum
look-alike of sorts). The left path is blocked by a closed gate so turn
right instead and you’re a bit luckier here: the double gates open as you
approach. In this next section of the courtyard notice the gate to the right.
It won’t open yet, but it’ll of a certain importance later on.
Nearby you’ll find a sort of square “pyramid” with an open top. Stand in
front of it facing E, standjump over the sloped wall and press Action.
This way she should grab the ladder on the opposite side and you can climb down
into the hole. Follow the hallway around to a room with four chains, a burning
bowl and four gates. Two of the gates are closed, you need to open the
remaining two so that Lara can pass through them. Naturally this is done by
pulling the correct chains. Stand in front of the chains facing W. I
have labelled them so that the first chain to the left is # 1, the first chain
right is # 2, the back chain left # 3 and finally the back chain right we’ll
call # 4. Pull the chains in the following order: 4-1-3. If done correctly all
four gates should be open by now.
On top of the hill turn right, follow the narrow hallway and pick up the
matches/pinewood sticks at the end. Go
back where you came from and head up the stone ramp. On top turn right and the
gate leading out to the arena opens (see the two dogs sleeping on the other
side?). Save the game, enter the arena and get ready for battle.
The gate closes behind you so the only option is to go forwards.
Speaking of which: the gate across the arena opens, releasing two gladiators
and…..a bear? This also awakens the two dogs, so
now you have more than enough to do. I would recommend you to try killing the dogs first, as they’re a lot faster than the
others and will cause her a lot of damage. As soon as you’re rid of the dogs, dispose of the bear.
Finally you can kill the gladiators.
They’re not very fast and quite easy to kill, but keep a certain distance;
their swords can do a lot of damage if they get up close. Remember that you can
also save the game between the kills, that way you won’t have to start all over
again if Lara is killed. When all the enemies have been taken down pick up the Bloody Dagger left
behind by one of the gladiators.
The gate behind you is still closed so go through the gate where the
gladiators and bear came from (it opens on approach). Head left through
a second gate, down the stone ramp and have a look at the picture tiles on the
wall. Does it seem familiar? It’s called the Puzzle of the Sphinx and what you
basically need to do is to push the buttons in the correct order. Simple
enough, but which order is the right one?
Notice the closed gate to the left. The sign above it says “Decretum
falsum, ego punio”. You’ll also find the words “decretum” (decision) and
“punire” (punish) in the Latin-English excerpt you’re carry in the
inventory. What it basically means is that if you make a wrong decision in
regards to the Sphinx puzzle you’ll be punished for it. By solving the puzzle
correctly a gate will open next to the buttons. However, if you choose the
wrong buttons the gate will remain closed. In order to fix this either reload a
savegame or go through the Chamber of Death to pull the chain that will reset
the buttons. The Chamber of Death is the one located on the other side of the
closed gate underneath the Latin sign.
You can try the Sphinx puzzle yourself or highlight the line below for
the solution:
Simply push the third button from the left, then the
middle and finally the first.
Done correctly the gate left of the buttons opens and you can enter the
next room. Pick up the matches/pinewood sticks
and the Golden Skull and you’ll see the entrance gate in the arena
open.
**** NOTE: This is only necessary if you fail to open the correct gate
and do not wish to reload a savegame.
If you make a mistake the gate to the Chamber of Death
opens no matter in which order you press the buttons (provided it’s not the
correct order). In that case you have to roll and dash through the gate
before it closes.
Standjump to grab the back of the grated slope as the first axe swings right. Stick to the middle, pull up
as the second axe swings left, slide
and jump AT THE VERY END of the slope. Press Action in the last moment
to grab the pillar ahead. Turn left and runjump across the pillars until you
reach the ledge with the slope. Pull the chain and leave the room by run
jumping to the next pillar and from there to the slope. Pull up, slide and jump
+ grab to the starting ledge, leave through the gate. Now the buttons should be
reset, so you can try again.
****
Leave the room the same way you came and go back to
the arena. Run across, through the open gate and go down the ramp, through the
open gates and past the four chains. From there follow the hallway around until
you’re back at the ladder and can climb back up to the courtyard.
The gates of the Palaestra
(the Palace- the gates I told you to notice earlier) now open as you
approach and a gladiator comes charging out. Kill him and
pick up 50 % health and matches/pinewood
sticks, then enter the Palace. Go left over to the
Minerva statue at the middle of the wall and behind it you’ll find a moveable
block. Push it in ONCE, then turn right and reach into the wall niche.
The block you just moved drops down into a fire pit, which
is where Lara would have gone too had she attempted to push the block even
further. Enter the next room where you’ll find Secret #6: the poker/crowbar/pickaxe as
well as Trophy 1: the Silver Gladiator Helmet.
Leave the room and
cross the Palace courtyard over to the opposite side. Here you can use the
crowbar to pry open the wooden door. Enter and head over to the back left
corner, where you’ll find a ladder. Climb it to the top, pick up 50 %
health near the flower bed and enter the room with the
beautiful pool and fountain opposite. The urn to the right can be shattered and
contains 50 % health and you’ll find two
bundles of matches/pinewood sticks in the back right corner. Return
to the ladder and climb back down, you can now leave the Palace and head
back to the Amphi Theatrum courtyard.
Leave the
courtyard the same way you came in earlier and as you go through the arch turn
right down the street. Follow the street all the way down to the gate you
opened when finding the secret earlier, remember to bring with you 50 %
health from the counter at the very end of the street. Head
through the gate and make it a first left through the open door. Back in this
familiar room go through the torn curtains and back to the time machine.
We’re not quite
done here yet though so enter the Roman shrine again and now it’s time to give
the Gods and Goddesses what they want. If you read the encyclopedia again
you’ll find clear hints as to their preferences. You should already have lit up
Vesta’s bowl (she being the Goddess of the home and hearth) so that
leaves five bowls.
The items needed
are the following (from the left bowl to the right):
Minerva (the
Goddess of knowledge): Scroll with Philosophical Treatment.
Mars (the God
of war): Bloody Dagger.
Bacchus (the
God of wine and fertility): Falernian wine (the amphora is used the same
way as the waterskin, so you have to pour the wine into the bowl).
Apollo (the God
of prophecies and arts): Lyra.
Venus (the
Goddess of love and beauty): Bottle with Seductive Perfume.
Pluto (the God
of the Underworld and death): Golden Skull
When all the items
have been placed the door right of Vesta’s bowl finally opens. Enter the room,
climb onto the block and retrieve the God Statuette. Drop
down, cross through the shrine, head right past the time machine and go back to
the street. Turn right and go through the open gate, run along the street until
you reach the second gate (you’ll now have the entrance to the Amphi
Theatrum to your left). Run straight through the gate and continue
following the street until you see the doorway covered in a red curtain
straight ahead.
Go through said
doorway and in here you’ll find a Goddess statue (looks like Isis to me).
Combine the God Statuette with the Sun Disk to create the Isis Statuette and
place it on top of the crystal at the base of the statue. Electrical beams
shoot out, the statuette soars up in the air and a door on top of the stairs
behind you opens. Walk up into the sacred shrine and here you’ll find exactly
what you were looking for: the Energy Sphere.
Save your game
before picking it up. The moment you pick it up the ground starts shaking….this
is the start of the volcanic eruption! You have to get back to the time
machine, insert the energy source and get out of here before all hell breaks
loose. You have two ways of getting back to the time machine. Provided that you
picked up the first secret and pulled the chain you’ve been given a shortcut
back. You can also give the long route a go, but it is harder and you won’t
have as much time once you reach the time machine. I’ve tried them both and
although the long route is harder, it’s certainly not impossible. To help out I
have provided you with two maps. The first map shows the shortcut route,
through the gate you opened when finding the secret. The second map shows the
long route through the Roman baths. The red line in the maps indicates
Lara’s path. Also watch out for falling debris and rocks along
the way.
MAP 1:
MAP 2:
Once back by the
time machine dash down the right side of the pool and through the now open
door. Pull the chain once to drain the pool. Now you really have to hurry up.
Ashes and fire rain down on her as she leaves the room and if Lara stays around
too long she’ll catch fire. Run left, hop over the pool and down on the
opposite side (close to the God/Goddess shrine), then turn right. Here
you’ll find the slot for the Energy Sphere. As soon as you place it the timer
will be reset and Lara will no longer be in danger of catching fire (if she
does it simply means that you were too late in placing the Energy Sphere).
Climb out of the pool, drop down in front of the now open door of the time
machine. Enter and press the green Back button to leave Pompeii behind for
good.
A SHORT STOP:
After the cutscene
you’re back at a familiar place: the dark city where you began the adventure.
The door won’t open and one of the buttons has turned green (depending on
where you have just been), so don’t waste any more time. Just walk over to
the button and press it to move on to the next location.
DAYPORT SUNSET:
Pickups: Matches/pinewood
sticks, torch, Left Gauntlet, 50 % health elixirs, Easter Egg:
fireworks, Bronze Bell Tongue, 100 % health potion, poisoned crossbow
bolts, Interesting Letter, set of lockpicks, Mould with Key Shape,
large waterskin, Not Very Well Hidden Key, crossbow + 1
Secret (poisonous crossbow bolts and 50 % health elixir)
Enemies: Rats,
crows, peasants, stray dogs
Leave the time machine and the door closes behind you. Lara is now
located inside a barn (of all places) and the air is instantly filled
with the sounds of crows cawing, wooden floor panels and doors creaking and
dogs barking. Go around to the left, climb over the small mound and break a
wooden box to find some matches/pinewood sticks.
In the S/W corner of the barn (near the time machine) you can
pull up onto the higher floor. Turn right and shoot two
rats. Push open the doors in the W
wall and walk out into the golden gleam of a setting sun.
Gallows Place- finding the torch:
Turn left and jump over to the brick wall. A crow
rises up into the air S/E so shoot it down before it reaches
Lara. The square with the corpses is called Gallows Place. The wooden
building S is Rosie’s Brothel. Two more crows appear as you drop down to Gallows Place.
The box underneath the corpses can be shattered, here you’ll find the torch (there are three available in case you
should lose one or two). Cross the wooden bridge over to the W side
of the channel and turn left, here you’ll find a lit wall torch next to the
sign that says Rosie’s- you can use this flame to light your torch.
Rosie’s Brothel- the Left Gauntlet:
Leave the torch here for now (or you can leave it over by the
gallows, just so long as you remember where it is since you‘ll need it later) and
dive into the channel. Swim W underneath the brothel and up through an
opening in the floor. Climb out of the water, you can shoot the wooden box if
you like, but there’s nothing of interest in it. There is, however, a door
nearby and it can be opened. The storeroom you’ll enter now contains some
crates, boxes and barrels (most of them can’t be broken and those that can
hold nothing but dust). There are also some rats
residing in this room and it’s in your best interest to get rid of
them right away.
Open the next door and follow through to the dining room. Continue left
and head up the stairs in the next room, by now you should have reached a long
hallway with doors leading to the bedrooms (no worries, the business is
closed down so there’s little chance you’ll run into anyone).
Apart from a bed the first room to the left is pretty much empty. Note
that the windows in these rooms can be opened just like the doors, but since
Lara pushes them outwards she will drop down to the level below. At least one
window in this level must be opened in order to proceed, you’ll see which one
I’m talking about later on. For now just know that there’s no actual need to
open any of the windows in the brothel (unless you absolutely insist on
checking it out).
The first door to the right leads to a room with a bed, some mighty
interesting decoration on the walls and a forgotten Left
Gauntlet. Remember the rule that goes something along the lines of
“anything that isn’t nailed down….”? Why this gauntlet is of interest to Lara
we’ll find out in the next level. The second door on the left side (which
just happens to be the last door on this floor that can be opened) leads to
a room where you can pick up a 50 % health elixir from the floor next to the bed. You can leave Rosie’s
Brothel now, simply open the nearby window and she’ll drop back down to Gallows
Place.
The Easter Egg by the Mill wheel:
From Gallows Place go S/E, underneath the clothesline with
the clean sheets and you’ll reach another bridge. Walk up to it and follow the
brick wall left. At the end hop over to the wooden platform and cross over the
bridge to the Mill on your right-hand side. In one of the alcoves right
you’ll find a wooden box, shatter it to find a 50 %
health elixir. Return to the brick wall and continue following it
all the way to the mill wheel at the far end. Do NOT dive into the water
near the wheel- Lara will get stuck
underneath it and be killed immediately. Instead go to the end and notice the
red roof. Do a running jump + grab to the higher part of the roof, shimmy right
to the end, pull up and backflip/roll to land on a balcony. You have just found
an Easter Egg: a keg of fireworks.
The Mill- ways of slowing things down:
You can dive back into the water, but just make sure to make that the
higher part of the channel (not down by the mill wheel). Make your way
back up to the brick wall the way you came here and return towards the wooden
bridge and Rosie’s Brothel. This time cross the bridge and turn left.
Walk up to the Mill and you’ll find a door in the far wall with a switch
next to it. Pull the switch and enter the Mill, disposing of the peasant that comes rushing down the hallway
straight ahead. Enter the room he came from and pick up the matches/pinewood sticks near the fireplace (next
to the pile of logs).
Return to the entrance and follow the hallway right to a hole in the floor
with a ladder leading down. Climb down almost to the bottom (noticing the
rats down there) and backflip to
the first floor. Turn and walk along the edge. If you’re lucky you can get a
few shots at the rats running around on
the ground floor. By the W wall there’s a moveable box, but the sack
placed on the floor in front of the box prevents you from going anywhere with
it. Stand in front of the sack facing S and press Action: Lara will pull
the sack out of the way. Now you can move the box around the ledge, following
the perimeter of the Mill, to the other side.
Once there you’ll have to draw guns and dispose of a rat that crawls out of a nearby sack. Now notice
that there’s a lowered trapdoor left of the aforementioned sack. You’ll have to
pull the sack out of the way, then position the moveable box right next to the
lowered trapdoor. Drop down to the ground and dispose of the remaining rats (if any at all). Remember that as long
as you’re down here you have to stay clear of the grindstone
at all times, it will cause her quite a lot of harm.
Head over to the N/E corner and pull the sack away from the
crate. Push the crate in as far as it goes and pull the revealed rope, raising
the aforementioned trapdoor. Climb back up onto the floor above and push the
box onto the trapdoor. A camera shot reveals that the box causes the grindstone
mechanism to come to a halt. Drop back down there and in the S/E corner (next
to the grindstone) there’s
a hidden trapdoor (see the screenshot below if you have trouble finding it).
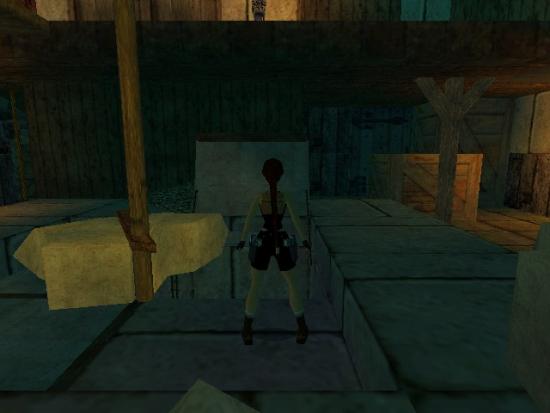
Drop down into the creepy basement and locate the water hole by the S
wall. Dive into the water, swim forwards and right at the first junction (left
is a dead end). An underwater current will grab hold of her, just go along
with it and when she comes to a halt swim to the end and upwards. Continue
following the tunnel, through a narrow triangular crack and up until she can
surface. Lara now finds herself in the cloister well (in reference to the
map found in the readme). Climb the rope (standing directly in front of
it and jumping straight up while pressing Action) and backflip to find Lara
standing in the Cloister Courtyard.
The Cloister and belonging Church:
There’s nothing to do in the courtyard itself, but in the N/W corner
you’ll find two open doorways. Start with the leftmost one and enter the Church.
It seems someone has been wreaking havoc upon this once beautiful nave- go to
the far end to find a rope. Stand in front of it, jump straight up and press
Action to grab hold of it. Turn left to find a crawlspace high up on the wall,
swing over towards it, jump and press Action. Crawl through and you’re met with
a short fly-by camera introducing you to the interior of the Bell Tower.
The Bell Tower and a piece of Bronze:
Drop down onto the wooden platform below and turn to face the wall
opposite of the crawlspace. Standjump onto the broken stairs and continue
working your way left and upwards. When you reach the rope with the burning
bucket attached to the bottom turn left and do a long running jump to the
corner platform. Turn back towards the rope again and this time do a standing
jump to grab the platform above the rope. You might noticed that the platform
has stains of soot on it, it has been damaged by the fire burning at the bottom of the rope and so the platform will collapse under her feet once she
pulls up onto it. Pull up and immediately backflip to the platform below.
You’re now safe so standjump over to the platform next to the bell and pull the
rope.
Apparently the bell has been severely damaged too, because the moment it
starts tolling the bell clapper comes off and plummets down to the ground. You
now have to follow the same way: standjump with a grab to the previous
platform, standjump and press Action to grab the rope, slide down to the bottom
as far as you can go without catching fire, turn right and backflip onto the
platform behind. Continue making your way down along the platforms to the
ground where you can pick up the Bronze Bell
Tongue, which amazingly enough didn‘t seem
to take any damage from the high drop.
Climb back up to the crawlspace, drop down on the other side and cross
the nave back to the courtyard. Turn left and go past the tapestry covering the
open doorway, down the hallway and at the end you’ll find a switch on the right
wall. Pull it and there you have a way back out to the streets in front of the Mill.
A short detour for some goodies:
We’ll go for some pickups before moving on: from the door you just
opened turn right and climb up onto the wall. Do a running jump across the
channel (E) and on the other side continue following the
wall until you reach a roof running alongside the wall. Crawl underneath the
roof to the other side and reap the rewards: a 100
% health potion and poisoned bolts.
Head back to the Mill the same way you came.
Breaking and entering:
Return to Gallows Place and hopefully you remember where you left
the torch, because now it’s now time to put it to good use. Light it if you
haven’t already and cross the bridge over to the W side of the channel.
Head right and through the N/W alley and follow it around the houses
until you spot a small cannon on the ground. Stand behind it, use the torch to
light the fuse, watch with glee as the cannonball smashes through the door of
the building ahead and Bob’s your uncle.
Inside the house head left and when you reach the kitchen turn left
quickly and go through the next doorway with guns drawn, prepared to blast down
the dog looking after the house. Pick up
the matches/pinewood sticks right of the first doorway and head through to the
bedroom. First of all turn left and pull up onto the counter (you’ll need to
crouch in order to do so)- here you’ll find a 50
% health elixir. Drop back down to the floor and continue up the
stairs.
Head right and go around to the next bedroom, where you can pick up some
poisoned bolts from the window sill.
Return to the stairs, but do not leave just yet. You might notice that there
are two windows here that can be opened. Open the one left of the stairs first,
this will provide you with a useful shortcut and luckily you can simply pull
back up into the house right away. Now open the window right of the stairs.
Lara will drop down to the ground, so turn left and go straight ahead towards
the Castle and the rope hanging from the left-hand building (this is
to avoid any detours later on). Turn left to face the building from which
the rope is suspended and you’ll spot a fence blocking the open window. Draw
guns, start jumping and fire at the fence until it breaks. Now turn to face the
building opposite of the rope (W) and walk along the left
side, around the right corner you’ll find some more poisoned
bolts.
We’re done here for now so head N and right around the corner.
Since you were smart enough to open the first window to begin with you can
simply use that to pull back up into the building from before. Clever huh?
The writing on the paper:
Return to the second window and this time do a running jump across the
alley to land on the window sill of the building opposite. Enter the room, turn
left and pull down the hatch in the ceiling, climb up into the attic. Shoot
away the fence in front of the window and do a running jump over to the sloped,
grey roof to the right. Lara will start sliding so grab the edge and start
shimmying left. Go on until she’s hanging directly above the wooden crate, then
pull up. Backflip, roll in mid-air and press Action and she will indeed grab
the rope suspended from the opposite building. Swing towards the open window (and
now you see why we had to get rid of that fence before), jump and press
Action to lower Lara’s arch and land neatly on the window sill.
In the next room you’ll find a few pickups: matches/pinewood
sticks on the window sill and an Interesting
Letter underneath the table. It reads:
“G, fetched this mould,
let’s hope it fit’s the Castle lock. The draw-
bridge rope is easy to
cut- Good luck. B”
Open the window nearby and enter the next room. Pick up the set of lockpicks to the left, then pull out the
box of coal in the far right corner. Behind it you will find the Mould with Key Shape (presumably the one
mentioned in the letter). Return to the previous room and this time go past
the sheets hanging on the clothesline to the left to find an alcove. The “unlit
torch” on the wall is in reality a switch, pulling it opens a hidden passage
which leads to Secret # 7.
The Castle Basement Crate Puzzle:
Dive down into the water, swim along the passage and around to the left.
A new level loads and if you save the game at this point you’ll find that the
savegame file reads “Dayport Sunset- Castle”. There are some pickups to be
found down here. Note that these count as a secret for the level called Dayport
Sunset and there’s another secret to be found in the Castle itself later on.
According to Trix these two levels (Dayport Sunset and Dayport Sunset-
Castle) are really meant to be one huge level, but due to the limitations
of the level editor she had to split them into two parts. Lara is now located
in the basement of the Castle and it is not possible for her to enter
the upper levels from here- she’ll have to enter the Castle itself
through the main gate. Confused?
Don‘t worry, we’re going back to the village in just a few moments, but
first let’s find the pickups we came here for. Kill the rat that comes running at you from the left, then
head that way and next to the right-hand pillar you’ll find a wooden chest-
shoot it to find two kegs of poisonous bolts.
Continue around to the right and here’s another chest for you to break, it
contains a 50 % health elixir.
Ok, now you have the pickups, but we’re still not entirely done here. As
you might have noticed there’s a whole bunch of crates down here. Some of them
are moveable and if you go W between the rows of crates you’ll be
attacked by another rat and you’ll see a
rope stuck inside one of the crates to the left. Your current goal is to find a
way of moving the crates in order to gain free access to said rope. To make the
process easier to understand I have made a few screenshots that can be found
below.
1) Pull out the crate marked with the number 1 as far as it goes:
2) Walk up to the sack lying on the floor between the two rows of crates
and pull it away:
3) Stand in front of the crate marked with the number 2 and pull it out
twice:
4) Go around to the opposite side of the crate you just moved and behind it
you’ll find two wooden boxes. Shoot them both to find a rat and the large
waterskin. To the right there are also some poisonous
bolts for you to pick up:
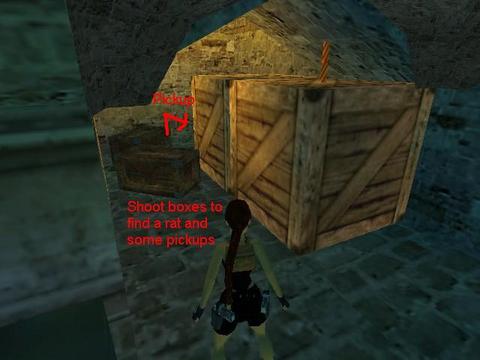
5) Turn left to face the moveable crate here (marked with
the number 3 in the screenshot below) and push it out once, which is as far as
it will go:
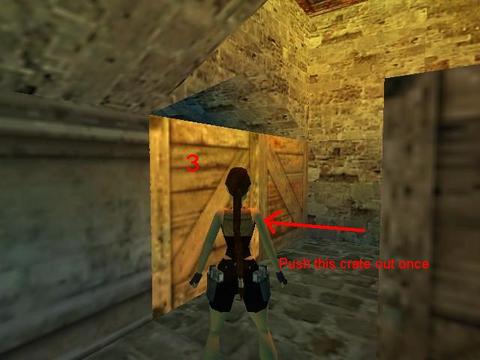
6) Turn around and go back to the other side of crate # 3 (the one you just
moved), now pull it out once:
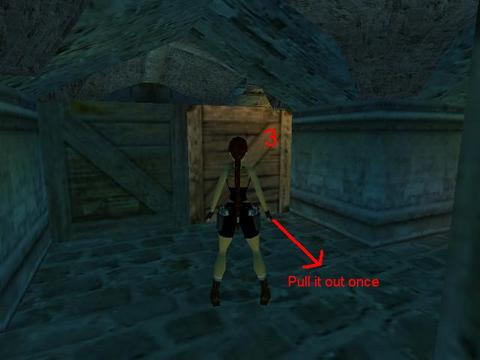
7) Return to the crate with the rope and this time pull out crate # 4 once:
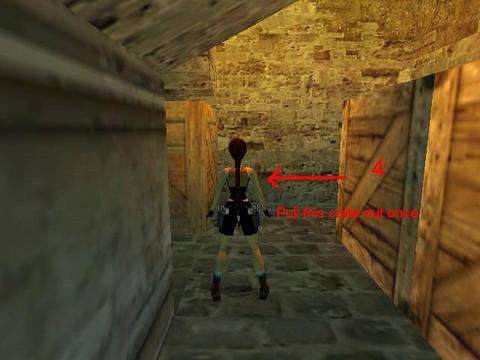
8) Now you can go back to the crate with the rope (# 5) and push it in (one
time will do):
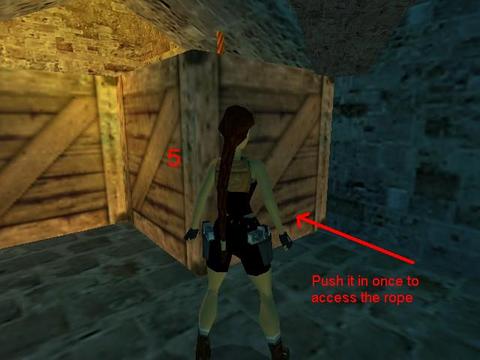
The rope is now uncovered and when you pull it you’ll see a block rise
on the floor above (this will come in handy once you’ve reached the Castle
itself). There’s nothing more to do down in the basement so return to
the water and swim back to the secret passage the way you came in before.
Going back to Gallows Place:
Climb the ladder back up to the floor and leave the building through the
open window near the suspended rope. Head N, right at the first corner
and down the hill through the small arch. From here go right and then head left
through the arch to find yourself back by the channel near the barn with the
time machine.
Cross the bridge over to Gallows Place and if you’ve left the
torch somewhere and it has disappeared, simply pick up and light a new one-
you’ll be needing it again soon. We’re now going to check out what has so far
been undiscovered territory to us. From the gallows go down the hill N/E.
As you turn the corner a peasant and his dog attack, kill them both and continue right down
the hill past the drying laundry.
The J. Fax ancestor:
Down here you’ll find the J. Fax Smithy (an ancestor of the J.
Fax whose store and apartment we looted in Somewhere Sometime perhaps?).
The door is locked and you need a key. Turn right from the door and go towards
the wooden fences. You will notice that Lara is looking at something. Shoot the
fence, pull the yellow bag towards you and pick up the Not Very Well Hidden Key (and in these
troubled times too, you‘d think people would hide their belongings better). Use it to open
the door to the blacksmith’s abode.
How to forge a key:
Apparently some villagers still prefer to defend their homes, as is the
case with the blacksmith (or an
apprentice, perhaps). When he’s dead you have to go find the torch and
bring it with you to the Smithy. First of all go around to the right and
pick up the poker/crowbar/pick next to the fire (be
careful not to get too close, you can also light your torch here if you haven’t
already). Next head around to the left and on the side of the metal cage
you’ll find a square receptacle. Notice that there is a lever inside the cage,
but it’s inaccessible until you can find a way of opening the cage door. Place
the mould you found earlier in the receptacle and next climb the ladder right
of the cage.
Shoot the wooden box on the right-hand side to find the crossbow, opposite of the box you shot there’s a
small niche in the wall. Finally we can put that bell tongue to good use: toss
it down into the niche and return to the ground floor. Retrieve the torch and
go around past the mould receptacle, here you’ll find a stack of wood for a
fire. Carefully light the wood and as time flies by, the cage surrounding the
lever opens.
For some reason the lever handle has come off, but that’s not even an
issue since you already have a more than good enough substitute in the poker.
Activating the lever mechanism causes the container above to tip over, pouring
glowing hot bronze into the casting mould. Some time goes by and finally the
mould bursts open, releasing the key into the small water pit. Go over there
and pick up the now cooled-off Bronze Key, which in its turn could possibly help you gain access to
the Castle.
Let’s see if this works:
Leave the house and return to Gallows Place. Go up towards the Mill,
but crossing the bridge rather than going all the way. Turn right and continue
until you reach the moat surrounding the Castle. First things first and
in this case that would be how to lower the drawbridge. In the letter Lara
found earlier it said that the rope suspending the drawbridge was easy to
break. So: draw guns and fire at the rope, causing it to snap and granting you
an easy passage across the moat. Use the newly cast key to raise the portcullis
and head through to enter the next level.
DAYPORT SUNSET- CASTLE:
Pickups: Torch, matches/pinewood
sticks, Useful Dagger, crossbow bolts, crossbow, Trophy
# 3: the Golden “Croft” Coat of Arms, 100 % health
potion, 50 % health elixir, Right Gauntlet, Trinket Left Half +
Trinket Right Half (=Heraldic Trinket), Energy Sphere+ 1
Secret (small waterskin, 100 % health potion and crossbow bolts)
Enemies: Guards, undead
knight, Guardians
Welcome to Dayport Castle:
Proceed through the archway and into the Castle Courtyard.
Approach the wooden door opposite, turn left and take down the guard coming down the stairs (it seems that
you‘ll have to cross the courtyard in order to trigger his appearance).
Enter the room he came from and have a look around. The wooden chest is empty
and at the W side there’s a locked door with a key slot of sorts to the
left and a ladder and switch opposite.
We’ll deal with the ladder and switch later, for now turn around and
head up the stairs E. Continue down the stairs on the other side and
you’ll arrive in the small room opposite of the one you came from. Approach the
far wall, shattering the wooden chest to uncover some torches, and turn around
to shoot a guard sneaking up from behind.
Pick up a torch, light it using one of
the burners hanging by the wall and leave it here before heading down the
stairs to the Courtyard and crossing over through the doorway opposite.
Turn right and head over to the ladder in the alcove. Pulling the switch
on the left wall opens the overhead hatch, enabling you to climb the ladder.
Dismount on the left-hand side and you’ll find a ceiling hatch that you can
open by yourself. The handle is pretty hard to spot, the screenshot below shows
you how to position Lara correctly for pulling the hatch down:
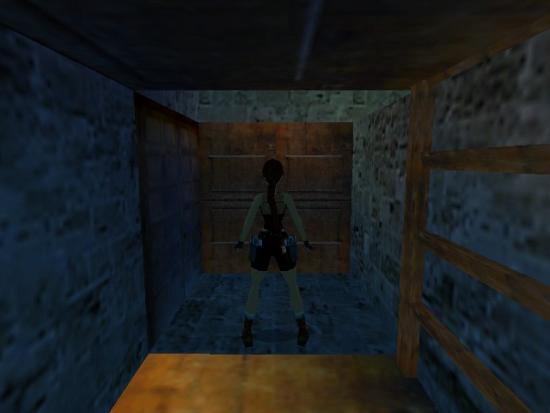
Before climbing up onto the floor above we need to clear way for a timed
run we’ll come across later on. Turn around and there’s a closed window at the
opposite end of the passage. Hop over the open hatch and open the window,
causing Lara to drop down onto a slanted roof and slide back down to the Courtyard.
This might seem unnecessary, but it will provide you with a shortcut that will
come in handy soon. Return to the small room you just came from, climb up the
ladder again and dismount on the right side. Pull the switch next to the open
window to close the hatch where you climbed up. Now you’re ready to explore the
floor above.
The Gauntlet Courtyard- a timed run:
Up here you’ll find a wheel mechanism. Pulling the wheel towards you
will gradually open the wooden door down in the courtyard. That’s the easy
part. The door won’t stay open forever though, so the hard part is to reach the
door before it closes. This is why we opened the window before, it will provide
you with an easy way down. Here goes:
Pulling the wheel five-six times should do. Backflip
twice so that Lara drops down through the open hatch. Now sideflip right twice,
turn right and run through the open window. She will slide off the roof and
land in the courtyard. Veer left and dash towards the closing door, finishing
it off with a diving roll (i.e. pressing the Jump key while sprinting).
Phew!
In front of you there’s a plaque mounted to the floor, it reads: “Challengeth
the treasure’s Guardians if thou longeth for death”. Yikes! On the plaque
there’s also an image of two gauntlets. You only have one as of now, so guess
that means we’re going for a second one. At the middle of the grated floor
there’s a raised block, this is the block you raised when accessing the Castle
basement in the previous level (when finding the secret). The door
opposite is locked and it seems you’ll need a coat of arms of some sort to open
it.
The only available option right now is an open doorway in the N/E corner
(right of the wooden door you came through). Climb up the passage and on
top you’ll find a ladder around to the left (in the alcove S you’ll
see the wheel mechanism from before- seen from the opposite side this time).
On top go straight ahead and through the door that opens as you approach.
Continue along the hallway and right at the second corner there’s a
closed door with a switch next to it. Pull the switch, go on through the now
open door and start running down the stairs.
The Dungeons- a Maiden of spikes:
Wow- all of a sudden the steps turn into a slope, sending Lara down into
a less than pleasant place. Time a run past the first chain, continue past the murky pool (there’s
nothing of interest down there) and cross another couple of chains to arrive at the heart of the Dungeons.
Approach the Iron Maiden- this is the medieval torture device shaped as
a coffin. Its interior is lined with sharp spikes (and occasionally glass as
well). These would press into the body of the victim, causing him/her to
slowly bleed to death. The lid opens and a ghoul silently glides across the
floor. It disappears through the bars of one of the nearby cells, leaving a
hidden passage inside the Iron Maiden. The problem is that you can’t access it
due to the spikes. Face the device
and look slightly right of it, you’ll spot a lever mechanism on the floor. The
handle has broken off, but you still have a crowbar right? For some odd reason
I found that Lara started losing health while using the crowbar here. Pick up
the matches/pinewood sticks underneath
the burning torch and head through the passage at the back of the Iron Maiden (the
lever mechanism deactivated the spikes inside).
A guide to secrets and useful items:
Enter the next room with guns blazing as a guard
is on patrol here. Pick up the Useful
Dagger that he drops + crossbow bolts and
the crossbow itself from one of the
wooden chests. Go up the stairs, pull the rope on top and in the next room
you’ll find a switch right of a closed door. Leave and you’re back out in the
room from before. Grab the torch (if you haven’t lit it already, you must do
so now) and return to the previous room (with the rope you pulled to
open the gate).
Along the N wall there are three barred doorways. Walk over to
the rightmost one, still with torch in hand. Stand close enough, the barrier
will catch fire and crumble. Enter the newly revealed room and in here you will
find Secret # 8: a small waterskin, a 100 % health
potion (underneath a chest that you’ll
have to shatter), crossbow bolts (by the suit of armor in the corner) + Trophy # 3: the
Golden “Croft” Coat of Arms. You won’t need the torch for anything
else, so you can leave it behind here.
Exploring the Castle:
Leave the room and head back outside to the Castle Courtyard.
Cross the Courtyard, head through the archway straight across and go
right towards the alcove with the ladder. Remember that there’s a closed door
nearby? Insert the dagger dropped by the guard into the slot next to the door
and voila: you have full access to the next area.
Head up the stairs and in the next room you’ll find a fire blazing in
the fireplace and a closed door in the W wall. At the wall straight
ahead you’ll see two sets of crossed swords and between them a dagger that
sticks out due to its horizontal position. This is in fact a cleverly concealed
jump switch, pulling it down opens the aforementioned door to the left. It leads
out to a balcony above a small courtyard. Jump over the barrels ahead and to
the left you’ll find a ram’s head attached to the railing. Shatter the railing
with your pistols. The ram’s head drops, hitting the stone pillar ahead and
breaking off a huge chunk of it.
Scales and Water:
Drop down into the courtyard and locate the small waterhole. Fill up
both waterskins and combine them, so that you’ll have 2 liters in the large
skin and 3 in the small one. Now use the slab of rock that was knocked off the
stone pillar to climb up onto the roof above. Break the railing and approach
the scales on the other side. What you need is to pour the contents of the
large waterskin (so 2 liters) into the urn on the left side of the
scale. When this is done correctly you’ll get a shot of the door below opening.
Drop back down and enter the stable. Get some matches/pinewood
sticks to the right, crossbow bolts from
the middle box to the left and a 100 % health
potion from the wooden chest, then leave the stable.
My kingdom for an arm:
Climb back onto the roof and enter the room to the right. There’s a
closed door ahead, flanked by two arms holding up swords. On each side there
are three alcoves occupied by knight statues, these statues are moveable and
they’re all missing one arm. There are only two arms available though: the ones
in front of the door. You need to push the correct statues up to the arms and
once they click the door opens. Use the statue in the middle alcove to the
right for the left arm and for the right arm you need the statue located in the
first alcove on the right-hand side.
Nip up the stairs, turn the right corner and open the window at the far
end. Lara drops down onto a wooden walkway. Immediately roll, safety-drop to
the ground below, draw guns and turn to get rid of the guard firing at you. Pick up the crossbow bolts he drops, then go to the far side
and down some steps to a door that you can open with the lockpicks. Enter a
small basement to pick up a 50 % health elixir,
apart from that there’s nothing to do here. The wooden chest can be shattered,
but it’s empty so head back to the courtyard where you killed the guard.
A missing gauntlet:
Go towards the wooden walkway that you dropped down from before, turn
left and pull up onto the slanted, red roof. Immediately backflip onto the
wooden walkway, turn around and follow it along the perimeter of the courtyard,
then through the doorway on the other side. Head up the stairs and take down
the guard waiting for you, then look up
at the ceiling just on top of the stairs to spot a handle. Pull down the
trapdoor and climb up to the floor above. Continue through a room with a suit
of armor in the centre and enter the next room.
I hate to be the bearer of bad news, but you’ll soon enough be stalked
by a mean-looking, undead knight dragging
his sword along the ground. Remember the armor in the previous room? You need
to lure the undead knight into that room, but unfortunately there’s a pit
preventing him from leaving his own premises. Drop down into said pit, pick up
some matches/pinewood sticks and pull
the nearby switch. Platforms and cages rise around you so now the knight has free passage into the room with the armor.
The problem is to find a way for YOU to get out of there. Turn around to face
the wall opposite of the switch. The block ahead is moveable, so pull it out
once. That done a block lowers next to the switch, revealing a crawlspace. Go
through there and around the corner. Soon you’ll come to another switch, pull
this to open a nearby trapdoor. Now you can climb up onto the floor above and
you’re back in the room with the undead knight.
Lure him into the other room, position Lara approximately in front of
the armor and wait for him to come staggering after her. When he’s close enough
he’ll lift his sword to attack, when he gets to that point you’ll need to
sideflip to avoid being hit. If all goes well the knight
will hit the armor instead, shattering it to pieces. In this case
get him to follow you back to the other room, then dart past him and pick up
the Right Gauntlet that dropped from
the armor.
As you do so you will see a camera shot of a trapdoor dropping somewhere
nearby. Dart out of the room with the knight
hot on your tail, nip into his bedroom and in the corner there you will find
the open trapdoor. Drop down and slide to the safety of the floor below. Head
down the stairs and through the door that opens as you approach. Turn left,
shoot the railing and drop down into the courtyard with the gauntlet plaque.
NOTE: There’s also an alternative
route, but it’s a bit longer. After grabbing the gauntlet you can drop down to
the stairway where you came up, go back to the courtyard and cross the wooden
walkway over to the open window opposite. Follow the hallway up to the room
with the moveable armors, out to the scale puzzle and drop down into the
courtyard with the ram’s head. Open the door in the E wall by flipping
the switch next to it, go through the next room and down the steps N to
find yourself back in the small room near the Castle Courtyard.
Cross over to the ladder in the opposite alcove (and
open the trapdoor if it’s closed), climb up and dismount on the left side. Pull
up to the bridge with the wheel mechanism and get ready for repeating the timed
run through the double doors below as they’re closing.
Treasures and Guardians:
Now that we have both the gauntlets we can start focusing on the real
challenge. Place the two of them onto the sign speaking about treasures and
guardians and prepare for battle. Two of the doors ahead open and the
aforementioned guardians make their
appearance. There are two of them and they have horses at their disposal, so
it’s not going to be a battle for those faint of heart. The first thing you
need to do is to knock the guardians off
their horses. This is done by firing at them non-stop and it’s essential that
you hit them square on in the chest. A good indication that you’re doing things
right is that you see blue sparks flying as soon as the bullets hit them. Once
they’re off their high horses they will start running about instead of getting
back up. This is when they’re at their most vulnerable, so luckily for us
they‘re not like their undead cousins. Continue running at them, shooting them
in the chest, and dodging their attacks as much as you can.
I’d recommend you to finish them off one at a time. Get one off the
horse and then concentrate on taking him down before going for the other one.
Remember that they’re a lot easier to kill once they hit the floor and also
that they can deliver quite a blow to Lara even when they’re up on the horse.
They’re fast and their attacks drain her health quickly, so try to avoid
getting too close. How long the battle lasts depends on how well you hit. If
you’re not feeling courageous you can climb up onto the metal cage on the floor
(this was the one that rose when you were down in the Castle basement for
the secret in the previous level). The guardians
can’t reach Lara there and you can safely pick them off from a
distance. If you’re feeling up for the challenge you can also take them on from
their own level, this will probably be less time-consuming. When the battle is
over and they’ve both gone down you can pick up the remains: the Trinket Left Half and the Trinket Right Half.
Victory at last:
Combine the two halves to create the Heraldic
Trinket and use it in the receptacle by the final closed door. Go
down the hallway and through the next door. Apparently we’re not done quiet
yet: Lara enters a darkish room with a deep pit leading down to the pool of
water you passed by on your trip through the Torture Chamber. Make your
way up the stairs on either side of the room, but be careful when you reach the
top. The wooden part of the ledge is a trapdoor and if you step on it you will
be deposited down into the pool below and you’ll have to go one heck of a long
way to get back up here (through the Torture Chamber, back to
the Castle Courtyard and through the timed run to re-enter the Hall
of the Guardians). Or alternatively you can reload a savegame.
Stand at the very edge of the safe floor, hop backwards and do a running
jump towards the other side. The trapdoor opens, but never mind that. Just make
sure you press Action in the very last moment so that Lara grabs hold of the
floor on the other side. Pull up and continue through the curtains to the next
room. All the wooden chests are empty, but in the far left corner you will find
the most prized possession: the Energy Sphere that
you’ve come so far to find.
Now that you have it, you’ll need to return to the time machine. Leave
the room and dive down into the pool of the Torture Chamber. Climb out
of the water, carefully make your way past the chains and re-enter the passage
behind the Iron Maiden. Cross the next room over to the stairs N and go
up to the room above. Head right up the steps and through the doorway. When
you’re back in the Castle Courtyard turn right and say good bye to
knights, dead and undead alike, as you prepare to leave Dayport Castle to its
inevitable faith.
DAYPORT SUNSET- REVISITED:
Pickups: None
Enemies: None
Return to the Village:
Cross the drawbridge, turn left and then head right through archway. Go
straight ahead (E) towards the Mill, continue left
up the stairs and cross the bridge over to the other side of the channel. Run
under the laundry hung up to dry and you’re back at Gallows Place.
Follow the channel past the gallows, making your way towards the wall N.
Turn left and do a running jump across the channel to the wooden ledge, then
turn right again and runjump over to the brick wall near the old barn where the
time machine is located.
And it’s back to the Future:
Pull up onto the sloping roof and enter the old barn through the same
window you came through when you first arrived in Dayport. Drop down to the
ground and place the Energy Sphere in the only vacant slot. The door to the
time machine opens, so make your way across the small mounds to the other side
and enter the machine. Press the green Back/Undo button and you’re taken back
to the city. Press the green button one last time, then sit back and enjoy the
final cutscene of this fantastic adventure.