LB Advent Calendar 2012 –
The Golden Helmet
Level by Eelkemama
Walkthrough by manarch2
Conveyor Belt
After the starting cutscene go left and through the opening in the side room.
Head N to the end and use the torch as a lever. Now return to the starting area
and to the start of the large slope. Look up left to spot a jumpswitch that has
suddenly appeared, use it and the slope turns into a conveyor belt. Jump onto
it and it will carry you upwards, head to the crossing and the door behind you
closes. Head E in the courtyard and go to the left side of the plant under the
left cross. Spot the Revolver in the
wall and take it with you. Head to the SW corner of the garden and spot the
movable block under the lantern, then push and pull it inside the building and
finally in front of the opposite W opening.
The Pool
Climb on it, turn facing E and jump up to use a jumpswitch. This opens a door
behind you, push the block away and enter the new room. Climb down into the dry
pool and pick up the Lasersight in the
NE corner. Climb back out, then head S and use the lever to open the last door
at the crossing, but don’t return there yet. Combine Revolver and Lasersight
and face the high NE block row in this room, and aim for the left side. Shatter
the glass cube and a block raises, climb up to the blocks and use the button to
flood the pool in this room. Look up to spot a monkeyswing and use it to get to
the SE blocks. Drop in the hole and follow the passage to use the lever which
opens a door on the other side of the pool. Return and climb out of the hole,
then jump into the pool and climb out at the other side.
First Smaragd Piece, Sword
Pick up Revolver Ammo and climb the
ladder to the right of the pool to the top and use the jumpswitch; this lights
a wall torch for later. For now enter the newly opened room. Notice a missing
item in the right passage, then head into the large hall and open the two
sarcophagi for more Revolver Ammo and a Large Medipack. Head to the SW corner and open
the trapdoor in front of the slope, drop down and take the first Smaragd Piece. Now climb back up the ladder
and head to the NW corner of this room, climb the greenery into a high room and
pick up a Readme (“Search for the
Helmet!”) and a Sword. Climb into the
NW crawlspace and crawl to the end to trigger a cutscene with a jumpswitch that
magically appears on a wall.
Secret Detour
Climb back out of the crawlspace and down the greenery. Head E through the room
and back in the pool room, go right around the pillar and use the magically
appeared jumpswitch. A horse statue in the courtyard where you found the
Revolver moves away revealing a hole. Get there through the pool and the
crossing, drop down the ladder and find an Encyclopedia
of Secrets for Secret #1,
then climb back up the ladder into the courtyard and head back to the crossing.
Enter the S door and head upstairs. There are two paths now – you can take
either of them first.
Slope Jumps
A camera shot shows you a swinging ball, notice this as you need to shatter it
soon. Jump to the NW slope and jump over the slopes, eventually grab the ladder
and shimmy left, backflip on the next slope and jump on. When you reach the
slopes near the W wall, take a weapon and shoot the ball to open the door at
the end of the slope sequence. On the last slope, jump at the very last moment
and grab the edge of the doorway. Climb up and at the end of the passage pick
up the Skeleton Key as reward. Return
to the opened door and stand-jump holding Action to the right hand block. Go to
the SE side and jump to the crevice, shimmy left and climb up around the
corner. Pick up Secret #2, an Encyclopedia of Secrets, and finally jump in
the pool. Either jump back to the block near the crevice, then to a platform
where a block lowered and then to the entrance or spot the door in the N wall
(also if you didn’t manage the slope jumps earlier) and at the crossing swim
right to use the underwater lever, then turn and swim straight at the crossing
and climb out and the trapdoor closes behind you. Run upstairs again.
Alternating Platforms
Open the left door with the sword button, then spot the crawlspace in the NE
corner and behind it use the floor lever to open the gates in the previous
room. Get back there via the crawlspace and head through the opened gates. Dive
in the pool and pick up Secret #3, an Encyclopedia of Secrets, near the middle of
the W wall. The only brown panel that can be opened is NE, swim up and climb
out and back into the room in front of the gates. Re-enter through the gates
and now concentrate on the central alternating structure. Step back and time
the run-jump so that Lara lands on the platform when it appears, then run onto
the central tile which is safe. With the same technique you can get to both S
and E side and use a lever each there, when both are used return to the
entrance of this room and a gate has opened in front of you. Take a Torch with you and get out of this room; if
you didn’t get the key before, throw it in front of the W opening.
Burning Floor
With the Torch in your hands head back to the pool room (back to the crossing,
then left) and light it on the wall. Now return to the stairway where you just
came from and head down to the trapdoor; to the right of it you can use the
Skeleton Key. Throw the torch on the wooden floor and it eventually burns. Drop
down and pick up the Silver Key from
the corner. Push and pull the block in the middle of the room, climb on it and
jump out. Exit this area and head upstairs, then back to the crossing near the
conveyor belt and left into the pool room. Get to the other side and return
into the large sarcophagi hall. Place the Sword in the receptacle and head in
the new passage.
Mirror Room, A Bunch of Items
Enter the left passage at the crossing. Ignore the lever for now and go left to
the hole in the wall, grab in and get the Diamond.
Return to the crossing, then head straight and go to the far right corner of
the room. Pull out the block once, go in the just revealed passage and find the
Fire Key. Open the small door in this
room and you find yourself in a mirror room. In the mirror you can see Flares (you can pick them up already at their
corresponding place) and the second Smaragd
Piece which is yet on fire. But you also can see only one knight in
the mirror so in reality you have to shatter the left one; the fire goes out
and you can take the quest item with you. The other (right) knight holds a Stick in the mirror, so go to him and take it
with you. Head out to the crossing and left to the large hall. You might
remember the missing item in the NE corner of this room; combine the Stick with
the Diamond to form the Scepter, then
approach the pedestal facing SW and place it.
Timed Raising Blocks
The door near where you found the Diamond opens, so head back in the W passage,
go left and to the open door. Again ignore the lever for now and run onto the
stairs. Dive into the water and swim in the passage in the NW corner. Use the
underwater lever and a book appears in the SW passage; swim there and pick up
the Encyclopedia of Secrets for Secret #4. Swim SE, climb out and while still on
the stairs use the Revolver or Pistols to shatter the four vases in the N
alcoves (can be done after the timed run too). This opens the door on the W
balcony, but now you need to get there. Activate the timed lever, hop back and
run-jump on the edge of the nearest raising block. It’s best to do a continuous
jump sequence so try to never stop while taking run-jumps over the blocks,
using slight left or right curves to land at the near edge and being able to
run and jump further. It’s not very hard and I assume after a few tries you’ll
be on the other side. Pick up Revolver Ammo
and enter the open door.
Fire Passage, Yellow Crystal
Go to the W end of the room passing a long fire corridor and two pillars
blocking the way to a wall lever on the slope, then head right and spot a
keyhole for the Fire Key. Place it and the two pillars in the middle of the
room explode, revealing the lever. Approach it and use it; a princess is moved
along the fire passage, deactivates the fire and vanishes in the wall. Now you
can run safely across the formerly deathly trap. Pick up the yellow Crystal at the end of the passage and return
through the corridor, then left and exit this hall. Dive in the water, climb
out SE and head back upstairs. Head straight at the crossing and afterwards
head right, combine the two Smaragd Pieces and place the just formed Emerald on the receptacle to open the door in
this room. Head through.
Colour Puzzle, Purple Crystal
There are three passages with six levers each; behind each lever is a different
colour and below them a trapdoor. When you pull a wrong lever, you’ll fall
through the trapdoor and have to pull a lever, then climb a ladder upstairs
again. The right solution for this puzzle can be found above the entrances of
the passages:
Right passage – Green
Middle passage – Blue
Left passage – Red
So you have to pull a lever in each passage – exactly the one which fits to the
colour above the entrance. After the three correct levers are pulled, the
purple Crystal appears at the right
of the trapdoor; take it and the door at the end of the right (green) passage
opens. Head through (when you have both other crystals, the door closes) and
reach another outside area.
Courtyards, Blue Crystal
Ignore the two doors to your left as well as the pool for now; just head straight
passing the dog courtyard to your right. There are two strange wall structures;
the lower parts of them are actually two pushable blocks – just push them to
the near wall and the double gate opens nearby. Enter the room and go right
around the corner to find Secret #5,
the fifth and last Encyclopedia of Secrets.
Climb one of the two ladders to either left or right of the door and on the
high balcony pick up the blue Crystal.
Climb back down and exit this room. Head to the opposite wall and place the three
Crystals to open the small gate in the right hand fence.
Block Puzzle
In the new area you can see a crowbar door and a place to use a beetle to the
left, so go find them now; also notice a ladder on the N wall leading to a
currently closed door and a gate to the left of that ladder. Go E for now and
spot a princess suspended in a glass cage, behind her are two pushable blocks
on the floor level and also two on the higher level (the ones with purple
lighting). Go to the high right block and push it in to reveal a lever. Pull it
and the door up the ladder you spot earlier opens. Don’t go there yet though as
there’s still work to do with the blocks. Look up N in this area and see a hole
in the ceiling, you need to get there with pushing the other high block next to
it. So first push and pull the two lower blocks in one row to the left high
block so that you can pull it out twice, then go around it and push it one last
time. Finally you can climb on it and jump up through the ceiling hole. A
standing jump won’t work, so you’ll need to run-jump, but no need to grab the
edge though. In one of the niches in the middle of the room you can find the Crowbar, then go SE and shatter the box to
pick up the Mechanical Scarab Key.
Climb back down in the courtyard and then get up the ladder on the N wall.
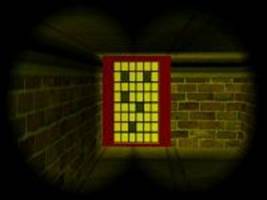
Tile Jumping
When heading through the passage Lara will look on a lantern, use binoculars to
light the rear part of this passage and see a painting on the wall which will
be the solution of the next puzzle:
Climb down in the room through the narrow crawlspace and you can see a cutscene
of an opening door, but it closes when you step on the wrong tile. Use the
painting to jump to the correct tiles and the door will stay open, eventually
you’ll make it inside the doorway. If you want you can try out finding a
shortcut. Climb up the ladder and backflip over the gate onto the platform.
From here jump to the NW ledge and run around the walkway to pick up the Mechanical Scarab. Go to the end of the ledge
and drop backwards off the ledge and grab the edge, shimmy left and climb up in
a small alcove. Pull the rope and a block raises under the exit, drop down and
climb out of this room as you’re now able to. Drop into the central courtyard.
The Boulder
Go to the SW corner of this area and open the door with the Crowbar. A flyby
shows you a boulder on top of this room which has to be transported to the NW
hole; to achieve that, pull the lever in the SW corner to release the boulder
and a second one in the first E side alcove to open the trapdoor. With both
levers pulled the boulder rolls onto the hole and an underwater door in the
pool near the start of this level opens. Exit this area and outside go left.
Using the Scarab
Combine the Scarab Key with the Key and put it on the marked tile on the floor
and it moves into the building. The gate in the NW corner of the courtyard
opens – head through, pick up the Scarab and also the first Amulet in a left passage. Now head back out to
the courtyard again, then S through the gate in the fence and approach the two
doors. Open the right one and use the Scarab again to let it move through the
narrow tunnel, then exit, open the other door and run to the end of the passage
and pick it up again – this works in two directions. This opens a door back to
the colour puzzle room in the S of the courtyard. Head through and get back all
the way through the sarcophagi room to the pool.
Final Courtyard
Dive in and spot the open door in the SW corner and swim left at the junction.
Use the underwater lever in the far left and a ceiling trapdoor at the W end
opens. Swim there and climb out, then place the Silver Key in the receptacle.
Enter the outside area and go straight W to the other side and pick up a Torch from the pedestal. Go SE and light it on
the campfire, then head to the N wall and light the elephant trunk to lower the
block left hand. Throw the Torch away – you don’t need it anymore – and enter
the passage. Press Action on the pedestal and the grabbing opens a trapdoor in
the NW corner outside, return there, drop in and pick up the second Amulet. Go to the end of the tunnel, turn
around and use the jumpswitch to open a door somewhere else. Climb back
outside.
The Golden Helmet
Now head into the NE corner of the yard (right of the entrance). Here use the
floor lever to release a boulder in a small pool which triggers a raising
block. Go S and place the two Amulets and go around the building to find and
enter the just opened door in the fence. Enter the smaller yard and go to the N
side of the NW pillar to spot and use a jumpswitch. This raises a second block
in this area; climb on the lower block, then jump to the higher one and jump
into the high opening of the building. Head through the hall; a message shows
up when you found all secrets. Pick up the Golden
Helmet at the end to finish this level.
THE END