CAC ’21 - ROME WASN’T BUILT IN ONE
DAY/1.
Level by AgentXP
Walkthrough by G&D Productions.
Parts related to the 20 Secrets are in dark blue, all
Secrets gives a small bonus.
In the inventory is a Map you can select
to give you some direction.

When in Rome…
Next to the window is a box you can shoot so you can pick up the Revolver ammo. Go through the door S
and left. To the left is a Keyhole, go down the stairs at the end of the
corridor. Downstairs and to the right is a button opening the door to the
street. First go into the lounge and on the table is the Hotel Room Key, in the corner are Flares.
Exploring Other Rooms.
Back upstairs and take a right to open that door you saw, shoot the
window and also the one across the alley and walk the clothesline to that
window. To the left are the Landlord’s
Keys. Go through the door N and open the next one left with those Keys. To
the left in that corridor is another door you can open with the same keys.
In that room, on the left wall and next to the clock
is a broken lamp, it’s a switch to open the door left of the clock. Go in and
get Secret #1/20, a Gold Rose. On a cabinet in the corner
is Shotgun ammo (jump on top of it).
Back out to the clock.
Open the door S and find a grumpy secretary… On a cabinet in the far
corner is a small medipack,
then shoot the right hand window (E). Run jump and grab the clothesline, swing
and jump/grab to the next and another swing and jump will get you to a small
roof, turn around left and run jump onto the balcony (NW). Shoot the window and
go down the stairs, follow the corridor and to the S is a door to the street
(opens with the button).
But there’s a grate left of the door, shoot it and get into the duct,
shoot another grate and lower yourself into the generator room. Pick up Flares and start the generator to open
the gates outside. Get back out and out of the duct, out to the street and take
a right, up some stairs under the clotheslines and pick up a small medipack.
Down you go, to the E and through the open gates.
Roaming the Streets,
Bartoli’s.
At the intersection take a right (S) into the street, at the end climb
the scaffolding (left) to the top. Pick up Flares
(shoot the box) there and shoot a crow.
From the other end you can run jump and grab a
balcony, then a curved run jump NE to grab a short balcony. Grab up to the
crack, shimmy around the corner and pull up onto a terrace. Shoot the window
across the street (W) and run jump/grab over there, in that room you’ll find Secret
#2/20, a Gold
Rose and Revolver ammo on the
table. Run jump/grab back to the terrace and drop down onto the crate below.
Head N all the way, up to a Square with a fountain (later referred to as Bartoli’s Square), to the right
is Bartoli’s where you’ll meet Pierre on the terrace.
Storeroom Key, Lasersight.
After the conversation with him go NW to a big gate and get a hint about
a red switch inside the building. Back a bit and to the left (N) is a closed
door, right of the door is a pillar you can climb, get to the top and side flip
onto the roof. Grab the edge and shimmy left into the window where you can grab
the Storeroom Key. Open the door
left (S) and go left to pick up a small medipack at the window.
Go back a bit and shoot the window S, run jump and
grab the crack in the pillar S and shimmy left to the terrace where you’ll find
Secret #3/20, a Gold Rose, Revolver ammo and a Medipack. Safety drop down into the street.
Now you can open that locked door N and pick up the Lasersight and Revolver ammo. Go back to Bartoli’s
restaurant.
Backstreets.
Open the door and enter the restaurant, go through the doors far right
(SE) and shoot a crate right for Revolver
ammo. In the other end of the passage is another door you can open and find
some rats. In that kitchen is a wooden crate and behind it is a box with a Medipack.
Now, get down the stairs and open the door to a back alley. To the left
is a gate you can open with a button (shortcut back to Bartoli’s Square). Then
head the other way and a door opens to the right, Lorenzo’s shop, pull out the
shelves and move them as far as to the S and climb up, grab the grates above
and move S and right into a windowsill, shoot the window to get inside a
poolroom. Right up the stairs and up left through a window.
The Spa.
Drop and go S, find a button opening a gate somewhere and the trapdoor
left of you opens too. Get down there and the opened gate is S.
But for a Secret, go N into the room, shoot a dog and
take a left to a pool, there’s a statue on the other side of the pool, get
behind the statue to push a Timed button and see a door opening up. So, quickly
back to the room E and out E to the alley, take a right and keep left of the
stairs into a lower room, to the right is the door you opened. Go get Secret
#4/20, a Gold
Rose. Shoot the rats and in the SW corner are Flares. Pull the shelves NW out of the corner for Revolver ammo. Push the button E twice
to open the door. Go left to the alley and left into the building. Left to that
open gate where we left off.
Go S through the gate to a small square and right around the corner is a
big gate you can open with the button (shortcut to the first street). On the
other side, (E), is another gate you can open and that one leads to the back
streets we just came from. Go back to the small square (N), up the stairs on
the right and turn left, hop onto the grate. Run-jump SE into the windowsill
and grab the Shotgun ammo.
Run jump W and grab the roof, go left just around the
corner and pull up, back flip/roll and grab the balcony. Run jump over to the
one straight ahead, then left across the street to grab the arched entrance
roof, where you can get Secret #5/20, a Gold Rose.
Drop down.
Library Square,
Revolver.
Head S and watch a flyby, go to the Library Square, on the stalls S are
boxes with Revolver- and Shotgun ammo and some Flares. From the area with the pillars
(E) you can jump and grab up to the canopy (close to the wall) and pick up the Shotgun ammo.
Drop down, go into an alley left of the W side stall and push a button
to open the shortcut to the First streets. Go back to the stall and climb up to
the green/white canopy, jump S to the terrace and get the Revolver. Combine it with the Sight and shoot the Bell in the tower
to open the Old Library (you may have to jump back to the green stall to aim
for the bell).
Still on the balcony look into the alley W and up
right is a window you can shoot with the Revolver. Jump down to the stall again
and jump to grab the roof SW, shimmy right till you are over the button below,
pull up and back flip into that window. Turn around and shoot the right hand
window up S. Get in there and shoot the other window to jump to the balcony
across the street (N).
Between the chairs in the end is Secret
#6/20, a Gold
Rose. Turn around, look up at the arches there and spot a jump lever. Go
back S, jump on the roof and safety drop into the alley, get to the Bell tower
and drop into the passage (left of the stall with the red canopy), grab Revolver ammo and a small medipack
from the tombs. Next to where you entered is a ladder in the ceiling, climb up
along the left side and grab Secret #7/20, a Gold Rose
from the top of the tower.
You might have noticed that box, half way up the
ladder, stand SW, hop NE to that triangle part of floor from where you can
shoot the box. Run down with Ctrl to land in that niche and grab the Medipack. Jump
and grab the ladder and get down, left and back up to the square.
Go enter the door you opened earlier, between the Neptune statues E.
The Old Library.
Go straight through the Hall to the end (E side) and up the left steps,
there’s a card reader on the right and when you pass through the gate, it will
drop shut behind you.
There’s a little side quest in this Library, which
involves finding 5 book switches that will provide access to a Secret. We’ll
just blend them into the text, because describing it separately would become a
mess.
The Library Access
Card.
On the book cases left (N) is a button and some book cases will start to
move in the E wall, use the button again to stop both book cases in the back
position so you can enter there. Behind a grate you can see a Card, opposite
that is another button, use that to operate the bookcase left so it is in the
“forward position”.
Go back to the first button in the hall and use it, the cases now move
separately, use the button again to have the left one “forward” and the right
hand one “backward”. Go into that passage again and behind the left bookcase is
a button opening up the gate to the Library
Access Card. Get out and left to the steps (S).
Using the Card, the
Bookcase Challenge.
Take a right up the stairs to the first floor landing and go right, just
right of the closed gate is Book switch #1, on the N side bookcases. Go to
the end (N) and right of the clock is Book switch #2. Now go all the way to the
other side (S), jump over the balustrade onto the high bookcases and climb down
the side of the case. On the S wall is a Card reader and the cover lifts from
the Timed button right. Push, turn around right and climb the nearest case,
turn left and hop over to the landing to get through the gate (NW) in time.
Use the button in the room on the N wall to start the moving cases, when
the closest one stops on the corner of the higher floor you’ll have a free
passage to a button in the back. Another case moves revealing a ladder and the
case next to you starts moving; jump out through the corner and go left around
the corner to the ladder. Take a left up there and behind a low bookcase is a
button to open a gate behind the moving bookcase below. Get back down the
ladder and left to that button behind the bookcases. Run after the moving
bookcase and right to the button, use it to stop the bookcase so you can get
through the gate E.
To the Office, Clues.
Keep left and go through to a moving bookcase.
Look in the S wall where the case moves and spot an
opening higher up, jump up in there for Secret #8/20, a Gold Rose
around the corner.
Jump through the case to the E and around the corner is another moving
case, jump through to the right, turn around and jump through to that button
(NW). A gate opens to the Office. Jump back through the case and go right, up
the stairs and left through the gate you opened. On a cabinet on the right (N)
are a Notebook with clues and a Camera. A gate opens up in the Library.
You might want to take a printscreen of the
clue on the N wall; it’s the same as the S wall, so one will be enough, as the
camera doesn’t work yet (Park Clue.jpg). Leave
through a now open wooden door SW and you are back at the low bookcase, go
straight (N) and around the corner and through the now open gate, second floor
landing of the entrance hall.
Take a left and find Book switch #3, on the W side bookcases.
Proceed to the N wall and use a button to open the gate there (staircase down).
Go down and find Book switch #4 at the bottom of the stairs, left. Go out to
the first floor landing, go to the opposite side and just left of the standing
lamp SW is Book
switch #5, a hole in the ceiling above
the chandeliers is shown, a block goes down. Go back up the narrow staircase
(N), jump/grab to the chandelier, then to the next S and climb the chain, back
flip into the opening and shoot the boxes for Shotgun ammo and Flares,
in the far left corner is Secret #9/20, a Gold Rose. Go down the chain and jump
from the chandelier to the landing.
Go to the narrow staircase (N) and down to the first floor landing and
down the stairs to the ground floor. Loop around and up the steps (E) and you
can now open the left side gate since you have the Library Access Card.
Creating another shortcut.
First clue: Bartoli’s.
Get out W to the Library Square, go straight over to the gate you opened
W (behind that green/white market stand). In the next street take a right and
all the way straight to Bartoli’s Square. Stand at the fountain, face E and use
the camera. The First clue landed in
your inventory.
Small Waterskin and
Rusty Gate Key, Second clue at the Hot Springs.
Go N of the fountain and shoot a grate in the wall, you can now shoot
that red light inside (Revolver and Sight) and the big gate left opens. In that
street and to the right is a door with a Keyhole. Further along a dog will
attack. At the Corbuono Café take a left (to the
right is the closed off Dig site). Go up some crooked steps and behind the
tables you can go down to a wine cellar and in the back is the Small Waterskin. Back up and to the W
up the stairs, before the pool, take a left and open the doors to a kitchen
with a Rusty Gate Key on the
counter. Go out and left to the pool, dive in and up on the pillar in the
middle, use the camera there, aimed at Neptune to get the Second clue. Swim back and go to that small square with the tables.
In the garden SE is Secret #10/20, a Gold Rose.
Walk back to the tables, look N into the street and spot a crack in the right
hand wall, run jump and grab that, from the top of the steps to the lowest
corner and go left around into a window.
Turn around and run jump/grab up to the window across
the street, one more time and shoot the window to get inside. There are Flares on the workbench. Shoot the
window S and hop out to grab the pole, swing and jump to grab the crack in the
opposite wall, shimmy right and pull up on the terrace, get inside the bedroom
and grab a Medipack
and Secret #11/20, a Gold Rose. Back to the terrace and
safety drop down onto the stairs below.
Rusty Gate, Dig Site.
Head to the N end of the street and open that rusty gate there and
proceed down the street. During the flyby a Wraith will be released, so roll
and sprint back through the street (S) to the end, take a right at the corner
and up the stairs into the Hot Springs and hop into the water. Then make your
way back to that square where we left off. Everything is closed off, the only
thing we can do is go up a ladder left of the closed gate on the right (E),
drop/grab to hang on the crack and shimmy left around into a window. Watch the
cut scene, get back to the window and make your way down to the square.
The Spa, a Trident.
Head S and left into the street to Bartoli’s Square, take a right, down
the tunnel and left to the little square. Left at the table through the gate N.
Once inside, go left up the ladder, climb off to the right and drop at the
button. Turn right and go left into the Scale Room. Fill the small Skin in the
pool and put the water in the bowl on the Scale. A Trident appears in the Hall
below. Safety drop down or go down the ladder to get it and get a screen of
where to use it, the Hot Springs.
Hot Springs.
Leave SW through the passage we came in from and right around the
corner, next street right again to Bartoli’s and left around the fountain. Next
crossing left and at the tables right to the Hot Springs, into the water to the
Neptune statue and use the Trident, a Coin
will appear under a water sprout. Go get that and leave the Hot Springs.
Pizza!!
Get back to Bartoli’s (down the stairs, right at the tables and take the
first right), approach that goon and you’ll get a Pizza. Go back through the street all the way (W) and take a right
through the gate, up the ladder to that woman in the room above…
Clue 3, the Park.
Open the door N, to the right is the door that opened. In the next room
you can decide to shoot a window and use the canopy below to safety drop to the
street, or go onto the balcony S and jump with Ctrl into the tiny niche in the
opposite wall and safety drop down.
Shoot a dog (somewhere around there) and go to a gate SW, open it with
the button (shortcut to the Dig Site). Return and loop right around the house
into an alley, down some steps into a small yard. In the left corner is a small medipack.
Go up the steps and right through a small alley into the park. Take a picture
near the statue at the fountain (face N) and save that as Clue 3. Open a gate SE as a shortcut to the street with the Taxi.
In the flowerbed NE is Secret #12/20, a Gold Rose.
Leave the park W, loop right around the hedge to a large building with
columns (Opera?).
Go up the steps in the middle and jump from the steps
to the W side balcony where you’ll find Secret #13/20, a Gold Rose
on the flower pot, jump back to the street.
Clue 4, statues on
the Po Sant’ Angelo.
Head down E and come to the River. After the flyby go left into that
tunnel towards a closed gate and use the camera at the gate to take a picture
of the statues on the Pont Sant’ Angelo.
Sewers, a Water
Deactivation Fuse.
Go back and left to the River, head down the stairs to the water and hop
in, swim S a bit get out to grab Flares
from under the box o the jetty there. Hop right down and swim into the sewer
pipe under the jetty, swim about straight to a grate where you’ll have to take
a right and come up in the next room. Climb out and shoot the boxes for more Flares.
Kick in a door at the other side (W) and enter, at the basin shoot that
red switch and go back. A door from steel opened, go back to the pool, take a
left (N) and through. Left again, shoot a rat.
Swim underneath the gate W, get out on the right and kick the door (N)
and if you’re fast you can run jump to the back before the burners start, go
right and under the pipes and find the Water
Deactivation Fuse on a box. Go back and straight under the pipes W, shoot
the last box for a small medipack. Go back to the Sewer.
Shoot the box in the water near the gate W and hop in
to grab Secret #14/20, a Gold Rose from the bottom (for one of
us this trigger didn’t work properly, be sure you hear the Secret sound).
Swim back under the gate E and go up right, shoot a rat and place the
Water Deactivation Fuse in the board SW.
Return E and right/right to the basin where you shot that red button. Go
left or right, side flip over the fence so you can grab the slope below and
shimmy to the W side, pull up and climb up to the room where the red switch
was. Shoot a rat and find Flares on
a workbench left.
Around the corner is a big red button, opening a steel door NE and also
a gate at the basins. Go through the passage NE and swim E through the sewer,
up right in the end to the basin and straight over through the gate S.
Park Puzzle, opening
up the Underground.
In the maintenance room are Flares
on a workbench, Revolver ammo on the
shelves behind you. Climb the ladder W, traverse to the floor (after having
Lara hang by the hands) and shimmy along the floor to the right to the NE
corner. Push the red button to open the covers on the buttons in the Park.
Shimmy back and go use a button on the W wall to open a trapdoor above the
ladder. Hang from the floor, travers to the ladder and go up to the Park.
Remember the Park Clue from the Library Office?
You need it here. According to that clue you need to use the 3 buttons
from the left and avoid the 4th button. Thor will send rays from his
hammer to the fountain and a door opens in the Maintenance room.
So, climb back down, go up a ladder in the SW corner of the room and
back flip off, the door is behind you (N). You are in the room above the basin;
go left into the passage. Grab the ceiling at the deep basin and go left where
the floor ends, drop/grab the crawlspace. In the next chamber open the door on
the right (W) and shoot a box for a small
medipack.
Crawl through right (N) and push a button to lower a
block revealing a Secret (later). Crawl back.
Leave the chamber, open a door on the right (S) and come to another part
of the Sewers. In the water is the House
Key, you’ll get a screen where to use it and a steel underwater door opens
up.
Go back through the door, hop into the water and swim through the tunnel
E where the door opened. Swim up and climb out of the water, you are back in
the Park. Leave W and at the street right. Take the first left around that
house through the gate you opened before (W).
Without the Secrets, go left/left into the street where that door with
the keyhole is.
But… for a few Secrets; go back up to that lady you
gave the Pizza to (take a right and up the ladder right of the gate), through
the door N and right onto that small balcony, jump with Ctrl into the tiny
niche in the opposite wall and hang from the edge. Shimmy all the way left to
where that block lowered and get Secret #15/20, a Gold Rose.
Roll, run jump and grab that Park entrance, follow the top of the hedges to the
roof NE, jump on top of the roof and jump right around the corner of the higher
house to get to a roof with a smoking chimney and Secret #16/20, a Gold Rose.
Make your way back W again and left over the Park
entrance to the roof S. Grab the edge of the roof and shimmy left around, drop
onto the hedge there. Follow up onto the roof SE, down onto the hedge behind it
and jump right around the wall (SE) to a small balcony. Run jump and grab up
onto that alcove with the arches SE and find Secret #17/20, a Gold Rose.
Jump back onto the balcony and then W onto the steps near the back Park
entrance. Head W to Bartoli’s Square and right into the street (W) where that
door with the Keyhole is (right).
The House.
Go through the gate W to the square with the Dig Site, go left through
the rusty gate. Left at the Café and left to that small door with the keyhole,
open the door. In the living room left is a fireplace we have to put out. On a
cabinet is a small medipack
and in a vase NW is Shotgun ammo.
Back to the entrance and left all the way up the stairs to a button.
Through the door and left is a bathroom, fill the water skin in the tub. Get
back down to the fireplace and use the water in front of the fire. Climb up in
the chimney a bit and back flip/roll off into a bedroom. The door E leads to
the staircase, you might want to open it in case you need it later (chimney
shortcut).
To the Dig Site,
using the Code.
Then go up to one of the windows W and jump grab across to the opposite
window, get inside and step into the window behind the piano (NW). Drop down
onto a scaffold and get down to the ground.
Go to the scaffold NW (N side has a ladder) and climb
to the top. Hop into the arched alcove N, to get Secret #18/20 a Gold Rose.
Jump back and get to the ground.
Head into the SW corner; open a shortcut gate left (leading to the rusty
gate) and to the right is the code pad.
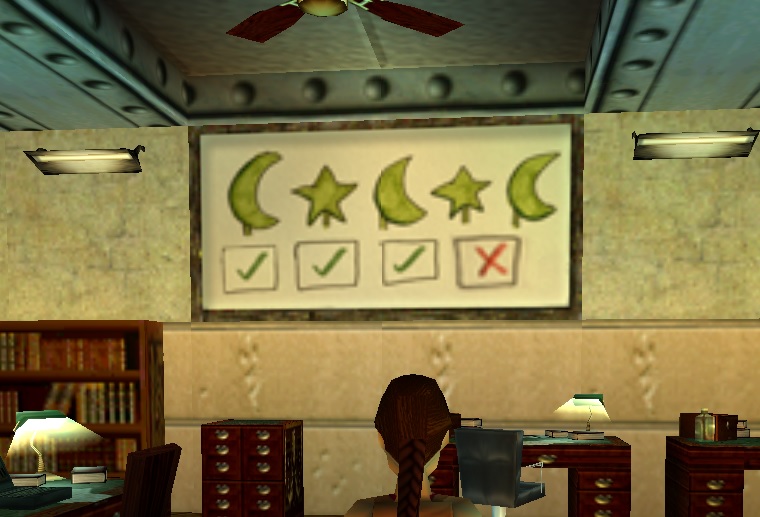
|
Q1 |
=2(fish) |
|
Q2 |
=3(statues) |
|
Q3 |
=2
(stars) |
|
Q4 |
=6
(statues) |
So, enter 2326 and the door
opens up. Enter and go right around to some shelves with Shotgun ammo. Head for the far NW corner and open the door to the
mess hall. Pull the dead bloke by his head and grab the Shotgun ammo, on the counter there are a Shotgun and more Shotgun
ammo. You’ll get a screen of where you can use that Shotgun…
A Crane Battery.
Get out and loop around the fence to the far SW corner, shoot the
barrier with the shotgun and open the door to a storeroom.
Pull/push the first shelf block left all the way into the opposite
corner (NW).
Move the second shelf block against the first, pull
the third block once and get behind it for Secret #19/20, a Gold Rose.
A gate opens at the Library Square.
Get into the maintenance room E, push the big red button to open the
door and climb the forklift, shoot a box E and grab the ceiling to go get the Crane Battery. Leave through the door
NE.
Backtrack for the last Secret: Go back (right) through
the code door, straight through the gate E to the rusty gate, right into the street
and left to Bartoli’s Square. Take a right and straight to the end of the
street, at the scaffolds left up the steps to Library Square. The opened gate
is in the NE corner. When you come to a small square, go right around the fence
and slip through the tiny gap to get Secret #20/20, a Gold Rose,
and an additional Grenade Gun with Ammo as a bonus. Good thing too,
because a skeleton wakes up. Blast him and get back to the Dig Site (you
probably know the route by now).
The Crane.
Go to the SW corner and right around the pit to a crane where you can
use the Crane Battery. Go around to that fork lift SE and get on top, run jump
and grab the cable and aim for that lighter block in the fenced off NW section.
Ready the Grenade gun and shoot the skeletons. Jump and grab the chain under
the crane and go all the way down to the crate. Hop W, safety drop down and
then you can climb down a ladder and jump to the ground floor. In the tunnel
head E, doesn’t matter which one you take, just keep going down and after shooting
some bats, keep left and come to a water sprout filling a small pool, swim into
the tunnel S.
See you in Part 2….