Dreamland 2: Mysterious Intonations of Constellations
By Haiozy
This walkthrough is meant as a general guide only. It
may not include every pickup or secret. There may also be alternative ways of
approaching situations within the game.
- Pickups and Items
- Enemies
- Secrets
WALKTHROUGH by Lizard Queen
Main Atrium
The level begins in a large gray atrium. Head forward, climb the ledge
and drop down to the lower area. Head to the north/east corner and pickup the small medipack behind the column. Reverse roll, head
straight (south) and push the floor lever. Immediately take a sidejump to the
left or right into one of the pools and climb out. This is the first of two
needed to lower two suspended blocks in another area. Turn right, cross the
room, climb the ledge and turn left. Push the second lever and the cutscene
shows both blocks are now lower in height. Reverse roll and head north to the
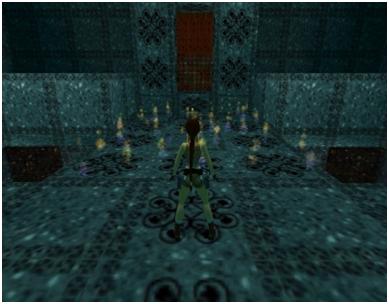
lever with the fire. Take a standing jump into the fire, push the lever and use
a medipack. [tip: If you position Lara in front of the lever as per
screenshot before jumping into the fire, although she catches on fire, the loss
of life is less, so a small medipack should suffice.] Immediately side flip
into one of the pools and climb out. Head south, climb the blocks to the upper
floor and enter the newly opened gate in the south/east corner.
Ram Constellation Room
Crawl through the darkened
crawlspace into a large room with a stunning Ram constellation image across a
large chasm. Climb down the stairs, head right and face east to the suspended
block. Take a running jump and grab to it and pull up. [tip: if you have
trouble grabbing the edge of the block, try grabbing the lefthand side, it
seems to be easier] Walk to the edge of the block and take a standing jump
to the ledge ahead. Walk to the wall, jump up and grab the semi-hidden alcove
above and pull up. Follow the corridor left and light flare. Turn left, crouch
and pickup the Hand of Orion in the crawlspace.
Exit the crawlspace and the corridor. Drop down to the outer ledge of the chasm
and take a standing jump to one of the suspended tiles. Take a running jump and
grab the ledge ahead. Head up the stairs, climb the block back through the
crawlspace. Back in the Gray Atrium, head to the middle of the room and turn
right (north). Climb the ledge between the 2nd and 3rd column from the right
and drop to a lower block. Turn left and drop again. Turn left and place the
Hand of Orion into the wall receptacle. Turn right, climb the block. Turn left,
climb the block and head through the newly opened gate in the south wall.
Multi-coloured Maze
Enter the pink maze and follow the
right wall all the way around until you reach an alcove. Pickup the first Hand of Sirius and reverse roll. Follow the right
wall again until you reach the blue maze. Climb the block and turn to face
west. There are two corridors going forward (west). Enter the corridor on the
right. Climb into the green maze. Follow the right wall until you reach an
alcove at the end. Pickup another Hand of Sirius
and reverse roll. Follow the right wall again until you reach the yellow maze.
Climb the block, enter the first alcove on the left and pickup another Hand of Sirius. Reverse roll, turn left and head to
the end of the corridor. Turn left (north) and climb the block into the red
maze. Turn left, follow the left wall to the end and pickup another Hand of Sirius. Reverse roll and follow the left wall
into the first corridor on the left. At the end, turn right (south) and pull up
into a black and green maze. Follow the right wall and drop into a hole in the
floor at the end (west), into another part of the red maze. Turn left and
follow the right wall until you reach a darkened corridor on the left. Enter
the corridor and light a flare. Crouch into the crawlspace on the left and
pickup another Hand of Sirius. Crawl out,
follow the right wall until you reach the black and green maze. Face east and
climb out. Turn right and place the 5 Hands of Sirius into the 5 wall
receptacles on the west wall.
[Note: At this point, you have a choice of two routes. One involves
backtracking to obtain Secret
#1 and another is a shortcut to the next area.]
Shortcut: After placing the fifth Hand into the wall receptacle in the south/west
corner, turn right and head forward. Turn left at the end to face west and drop
into the red maze. Turn left again (south) and follow the right wall to a hole
in the floor to the yellow maze. Drop down and turn left. Follow the right wall
until you reach a hole in the floor to the green maze. Drop down and turn left
(you should be facing west now). Follow the right wall until you reach a hole
in the floor to the blue maze. Drop down, angle right (north/west) and head
into the corridor on the right. Turn left (south) and drop into a gray
corridor. Follow the corridor around to the end where there is a sloped ramp
(west). Slide down and drop into a pool into the next area. (see Constellation Atrium)
Secret #1 (Mini Side Quest): After placing the fifth
Hand into the wall receptacle in the south/west corner, reverse roll and head
forward. Follow the right wall to the end and drop back into the first part of
the red maze. Turn left (west), follow the left wall and drop back into the
yellow maze (south). Turn right (west), go straight and drop into the green
maze. Follow the right wall and drop into the blue maze. Head straight (east)
and drop into the pink maze on the right. Turn left (north) and follow the
right wall back out to the Main Atrium. Continue north and drop to the lower
floor. Head to the north/east corner, face west and climb the block. Walk west
to the edge of the block and take 3 steps backwards. Take a standing jump to
the safe tile between the flames. Pickup the large medipack, turn right and enter
the newly opened area which is Secret #1. Turn right, head down the corridor
and pickup 2 Shotgun Ammo at the end. Reverse roll, head straight and pickup the Uzis at the end of the other
corridor. Reverse roll and follow the left wall around into another corridor.
Turn right to face north and climb the block. Drop down, head forward and climb
the block onto a slanted ledge. Drop down, head forward and pickup the Revolver Ammo in the north/west corner.
Turn right (east), head forward and pickup the Revolver. Head forward, turn right and drop into
the water. Face west, dive and swim through an underwater alcove. Swim left and
follow the long corridor until you reach a gate. Swim towards the gate and it
opens automatically. Swim through and surface for air.(see Constellation Atrium)
Constellation Atrium
Facing west, swim through the
underwater corridor and surface at the end. Turn around to face east and pull
up. Climb the orange wall to the top and pull up. Turn around to face west and
take a standing jump and grab (to change trajectory) into an alcove in the
wall.
Secret #2: Slide down the ramp and take a standing
jump and grab the ledge ahead. Pull up into Secret #2 and pickup the Revolver in the south/west
corner. Reverse roll, drop down the ramp and the level ends.
The End.