Dreamland 3 - The Tarot
By Haiozy
This walkthrough is meant as a general guide only. It
may not include every pickup or secret. There may also be alternative ways of
approaching situations within the game. However, it is recommended that you follow
the order as is presented in this walkthrough to help avoid level crashes that
have been known to occur.
- Pickups and Items
- Enemies
- Secrets
WALKTHROUGH
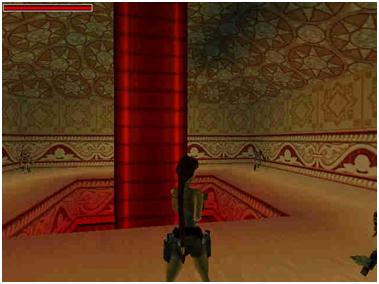
The
level begins tonight... in your dream with Lara standing in the corner of a surrealistic
red room. Run forward and pickup the Uzi ammo
in the north/east corner. Reverse roll and head to the sloped corner of the
block with a stand. While facing north/west, sidestep right to the highest
point of the corner. Angle left and take a standing jump to the top corner of
the block. Turn right to face the stand and jump and grab the ladder behind it.
The entire column is climbable, so make your way up and around to the opposite
side of the column. Facing south, take a backflip, roll and grab to another
ladder on the north wall. Climb up and take a backflip to the ledge above. Turn
right and head around the burning block to the edge of the ledge facing south.
Angle right and take a standing jump to the walkway in the middle of the area.
Angle left and take a running jump to the orange block in the corner. Turn
right and jump up and grab the ladder on the south wall. Climb up and to the
right until you reach the overhang on the right. Continue around to the
overhang and climb right until you are above the block in the centre of the
room. Climb down as far as possible, let go and grab the block below. Climb up
and pickup the small medipack and turn left.
Jump up and grab the monkey swing on the ceiling and climb to the well
concealed alcove in the south wall. Drop in and turn right. Pickup the Revolver ammo at the end of the corridor. Turn left
and exit the corridor.
Turn
right and follow the corridor around to a pool with 5
crocodiles swimming about. Dispatch them all from the safety of the
ledge and dive into the pool. Swim into the entrance on the north and turn
left. Swim through the underwater corridor and swim up to surface at the end.
Pull up and pick up the Shotgun ammo in the
north/west corner of the room. Head to the south/west corner and pickup the Shotgun. Turn to face the south wall and look up and
to the left. There is a well concealed alcove within the six point star symbol
on the wall. Jump up and grab the edge of the alcove and pull up. Head forward
into the dark corridor, turn left and pickup the small
medipack. Head straight to the other side of the corridor and pickup the
Revolver ammo at the end. Turn left and drop
down to exit the alcove.
Head
to the north wall and climb into the Tarot sign in the middle. Enter the
corridor and watch a cutscene. Angle left, take a running jump to the left and
while in the air, turn to the left to land on the ledge. Turn left and push the
lever in the south/west corner. Reverse roll, head forward to the end of the
walkway and climb the ledge ahead. Turn right and pickup the Crowbar in the middle of the walkway and head
forward. Turn right, drop down and push the lever at the end in the south/east
corner. Reverse roll and return to the middle of the north ledge, to the Tarot
sign. Face south and take a running jump and grab the first rope in the middle
of the room. It is not necessary to grab the second rope so just swing and with
enough momentum, jump into the alcove ahead. Exit the alcove and drop down into
the previous room. Climb the centre block and pull up. The entire column ahead
is climbable. Jump up and grab the ladder and climb up to the area above. Take
a backflip off the column, angle right and take a running jump over the corner
of the ledge and run through the door as 4 skeletons spawn
from the four corners of the room. Head left, then right and right again. Turn
right to face the middle of the west wall and jump up and grab the alcove
above. Pull up and notice a bird-type statue, which will come in handy later
on. Turn around and take a standing jump and grab (to change trajectory) into a
new area.
[Note: Eventually you will have to come back and deal with these 4
skeletons, as it appears that avoiding them makes the level crash later on in
the game. The walkthrough deals with disposing of them after collecting both
gems and more shotgun ammo.]
Enter
the corridor, turn left and head down the stairs. As you proceed through the
corridor, the camera changes to show two levers in small hidden rooms to the
left and right. Turn right to face west, drop into the first small room and
push the lever. Turn to face east and head to the wall. Even though it is not
evident, the ledge is still there, just cleverly concealed. Grab the edge of
the ledge and climb out. Head forward and drop into the next small room. Push
the lever, face west and head to the wall. Grab the edge of the hidden ledge
and climb out. Turn left, heading south and drop into the room below. Turn left
and enter the east door.
Approach
the hole in the floor, turn around and jump back and grab the ladder on the
inner wall. Climb down and near the bottom, backflip off the ladder to the
floor below. Arm weapons and shoot the two ninjas
in the room. Pickup the large medipack in the
north/east corner of the room. Head to the south wall and drop down into a
lower area. Pickup the Shotgun ammo in the
south/east corner. Head to the west wall and drop into the hole on the right.
Head straight, arm weapons and shoot the two ninjas
in the next room. Head back through the semi-concealed corridor in the
north/east corner and turn right. Up ahead is a series of circular blades for
which there are many different ways to pass through. A reverse roll, backflip
or a running dive timed correctly through these will do the trick. At the end
of the corridor, turn right and pickup the Horsemen's
Gem on the pedestal. Reverse roll, turn left and head back through the
circular blades by your method of choice. At the end of the corridor, turn
right and climb back into the previous room. Head to the west wall and climb
back up the ladder. Pickup the Shotgun ammo in
the south/west corner and exit. Head forward and enter the door on the west
side of the room.
Turn
left and pickup the Uzi ammo in the south/east
corner. Head to the hole in the floor and drop into the water below. Pull up
onto one of the flat ledges and head to the south/east corner of the room. Face
north and take a sideflip to the slope on the left. Jump off the slope and grab
the ladder ahead. Climb to the top and backflip to a flat ledge above. Turn
around, enter the corridor and pickup the Horsemen's
Gem on the pedestal. Turn right and head up the ramp. Safety drop down
to the lower ledge. There are three levers in the alcoves ahead that need to be
pushed. You can either take out the large scorpion
and use the ladders to climb from the lower floor into the alcoves. Or utilize
the ladders and columns to backflip, reverse roll and grab your way around the
room and into each alcove. After all levers are pushed, safety drop down to the
floor and head to the south/east corner of the room. Climb the ladder, pull up
and enter the large room. Angle left and exit via the semi-concealed corridor
in the north/east corner. Climb out at the end of the corridor and head left.
Climb up to the upper floor and climb the ladder in the middle of the west
wall. Exit the room and turn right. Climb into the opening in the north wall
and head down the corridor. Climb the stairs and turn right into the exit at
the top.
Angle
left and drop into the corridor below. Head forward, around the corner on the
right and right again. Turn left at the opening and take a running jump and
grab the climbable column in the centre of the room. Climb around the column
and backflip to one of the ledges. Arm the Shotgun and shoot all 4 skeletons off the ledge and down the hole in the
middle of the room. Return to the entrance in the west wall and turn right.
Pickup the large medipack ahead, reverse roll
and turn right. At the end of the corridor, turn left and left again. Facing
east, jump up and grab the alcove and pull up. Turn around and take a standing
jump and grab (to change trajectory) into the alcove ahead.
[Note: Another cause of level crashing appears to be completing certain
tasks in the wrong order (or perhaps not in the same order as was intended by
the author). I have discovered that placing the gems and obtaining the Pharos
Knot before proceeding to collect the Stars avoids a level crash later on in
the game. The walkthrough is therefore written to deal with these tasks in this
order.]
Enter
the corridor, turn right and head down the set of stairs. Turn left at the
bottom and enter a beautiful atrium of blue and green. Head to the back of the
atrium and place the two Horsemen's gems in the receptacles on the west wall.
Enter the room and climb one of the blocks in the corner. Angle to face the
centre block and take a running jump to it. Pickup the Pharos
Knot on the pedestal. Arm pistols, take out the 4
ninjas and exit the room back into the atrium. Head to the north/east
corner, climb the ledge and pull the lever. Immediately reverse roll and make a
hairpin turn left back into the corridor as a wraith
follows. Turn right and climb the block. Take a standing jump up to the next
two steps and turn left into the alcove facing the bird-type statue. Wait as
the wraith circles and eventually extinguishes itself on the statue. Turn
around and head back to the right down the stairs and return to the green
atrium. Turn right and enter the newly opened room.
The
red column in the center is climbable but before proceeding down, take a standing
jump and grab to the column and backflip back to the ledge to lure out a large scorpion lurking below. Take him out from the
safety of the ledge and take a standing jump and grab back to the column. Climb
down the ladder and take a backflip over the fire tiles into the room below.
Head around the perimeter of the room and pickup the Shotgun
ammo in the north/east corner and the small
medipack in the north/west.
Make
your way back to the south wall to the wall switch on the middle column. The
next sequence is a timed run. Pull the switch and take two sideflips to the
left. Run forward, curving to the left and jump up and grab the ladder on the
east side of the corner column. Take two climbs up and backflip off the column
landing on the column behind. Immediately take another backflip to the other
column. Turn left and jump up and grab the monkey swing and start swinging
forward. [tip: Hitting the "look" button right away while swinging
(to change the camera angle) I found helps orientation.] Swing forward,
curving left around the centre column and then right near the end to the
semi-concealed alcove in the north wall. Let go and grab the edge of the alcove
and pull up. Run left into the corridor before the door closes. Enter the room
ahead and use the crowbar to pry off the Golden Star
in the west wall. Turn left and climb into the alcove in the west wall.
Angle
left and take a standing jump to the slope. Jump off the slope to the one behind.
Jump and while in the air, angle to the right. Continue to jump back and forth,
angling right until you land on one of the flat corners on either side.
Sidestep to the next set of slopes and take a standing jump to one of them.
Continue to jump back and forth, angling towards the exit on the south wall
until you land on one of the flat corners on either side. Take a final standing
jump to the door and climb the block to exit back into the Green Atrium. Turn
left and head to the lever in the south/east corner of the room. Climb the
ledge, push the lever and reverse roll. Turn left and enter the next room.
[Note: If you encounter a "level crash" in this area while
trying to pickup the Revolver and/or small medipack, return to the room outside
and use the Shotgun to shoot the 4 skeletons off the ledge. Getting
rid of the skeletons appears to be part of the solution to the crash problem as
well as obtaining the Pharos Knot before collecting the Stars.]
Head
around the perimeter of the room and pickup the Revolver
and small medipack. Dive into the water and swim down to the bottom.
Turn to face south, swim to the end of the corridor and surface. Quickly climb
out of the water on either side of the small block and jump up and grab the
alcove and pull up before the 4 large scorpions
get at you. Take them out from the safety of the alcove, if you feel like it.
Turn around and enter the dark alcove and turn right. Head up the ramp and into
a green room with sloped blocks. Take a running jump and grab the first sloped
block ahead. Pull up, slide and jump off the slope to the next slope. Jump off
that slope to the next. Take a final jump and grab to the flat block ahead.
Turn to face south/east and take a running jump to the corner block and pickup
the Revolver ammo at the end. Turn right and
take a running jump and grab to the next block. Pull up, angle right and take a
running jump to the block ahead. Angle right to face south/east and take a
standing jump to the sloped block. Jump off the slope and grab the block ahead.
Pull up, face north and take a running jump to the flat block ahead. Turn left
and take a running jump to the block on the west wall. Use the crowbar to pry
off the Golden Star. Reverse roll and take a
running jump back to the previous block. Turn to face the north slopes and take
standing jumps over all three to the top. Turn left and jump up and grab the
wall switch. Turn around and run through the spikes and exit the room on the
left and back into the Green Atrium. Turn right and exit the atrium at the east
entrance. Turn right, head up the stairs and down the other side back into the
Oriental Red Room.
Head
to the back of the room and place the two Golden Stars in the receptacles on
the south wall. Enter the surrealistic red room and watch a cutscene. Take a
running jump and grab the first rope in the centre of the room. Swing, jump and
grab the second rope. Swing, jump and grab the third rope. Swing several times
and let go to land on the semi-transparent platform ahead. Take a running jump
into the alcove and pickup the Pharos Pillar .
Reverse roll and take a standing jump to the semi-transparent platform. Take a
running jump and grab the first rope. Swing, jump and grab the second rope.
Swing several times and jump directly into the opening at the end, avoiding the
third rope altogether. Head around the central column, climb into the north
opening and down the corridor. Climb the stairs and turn right at the top. Drop
down into the corridor, follow around and exit back through the east door into
the room with the climbable column in the centre.
Climb
down, head around the column to the east wall and drop back into the water.
Swim forward, follow the underwater corridor around and surface back into the
crocodile pool. Pull up and head to the south/east corner to a wall receptacle
hidden behind a column. Use the Pharos Pillar in the receptacle and exit the
alcove. Head to the other side to the south/west corner and place the Pharos
Knot in the wall receptacle hidden behind a column. Exit the alcove and drop
back to the croc pool. Swim through the newly opened doors in the south wall
and down the corridor. Turn right and swim through the upper crawlspace on the
left. Turn left and swim through the circular blades. Swim through the lower
crawlspace on the right and turn right. Swim through the circular blades and
into the upper crawlspace on the left. Turn left and swim through the lower
crawlspace on the right, in the middle of the corridor. Swim up through a small
opening in the top of the corridor and surface for air. Pull up, push the floor
lever and watch a cutscene. Reverse roll, head back to the water hole and
notice the alcove in the wall above the hole which takes you back to the croc
pool. Instead, drop back into the water and swim right. Swim through the
circular blades and pickup the Uzis . Swim back
through the blades and resurface in the opening above. Climb out and face the
alcove in the north wall. Take a standing jump and grab the edge and pull up.
Walk to the edge of the slope and take a standing jump over. Head through the
circular blade ahead, drop back into the water and swim north through the
corridor. Turn right and right again and pickup the Music
Scroll in the newly opened alcove. Reverse roll and swim left and back
to the croc pool for air.
Swim
back through the opening in the south wall and down the corridor. Turn right
and swim through the upper crawlspace on the left. Turn left and swim through
the circular blades. Swim through the lower crawlspace on the right and turn
right. Swim through the circular blades and into the upper crawlspace on the
left. Turn left and swim through the lower crawlspace on the right, in the middle
of the corridor. Swim up through opening in the top of the corridor and pull
out. Place the Music Scroll on the pedestal and watch a cutscene. Reverse roll
and face the alcove in the north wall. Take a standing jump and grab the edge
and pull up. Walk to the edge of the slope and take a standing jump over. Head
through the circular blade ahead, drop back into the water and swim north
through the corridor back out to the croc pool. Pull out and shoot the 3 crocodiles in the water and drop back into the pool.
Swim
south through the opening and turn left at the second corridor. Swim through
the newly opened doors and turn left. Pull up and turn right. Arm the Shotgun
and shoot the 2 skeletons into the water. Head
to the north/west corner and approach the door on the left. When it opens,
enter and watch a cutscene. Turn around and safety drop down to the floor below
using a medipack if necessary as there is substantial loss of life. Reverse
roll, climb the ledges and pickup the Ornate Handle on
the pedestal. Pickup the large medipack and
return to the south wall and climb the ladder now under the opening. Pull up
and head forward to the door on the opposite side of the room. When the door
opens, enter and watch a cutscene. There are two ways to proceed through this
area. One way triggers a timed run (timed run route) and another involves a long drop
with substantial loss of life (atrium floor route).
Timed Run Route:Take a running jump and grab to the block ahead. Head to the lefthand
corner and take a running jump to the lower platform. Climb the block, angle
right and take a running jump to the large platform. Pickup the Hathos Effigy on the pedestal. [Note: If you do
not want to go for the secret, then see "Main Route"]
Secret #1: Turn to face south, take a standing jump into the alcove and the door
ahead opens. Take a standing jump and grab to the climbable wall ahead and
climb down into Secret #1. Reverse roll and pickup large medipack . Climb the ladder on
the south wall of the alcove and take a backflip to the ledge at the top. Turn
around and take a standing jump back to the glass platform. [Note: See "Main Route"]
Atrium Floor Route: From the entrance, turn around and safety drop to the floor, using a
medipack if necessary as there is a substantial loss of life. On either side of
you are two floor levers. Push both levers in each corner, turn around and head
to the south side of the atrium. Enter the newly opened alcove which is Secret #1 and pickup the large
medipack. Climb the ladder on the south wall of the alcove and take a
backflip to the ledge at the top. Turn around and take a standing jump to the
glass platform. Pickup the Hathos Effigy on the
pedestal.
Main Route: If you took the "Timed Run Route" you will have to pull the
floor lever to open the door at the far end of the atrium, triggering a timed
run back across the platforms. If you took the "Atrium Floor Route"
DO NOT pull the floor lever as this will CLOSE the door at the far end of the
atrium. From the left hand corner of the platform, angle left and take a
running jump to the lower platform. Climb the block, angle right and take a
running jump to the large platform. In either case, face the north exit and
take a running jump to the ledge (tricky but possible) and exit through the
door before it closes. If you are not doing the timed run route, you can take a
running jump and grab to the ledge and pull up to exit.
Drop
back into the water and swim through the opening in the pool. Swim right at the
end and into the croc pool. Turn right, pull up and head through the exit in
the north/east corner of the room. Turn left and head through the semi-transparent
alcove in the north wall. Turn left, then right and safety drop down to the
ledge below. Reverse roll, angle left and take a running jump to the ledge
avoiding the fire block on the right. Head around the fire block to the back of
the ledge and take a standing jump and grab the ladder in the alcove. Climb
down to the near the bottom and take a backflip, reverse roll and grab the
column behind. Climb around to the other side of the column and drop to the
ledge with the stand. Combine the Hathor Effigy with the Ornate Handle and
place the Portal Guardian on the stand. Reverse roll, turn right and head to
the newly opened alcove in the corner. Climb into the alcove and turn right.
Head up the left side of the ramp first and when the boulder falls on the
right, turn onto the right side of the ramp, letting the boulder on the left
fall safely out of the way. At the top of the ramp, head through the red room
with the glass floor and up the white ramp at the other end. Enter the large
green atrium and the level ends.
The End.