TR3 - SERPENT CITY by BECK
Walkthrough by Harry Laudie
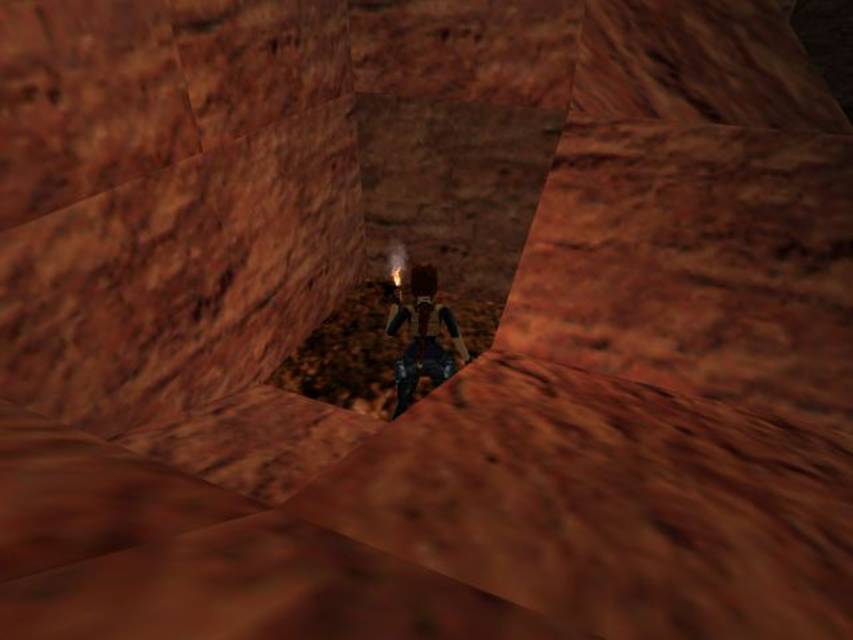
Lara starts in a stairway. There is nothing downstairs so go
outside to an area with buildings and mudslides. Go to the far left corner to
find shotgun shells (1) on the ground between two
mudslides. Go to the left side and notice a space between the mudslides. Jump
over the mud into an area and look around to see a trapdoor on the ground. You
can do nothing yet but remember where it is. Go back to the stairs and go right
around the corner. Follow the wall and turn right into an opening. There is a
closed gate and a switch that conveniently opens the gate for you. Go in and up
the stairs. Turn right, drop and walk through the barbed wire to reduce damage.
At the end of the ledge, Lara looks upwards to the left at a tall building. Go
to the left and at the end of the ledge is a small Medi
pack (2). Go back to the barbed wire and drop back off the ledge. Drop and
grab a crack and shimmy left to a crawlspace. Crawl in, turn around, drop,
slide and grab. Pull up, back flip, roll and grab a ledge. Pull up to a tunnel.
Follow up some stairs with guns drawn to kill a poisonous snake
(1) hidden at a corner. At this point secret #1 is also registered. Continue to
pick up Desert Eagle clips (3). Around
the corner pull a switch and get a cutscene of a gate being opened somewhere.
Continue down the stairs to a ladder. To your right is a small
Medi pack (4). Climb the ladder and up some blocks until you
are outside overlooking the canyon again.
Run/jump forward to a column and immediately use guns to kill two
vultures (2)(3). Run/jump forward to grab a pillar in front of
you. Pull up, slide and jump with a right curve to land on a column and slide
backwards and grab the edge. Drop, slide and grab again. Shimmy to the left
until you can pull up. If you climb the block and go to the right you go back
to the trapdoor at the start. Jump up the incline to the left and be prepared
to kill a snake (4) in the bush. When dead, jump up
there and continue to a point overlooking the building steps. Run/jump at an
angle to the yellow-stripped section to get to the steps and go to the doors.
You see a possible crawlspace in the upper left corner. First go to the right
side and jump up to grab a mud wall. Pull up, slide and jump until you land in
front of a crawlspace. Be careful of the barbed wire. Crawl in and down some
steps to a switch. Pull the switch to get a cut scene of the earlier trapdoor
opening. Go back and jump back to the yellow-stripped section of the steps.
Get in the building crawlspace and down the other side to kill a guard
(5) who drops a key card (5). You
see a large gate needing two key cards. Go to the far left wall to pull a
switch that opens up a trapdoor beside you. Go down and follow the tunnel
walking through barbed wire to each an area with dark green water. There is a small
Medi pack (6) at the water's edge. The water is not deadly but about half down
the tunnel is a poisonous snake (6) hiding
under the water. Get to the far end to pull a switch that opens the trapdoor
above you. Climb up to pick up some shotgun shells (7). On
the opposite wall is a switch. Pull it to open a trapdoor back at the beginning
of the pool. Go back there killing another snake (7)
on the way. At the far end, dive down and swim the only possible way into a
tunnel. At the end swim left over a hump to get shotgun
shells (8) and swim back for air. Dive again and at the end swim up towards
the right and pick up flares (9).
Look right and down to see an underwater lever on the wall. Pull it to a
trapdoor someplace and secret
#2 is registered. Go back for air and exit the tunnel at the other
end. Climb the wall behind the trapdoor to get back to the level start near the
first gate you opened. Go the trapdoor you open, drop down and slide until the
bottom.
Go left at the bottom and climb two blocks. Look down to see some
tempting flares on the ground. Don't go down but jump to the right side wall,
slide down and grab. A boulder rolls beneath you. Shimmy left and drop down to
get the flares (10). Go up the incline and look right
to see another snake in a pit. At the top of the incline is the trapdoor opened
by the underwater lever. Drop in and notice the barbed wire. Jump to a pillar,
pull up, slide, jump and grab to pull up onto a ledge. Pick up a large
Medi pack (11) and Uzi clips (12).
Pull the switch in the corner to get a cut scene of another gate being opened
and secret #3
is registered. Drop, slide and jump over the barbed wire to get back to the
trapdoor at the top of the incline. Go half way down the incline, light a
flare, look up to the left corner and you can see what looks like a secret area
but I could not get there. Drop into the pit to kill the snake
(8). Pick up dome shotgun shells (13) from
a ledge and see a guard pacing in front of a door. Kill the guard
(9) from here and take less damage. Go around the rocks to the right
and kill a snake (10). Go straight and in an alcove on
the left pick up Uzi clips (14) off the
floor. Follow the wall and turn right to kill a snake (11) and
pick up some shotgun shells (15). Call the rock formation to the
right rock A. Follow the wall some more to kill another snake
(12). Call the rock formation beside you rock B. Go right and around a
slope to kill the last snake (13) in this
area.
Go back to stand in front of rock A with your back to rock B.
Angle slightly and back flip to the edge of rock B slope and jump forward and
curve right to land on rock A slope. Keep jumping , roll, and jump with a right
curve. You may jump back and forth a few times with or without grabbing (I
forget). After about 200 tries a miracle happens and you may land on the flat
top of rock B and then save about three times. There must have been an easier
way but somehow but I missed it. [Things that seem more luck than skill really
suck the fun out of the game. Having to be on the exact pixel for it to work
makes you want to give up in frustration. I think I got lucky.]
[Addition by eTux in April 2012: The
hard jump sequence described above is not required! Light a flare where you picked up the Uzi ammo - and you should notice
the light falling differently on the block next to you. This is a movable
block. Go on the other side of it (see picture) and push it on top of the tile
where the uzi ammo was. Now you can use it to get on the higher rock ledge.
From there jump to the elevated rock platform you can reach from here. On to
the next one from there. From this one you have to jump to the slopes on the
right side and shimmy to the right till you can backflip onto another platform.
From here you can make it to where the guard was with a few jumps.]
From rock B look right towards another column and a sloped wall
left of it. Run/jump to the sloped wall, slide and grab. Shimmy right and back
flip to the column. From there is three easy jumps to the doorway where the
guard was. Pick up a second key card (16)
and a shotgun (17). Follow the corridor and go down
the steps to pick up a small Medi pack (18). Slide
down and kill the guard (14) who drops
Uzi clips (19) and follow the steps up to the
starting point. Go back to the right and walk through the barbed wire. This
time, run/jump/grab to a column in front of the ledge. Turn right to
run/jump/grab to another column and then run/jump/grab to the column where you
shot the vultures. Follow around as before to the yellow-stripped stairs, up
into the crawlspace and use the key cards to open the gates. Go in and go down
the hall and the gates close behind you. The lights come on and you see alcoves
on both sides. Most of these are deadly. In the second left alcove you kill a guard
(15). Don't check the body as it rests on an electrified floor. In the
next left alcove is a switch. Leave it as the floor is electrified. In the next
left alcove is a guard who comes out at you. Kill the guard (16) and
pick up the Uzi's (20) and
clips he drops. In the far right alcove is a switch. Pull the switch to open a
trapdoor opposite the other electrified switch.
Go there and drop down into a corridor. You can only go to the
right but look left towards a crawl space. Kill a guard (17)
in the left alcove who drops a key card (21). Go
to the end right alcove to pull a switch which stops the electrified floor
above. Go to the end left alcove to back flip and grab a ledge to pull up to
the previous floor. Now pull the previously electrified switch that is now
safe. Return to the hall entrance to drop down another trapdoor and end up in
front of the crawlspace. Kill a guard (18) and pick
up some Uzi clips (22) in the corner. In the crawlspace
the door is closed do go back up to the first floor. Go to the end, and pull
the switch to raise the trapdoor behind you. Get into the crawlspace and at the
end jump to a ladder and climb down. Pull up into another crawlspace and at the
other end reach an area with a pool with boxes and sloped pillars in the safe
water. Look left to see a switch on a ledge so go there.
Pull the switch to get a cut scene of a timed platform rising
behind you. Wait till it drops and the switch resets. Pull the switch again and
there is no cut scene. Turn left and run/jump back to the starting area.
Run/jump to the sloped pillar to your left. Jump but no grab and you should
land on the box against the wall. If the timing is good you could save here.
Turn right to jump to the sloped pillar against the wall and jump to grab the
platform. Pull up and immediately jump to the left to get to the other ledge.
This was a very tight timed run for me and it took a long time. On the ledge
are a switch and a key card holder. Use
the key card to open the door in the crawlspace. Use the switch to open a
trapdoor above you. Climb up and enter the door in the crawlspace. Turn the
corner and pick up a large Medi pack (23). Drop
into the hole beside it and slide to the bottom. Look down a large tunnel with
a large Medi pack on the floor. Sprint down and past the Medi pack a little,
turn left and jump up to a grab a crevice while two boulders roll beneath you.
The alcoves on the right are deadly drops.
Go back and pick up the large Medi pack (24). Return
past the crevice to jump up into an alcove to get the Desert
Eagle (25). Light a flare, turn left and grab a crawlspace. Crawl to the other
side and drop down. Pull guns and roll to kill a snake (19) that
scares you. Go further and kill another snake (20).
Go to the corner and jump up to a monkey swing. Swing to the other
side and go right. At this point secret
#4 is registered. Continue to pick up a large Medi
pack (26) and shotgun shells (27). Pull the
switch to get a cut scene of a gate opening somewhere. Back down to the tunnel
and go to the last alcove on the right. Turn around, slide, grab and shimmy to
the right. Now climb a very long rock ladder to the top. You face a grey
building with a closed gate. At the right side is a deep pit and you can see
the secret gates at the bottom.
Climb down the rock ladder in the right corner into the pit below.
Kill the three guards (21)(22)(23) one of whom drops a key
card (28). Go inside the three alcoves to pull the switches that open the
gate outside. Go into a large room with inclines and pick up flares from the
left corner. At the top right corner is a door. Start at the bottom right flat
spot. Jump to flat spots toward the left. Be careful of a hole with barbed
wire. At the top jump out at a small angle and curve left to land on the next
flat spot. Jump to the flat spot in front of the door and jump into the corridor.
Jump across to the pillar in front. Go to the side and drop down. Go to the
front and through a door into a room. Climb the ladder at the back left and
near the top back flip and grab a ledge. Pull up and if possible shoot the
snakes from here. Go to the end, jump across to a ladder and climb up. At the
top kill two snakes (24)(25) that will poison you so have Medi
packs ready. Jump across the gap to pick up a Serpent
Stone (29) and secret
#5 is registered. Run/jump to the side to get on top of the serpents
head. At the top pull up into a tunnel and pick up four
rockets (30)(31)(32)(33) and the rocket
launcher (34). Work your back down and out of this area. Back at the pit, climb
the rock ladder to get back to the grey building.
Back to the building and pull up into a crawl space on the right
side. Enter and stand up to climb a ladder. Exit to face some ledges with a lot
of snakes. You see the Serpent Stone across the deep pit. Turn around and drop
one block. From here you can kill the six snakes with the rocket launcher. If
you want to wait to kill the snakes later, then turn around with your back to
the pit, drop and grab a crawlspace. Crawl in and drop down. To your right is a
gate and at the end of the corridor is a switch (1). Pull it to get a cut scene
of the outside gate you saw opening. Turn to the right and pull up. In the left
corner is a trapdoor. On the right wall is a crawlspace. Crawl in, drop, and
pull a switch (2) to get a cut scene of a gate opening somewhere. Go back and
before dropping down look left at an incline. Rum/jump over the incline to pull
a switch (3). The gate below you opens. Go there to see the Serpent Stone
across from you. Drop down to the left then and shimmy left to a crawlspace.
Crawl in and a gate opens in front of you. To your right is a corridor with
more gates and a switch (4). Pull the switch to drop a trapdoor. Go into the
room on your right and climb up into a room and see a key card holder. Come
back here later. Go down and out and turn right into another open gate. On the
left is the open door to outside and on the right is a ladder. You see a large
gate through a crack in the wall. Climb the ladder and back flip into a room.
Go out the door onto a ledge overlooking the starting area. Go left and climb
up and follow the stairs to another room with a crawlspace. Enter the
crawlspace and it seems you no choice but to drop. Go to the left to find a
switch (5) that opens the trapdoor above you. Climb up and you are back in the
room with the incline. Drop down, out the door to drop and shimmy left to a
crawlspace.
Go to the key card holder room and use the key card and the closed
door in the room below opens. Go there and pull the switch (6) on the far wall
and the two big gates open. Go outside and see a dead end on the left and some
boxes on the right and the deep pit. Climb the boxes and follow the stairs to
see a dynamite plunger in the right corner. Go left and jump over the room and
pull up. Go the right and shimmy left under the rocks and eventually pull up.
Look across to the rock wall and the ledges with a snake. Jump to the snake and
run past it into the corner before it pushes you off the ledge. Kill the snake
(26) from the corner. Or use the rocket launcher and the KEYPAD 0 key
to help aiming. Jump to another ledge and then run/jump/grab the ledge on the
grey building. Go in climb up and go right to pick up the Bomb
Trigger (35) off the floor. Us the crawl space in the far wall to get outside
to the dynamite plunger and use the Bomb Trigger.
Climb the destroyed building roof overlooking the snake area. Drop
down one block and run/jump across the pit and grab the roof over the snakes on
the left side. Shimmy to the right and pull up to a flat ledge. Jump to the
roof and go to the hole in the back. From the sides of the top hole you can
kill two snakes (27)(28). Jump down the hole to kill the
third snake (29). Putting your back to the wall
keeps you out range of the snake. Go to a side ledge with your arm against the
wall and with your back to the pit. Walk forward one step and hop back and
grab. With luck and good timing, you do not grab the ledge but land on the
ledge below. It was the only way I could get to the second level. Kill the three
snakes (30)(31)(32) and grab the Serpent
Stone (36). The door in the wall opens behind you. Slide down to end the
level.
End of
the level.
Pickups: 36
Kills: 32
Secrets: 5 out of 6