Jump like an Egyptian
By Karsten Mittag
This walkthrough is meant as a general guide only. It
may not include every pickup or secret. There may also be alternative ways of
approaching situations within the game.
- Pickups and Items
- Enemies
- Secrets
WALKTHROUGH by Lizard Queen
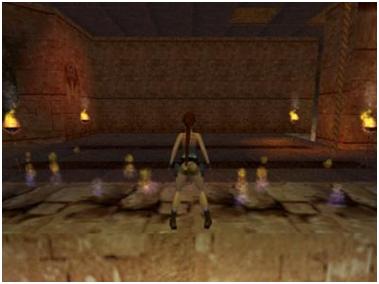
1st Room
The level begins with Lara
sliding down a slope into the 1st room. On the ledge and floor are light
brown/beige coloured tiles. Run over all of the light brown/beige tiles and
head towards the large doors, passing over the tiles there. The large doors open
but do not proceed. Instead, turn around and enter the newly opened gate at the
back of the room. Enter the corridor and the gate closes behind you. Take a
running jump and grab (to change trajectory) over the two spike pits in this
corridor. Climb the ladder at the end of the corridor to the crawlspace at the
top. Shimmy as far to the right as possible and quickly let go and grab again.
Immediately shimmy to the right before Lara can position her feet on the ladder
and climb into the crawlspace. Climb out of the other side and drop down into
the next room. Enter the area, turn right and shoot four
scorpions. Head to the corner on the right (north/west) take a standing
jump over the sandhill and shoot another scorpion.
Pickup the Shotgun in the corner. Turn around
and take a standing jump out and head right towards the other corner in the
room (south/west) and safety drop through the hole in the floor. Take a running
jump and grab over the flame pit and pull up into the main room. Now head
through the large doors.
Cartouche Room
Follow the corridor around
and shoot three ninjas waiting in the next room.
Pickup the small medipack left behind by one of
them. At the end of the room in the left corner is a ladder. Approach the
ladder but do not step on any of the light brown/beige tiles as this will
activate spikes under the ladder. Instead jump over the tile and climb the
ladder safely. Backflip into the room above and pickup the Shotgun ammo. Climb back down. Turn right, jump over
the brown/beige tile and head into the corner ahead and to the left
(south/west). Go through the corridor and enter this new area.
Jump Room
Take a standing jump to the
flat surface on the left and turn right. Get ready for a series of jumps. Jump
and grab the first slope. Shimmy as far to the left as possible. Pull up and
jump to the next slope. Jump and turn left to reach the next slope. Jump and
grab the crevice on the wall. Wait as a cutscene shows you the route. Shimmy to
the right around the block onto the next slope as far as you can go. Pull up
and backflip to the slope behind. Immediately jump and while in the air, turn
to the right. Jump again, reverse roll and grab the pole. Shimmy around the
pole and backflip onto the flat area. Turn left and drop down. Turn left again
and run towards the ammo ahead but don't pick it up yet. J Jump back to avoid
the spiked boulder then safely pickup the Revolver
ammo. Side flip into the corner on the right and do a backflip onto the
slope behind. Jump and grab the crawlspace. Pull up and pickup the Ba Cartouche. Crawl back out the way you came, turn
around and head back out to the water.
Secret #1: On the left is an
alcove and a lever. Take a standing jump and grab (to change trajectory) to the
alcove and pull the lever. An underwater gate opens. Turn right, exit the
alcove and take a standing jump into the water. Turn right and swim through the
newly opened gate, which is Secret #1. Pickup Shotgun ammo and a small medipack. Exit the
alcove and swim ahead. [note: swimming over the blue square triggers the
closing of the underwater gate.]
Pull up onto the slope
ahead and exit this area via the corridor on the right.
Cartouche Room(revisited)
Head to the large hole in
the middle of the room. Climb down the ladder on the west side of the hole and
drop down into the room below. Drop to the lower floor, turn left and pickup
some more Shotgun ammo. Turn left, climb the
block and place the Ba Cartouche in the receptacle ahead. Wait as a boulder
falls out of the way. Turn left and climb the block. Face the slope and do a
standing jump to the tile with the Pharaoh face. Immediately side jump to the
right out of the way as a boulder falls. Turn left and make your way back to
the first Pharaoh tile, which is now safe. Angle left and take a standing jump
to the next Pharaoh tile. Immediately side jump to the right as another boulder
falls. From the top right corner of the first Pharaoh tile, take one step back,
then angle to the right to face the last Pharaoh tile. Take a standing jump to
the tile. Immediately jump, reverse roll and while in the air, turn right to
avoid the boulder as it rolls out of the way. The gate at the top opens so make
your way back to the top of the slope and enter the alcove. As the second gate
opens, watch a cutscene of a boulder on the slope ahead. Walk to the edge of
the pit, turn left and do a sidejump to the Pharaoh tile. Immediately angle
left and so a standing jump into the alcove as the boulder rolls out of the
way. Head up the slope and turn right. Before heading down the corridor, turn
around and jump up and grab the ladder on the inside of the wall above. Climb
to the crawlspace at the top. Shimmy as far to the right as possible and
quickly let go and grab again. Immediately shimmy to the right before Lara can position
her feet on the ladder and climb into the crawlspace. Pickup the small medipack and climb back down. Reverse roll and
head down the corridor. Shoot the two scorpions that appear from the left and
right alcoves and exit to the next area outside.
Outdoor Desert Courtyard
There are two ninjas
outside. Shoot the one on the right and follow the other one who has headed
around the pool to the left and up on a hill. Shoot him, head to where he was
standing and pickup the Cartouche Piece. Head
back down to the pool. Facing south, drop into the pool and dive down. There is
a crawlspace about ¾ of the way down. Swim through the crawlspace. There is an
air pocket up near the beginning so take a moment to fill up on air. Then swim
down and make your way (south) through the crawlspace. At the end is the second
Cartouche piece. Reverse roll and quickly swim
back (to the air pocket alcove if necessary) north then up to exit the pool.
Back at the entrance to this area is a small ladder above the door. Jump and
grab the ladder, pull up into the alcove. At the end, turn right and climb into
the corridor. Follow the corridor around and jump over the Pharaoh tile. (A
spiked boulder will fall if you walk over the tile). Pull the lever at the end
of the corridor, turn around and follow the corridor back out. When you reach
the Pharaoh tile, reverse roll onto the tile so that you slightly touch the
tile and immediately run out of the way as the boulder falls. Side jump over
the boulder and face south where there is an alcove above. To get up into this
alcove you have to position Lara as high as possible at the left end of the
alcove and just press ctrl and the up arrow to initiate the jump up (ignore
Alt). Pull up, combine the two cartouche pieces and place into the receptacle on
the wall.
Secret #2: To get this secret, you
need to shoot 5 vases in various locations. To begin, shoot the two vases in
this room. Exit the room by climbing the ladder on the wall opposite the
cartouche receptacle. At the end of the corridor, shoot the third vase. Take a
standing jump and grab the ladder and climb down. Reverse roll and head
forward. Shoot the two vases in the left and right alcoves. Head back outside
and turn right. On the right is a set of stairs. Climb the blocks and follow
the corridor to the end. Enter the small room and pickup the Revolver and Revolver
ammo, which is Secret #2. Reverse roll, exit the small room and
head back into the large building.
Turn right at the ladder
where you dropped down from the Cartouche receptacle room, select the Revolver
from inventory and follow the corridor. If you use the Revolver, you can take
out one ninja from up above. Next, you can
either jump and grab the pole and slide down or reverse roll, drop down and
shoot another ninja before he gets a shot at
you. Run around the room and shoot the last ninja
and pickup the small medipack he leaves behind.
Locate the light gray doors on the east wall and exit this room.
Fire Room
Follow the corridor and
climb the pole. Turn and backflip into the room. Turn around and watch as two zombie mummies slowly approach. When you can, make
a run for the pedestal ahead and pickup the Eye Piece.
Make your way to the hole in the center of the room and climb down the ladder.
On the left there is a series of fire tiles, two ropes and a lever in the
corner. Turn to face the lava pool and take a running jump and grab the rope.
Turn to face the corner on the right, swing and jump to land in the corner with
the lever. Push the lever and face the lava pool again. Take a standing jump
and grab the edge of the pool. Shimmy to the right until you reach a midpoint
between fire tiles (screenshot #1). Pull up and take a standing jump out of the
fire. Turn around and take another running jump and grab to the rope. This
time, turn towards the second rope. Swing, jump and grab the second rope. Then
swing, jump and grab the crawlspace. Pickup the Shotgun
ammo on the right. Exit the crawlspace and turn left to face another
rope above a water pool. Take a running jump and grab the rope. Angle to face
the block on the left and swing, jump and grab the edge of the block. Pull up
and turn left into the alcove. Take a running jump and grab (to change
trajectory) over the well hidden spike pit and pickup the second Eye Piece. Exit the alcove and drop into the water.
To get out of the water, swim to the sloped blocks. Position Lara so that she
is in the middle of the sloped block on the left, pull up, jump, reverse roll
and grab the rope. Angle right, swing and jump to the floor ahead. Combine the
two Eye pieces and place in the wall receptacle ahead. Angle right and take a
standing jump to the slope. Jump off the opposite slope and while in the air,
angle left. Continue to jump back and forth, making your way over the fire
tiles, over the spiked boulder and eventually you will fall through a hole into
a pool of water.
Water Room
Pull up onto the south/east
ledge with the vase. Shoot the vase and pickup some Shotgun
ammo. Jump back into the water, swim to the alcove in the north/east
corner and pickup the Shotgun ammo. Swim back
out and pull up onto the ledge on the right. Turn right and even though it
doesn't look like it, there's a ladder in the corner. Jump up and grab the
ladder and climb to the top. Shimmy left and drop to the ledge. From the ledge,
face the rope and do a running jump and grab the rope. In the south/east corner
is a ledge. Swing and jump to it and pickup the Crossbow
ammo. on the right. Drop down to the ledge and return to the rope. Do
running jump and grab the rope.
Secret #3: There is another ledge
in the south/west corner. Swing and jump to this ledge to reach Secret #3.
Pickup the small
medipack and Crossbow ammo. Drop back down to the ledge below.
Return to the rope and do
another running jump and grab. Swing and jump to the ledge with the zombie mummy. Shoot the zombie with the shotgun and
push the lever. Drop back into the water and swim to the south/east alcove.
Follow the crawlspace to the end and pull up into a small room. Pickup the Hand of Sirius and a cutscene shows the large doors
on the ledge opening. Swim back out and pull up onto the ledge with the ladder.
Climb back up and exit through the doors. Crawl to the middle of the
crawlspace, stand up and draw weapons as three
scorpions attack. Head to the crawlspace in the north/west corner to
trigger three more scorpions. Draw weapons again
and dispatch the pesky little ankle biters. Go back to the north/west corner,
drop down and pickup some Shotgun ammo. Climb
back out and exit the crawlspace on the right.
Death by Mist: From the
center when the mist stops, drop into the pit and pickup the large medipack. Immediately grab the block ahead,
shimmy to the right and pull up into the crawlspace. Turn around and when the
mist stops, exit the crawlspace. Immediately turn left, jump up and grab the
block and pull up. Go as far as possible and turn right. When mist stops, pull
up into next alcove. Immediately turn right and angle to face the next alcove
and do a standing jump and grab to it. When the mist subsides, pull up and
immediately turn around. Do a standing jump and grab and pull up to safety.
Approach the doors and exit. Go straight and place the Hand of Sirius in the
wall receptacle to the left of the large doors.
Dart Room
Head through the newly
opened doors and turn left. Crawl through the next room, avoiding the darts
make your way around the right side of the water hole and into the alcove
ahead. Stand up and pickup the set of flares.
Go through the newly opened gate and turn left. Jump up and grab the crawlspace
and pull up. Drop down the other side and pickup the Crossbow.
Turn right, jump up and grab and pull up into the next crawlspace. Drop down
the other side and reverse roll. Go straight and ahead is one crawlspace. Turn
left and climb into the second crawlspace in the south/west corner. Pickup the Crossbow ammo and shoot the vase on the left. Crawl
back, drop down and turn to face south/east. Head toward the block in the
center, turn right and climb the crawlspace. Shoot the vase and watch a
cutscene showing the second crawlspace again. Pickup the Crossbow ammo and exit. Reverse roll, turn right and
return to the second crawlspace. Lo and behold, the vase is back. Shoot it and
watch another cutscene of a block raised back in the outside room. Exit the
crawlspace and turn to face south/east. Go straight, around the center block to
the corridor at the back and exit the room. The large doors on the right won't
open yet, so turn left back into the dart room. Face north/east and crawl
around the water hole to the area at the end. Enter the corridor on the right,
follow it to the end and push the lever. Reverse roll and notice the tiles in
the corridor are now on fire. Sidestep to the left and with Lara's back against
the wall, do a standing jump into the fire tiles. You should land in between
two tiles and not lose life. Take another standing jump but this time you catch
on fire (or at least I did). Use medipack if necessary and as quickly as
possible run, jump and grab the block ahead. Pull up and drop into the water.
Swim around the corridor and pickup a large medipack. Pull out and return to
the north/east area and enter the corridor on the left. Use the Crossbow with
explosive arrows and shoot the two zombie mummies
in the corner. Push the lever and reverse roll. Go straight to the end of the
wall, turn right and jump back as far as possible into the left corner (screenshot
#2). The tiles are
now on fire but there is a safe spot in the middle (screenshot #3). From the corner take a standing
jump to the middle of the fire tile area. Angle left and take a standing jump
out of the fire. Go straight, turn right and back to the area with the water
hole (crawling to avoid darts) and exit via the large doors, which are now
open. Head straight to the back of the room and turn left. Climb the block and
enter the crawlspace. Take a standing jump and grab (to change trajectory) over
all three fire pits. Reverse roll at the gate and notice only two of the pits
are on fire now. Do another running jump and grab over the two fire pits and
drop into the last. Reverse roll, climb out and drop into the pit ahead, which
is now flameless. Climb out and drop into the last pit. Climb out and the gate
opens.
Secret #4: Head straight to the
back of the room and a cutscene shows revolver ammo on a ledge on the other
side of a block. Do not fall down as there is no way to get back up and will
require a reload. Angle left, take a running jump and while in the air, angle
right and land on the other side of the ledge, which is Secret #4. Pickup the Revolver ammo. Reverse
roll, angle left and take another running jump back. While in the air, angle
right and land back on the ledge where you began. Exit the alcove.
Turn left and head to the
hole in the ceiling. A cutscene shows two ninjas
waiting outside. Dispatch them and head towards the jeep and the level ends.
The End.