HEATH ROBINSON
SOLUTIONS
A CUSTOM LEVEL CREATED BY
RICHARD LAWTHER
AUTHORIZED WALKTHROUGH WRITTEN
BY SELENE
Heath Robinson Solutions:
William Heath Robinson (1872-1944) was a London-born cartoonist and
illustrator, best known for his drawings of odd contraptions. The children’s
books The Adventures of Uncle Lubin (1902)
and Bill the Minder (1912)- both written and illustrated
by him- were considered to mark the starting point of his career as someone
drawing peculiar machines.
Appendix A:
This is for
those of you who wish to give the Expert’s Challenge a go. Appendix A simply
describes how to complete the challenge and claim the Expert’s Platinum Medal.
Appendix A is added as a way of emphasizing that this task is completely
voluntary. Skipping the challenge will not in any way affect the progress of
the level.
Pickups: Flares, Manna from Hexham, Manna from Heaven, Gold Key,
Demon Dollar, crowbar, Tantalum Key,
Rancid Meat, Copper Key,
Blue Diamond, Green Triangle,
Red Square, Yellow Star,
Thinking Cap + 1 Secret (the Expert’s Platinum
Medal)
Enemies: None
Main
Objective:
Obtaining the four underworld shapes that will open the gate to the Millinery
store, in which you will find a thinking cap for Demon Smalls.
A year or
so later we find Lara back in the familiar surroundings of the Demon Heights
museum. This place is quite large, so for further reference we will be calling
this hall Art Gallery 1 (for lack of a better name). Turn around
(S) and just before the stairs leading down have a quick peek into the
right corridor. What you’ll find here is the Millinery. With a bit of
luck we’ll find just what Demon Smalls needs there. Four shapes are missing
from the receptacles flanking the closed gate and these are exactly what we
need in order to gain access to this unique little store.
The area
beyond the portcullis at the end of the corridor is “closed for
refurbishment”, so until we find the required underworld shapes there’s no
reason for further exploration in this area. Opposite of the Millinery
corridor there are some stairs leading down to another room which is also
closed off.
Hop across
the barrier and go down into the dark room where Demon Smalls is pondering on
what to do with this latest invention. He won’t be of any help to you, so just
climb onto the wooden crate where he stands (the crate is labelled “W. Heath
Robinson Equipment”). Face the pillar in the dark corner S/W and do
a standing jump up there to gather some flares.
You’ve done all that needs to be done here for now, so return back up the
stairs to Art Gallery 1.
Go to the
far N end and at the junction turn right (Art Gallery 2
is located to the left, but we’ll get back to that later). Head
up the stairs and you’ll come to a room with an inactive water pump and a couple
of tourists enjoying the sights and marvels of the museum. First of all go
behind the block to the left (the one with the connecting pipes)
and pick up the Manna from Hexham (these
are the equivalent of small medipacks). In this room there’s nothing else
to do right here and now, so run up the next flight of stairs.
On top
you’ll reach a new junction. Off to the left you’ll see an open doorway and
before that some platforms suspended by thin poles with multi-coloured shapes
swirling around them. We have some other business to attend to, so for now
we’ll just ignore that and come back here later on.
Turn right
and enter the first room on the right-hand side. Here you’ll encounter a demon
immersed in an intensive study of “Demon Today”. Seems he’s got quite a bit of
time on his hands and quite frankly there’s nothing really for you to do in
this room either. I just wanted you to take a mental note of it. Leave and
continue right; straight ahead you’ll see a closed portcullis.
Go up the
stairs to the left and continue all the way to the top, from there head out
through the only possible exit. You’ll eventually come out on a ledge. Left and
down is the hallway you came from (the far end of it that you haven’t
explored yet), there’s another ledge running along the opposite wall and
through the window on your right you’ll barely get a glimpse of the Floating
Platforms Chamber (which I briefly mentioned earlier).
Run to the
far end of the ledge. The ghoul painting is transparent and apparently there’s
a passage beyond it. Let that be the hint you need and hop through the
painting. Continue along said passage, which ends abruptly with a hole in the
ground and a chain running through it. Run into the hole, press Action to grab
the chain and slide down into the Weight Watchers Chamber.
Just so
that I have said it already: this is NOT a spa, so don’t feel tempted to
hop into any of the lava-filled trenches
running along the walls. That’s not something you’d walk out of alive, so
consider yourself duly warned.
Now that
we’re here, let’s try to keep the required backtracking to a minimum and have a
look at the demon perched upon the pedestal. The poor thing: having 16 tonnes
stuck to his head seems to be weighing him down a bit. Also there’s the matter
of that diamond receptacle on the left-hand wall. It’s hardly a coincidence
that the demon is holding sticks with diamonds attached to the ends, but how
can we make him budge with that heavy weight on top of his head?
Stand
directly in front of the demon, draw guns and fire to shatter the weight. By
this action the tile underneath the demon pedestal rises and you’re free to
push it up against the receptacle on the wall, fitting the diamond perfectly
into the empty shape.
Turn around
and go through the now open portcullis, down the stairs towards the lava pool. Hop onto the window sill right, go
to the end and grab the Gold Key and Manna from Hexham from the pedestals. Return to
the Weight Watchers Chamber the same way you came.
We’re not
done here quite yet. As you might have noticed there are two chains in the
room: the one where you came down and another one leading up through a second
hole. Climb the latter, backflip to the floor above and follow the winding
passage to a small room. The only other doorway leads to what appears to be a
dead end. So what exactly are we doing here again?
Look at the
two statues by the W wall. What they have in common is that they’re both
lifting a bowl over their heads. The difference is that a fire is burning
cheerily in the bowl held by the right statue, but not in the other one. How
does one light a fire without a flame?
The statue
with the burning bowl is standing on top of an ornate tile. Do you see any
similar tiles nearby? Good. It’s located in the corner just left of the statue
with the unlit bowl. Now all you need to do is to move that statue onto the
ornate tile.
Once you’ve
solved that one you’ll hear a trapdoor opening somewhere in a nearby location.
Head out through the nearby exit and do remember to turn left just as you pass
the doorway: there are some flares for
you to pick up on top of the stairs (very easy to forget about those).
That done head down the stairs and at the end you’ll find an open trapdoor (this
is indeed the one that you just opened, so not a dead end at all then).
Stand at
the edge and look down to spot a jump switch. Position Lara directly across
from the switch, hop back and run into the hole while pressing Action. This
should cause her to grab the switch on her way down and a painting lowers to
reveal a secret alcove to the right. Climb into the alcove and grab the Demon Dollar.
You’re now
standing in Art Gallery 2 and just off to the S/E you might be
able to catch a glimpse of Art Gallery 1 (so you’re not that far away
from the starting point). That’s in fact the exact direction we’re headed
now. Do not enter Art Gallery 1 though, just pass by it and head
directly for the stairs in the corner that will lead you back to the room with
the water pump.
Place the
dollar you found a little while ago in the slot underneath the Anubis death
mask hanging on the opposite wall. This will get the water pump going. As you
will also see from the cutscene the unemployed demon from earlier goes back to
work, ultimately leading to the rising of a nearby portcullis.
Time to see
if we can find said portcullis. Head up the stairs in the corner, go right
again on the next floor and pass by the room with the demon you just saw in the
previous cutscene. At the far end (in the small room with the stairs leading
up) you’ll find the portcullis. Go through there and of course the
portcullis closes again as you pass by, leaving you with no other options than
that of going forwards.
Forwards in
this case means towards a large pool filled with scorching lava. The metal bars going across to the other
side does help a lot though, with qualities resembling that of your average
zip-line. Put simply: stand at the edge of the lava
pool facing the other side, press Action and off you go. It doesn’t
matter which pair you use and they also work both back and forth. In addition
you can use them as many times as you like, but frankly it’s only necessary to
do so this once.
Cross
through the transparent ghoul painting in the top right corner and follow the
dark passage to the next room. The gate closes behind her (this is becoming
quite a habit by now), meaning that there better be a way of opening that
gate you see in the far left end of the room. Pick up the flares and the crowbar
from the pedestals to the right.
Now focus your
attention on the demon on the pedestal. He holds one diamond stick in each
hand, but the receptacle seems to be located on the wrong wall and you can’t
turn him around either. What to do?
The crowbar
is the solution. Use it to pry the Gem Holder off the wall (yes, this
is actually possible) and pick it up. Bring it with you to the light grey
section of the S wall and insert it there (stand in front of the wall
and press Action twice). Now you can push the demon on the pedestal up
against the wall so that diamond fits into the empty slot.
The gate in
the corner opens and Bob is your uncle. At the end of the dark passage you’ll
find yourself standing behind another one of those transparent, ghoulish works
of art and you’re overlooking the room with the water pump.
There’s a
similar passage on the wall to your left, just at the same height as well. A
coincidence? I think not. To reach it you have to do a carefully left-angled
running jump, just barely tapping Action to land gracefully inside the alcove.
There’s nothing here but a lever, which happens to lower a painting over at the
opposite wall, revealing a gorgeous blue diamond.
What a
tease- there’s absolutely nothing you can do to reach that tempting diamond
from where you stand. Well, unless you have found a magical spell that can make
her fly. Anyways, you’ll have no choice but to go about it the hard way. Drop
down to the floor and head up the stairs like so many times before.
Still
faithfully ignoring the left section, head right and keep going upstairs to the
top (you’ll notice that the portcullis at the end is open again, but this
doesn’t matter as there’s no need to go through there a second time).
Eventually you’ll reach the twin ledges above the first floor.
This time
around jump across to the other ledge and go left, in the corner you’ll find
another dark passage. Follow it to the end and near the bottom of the stairs
you barely spot the alcove with the transparent ghoul where you were earlier. You
now find Lara at the edge of another opening overlooking the water pump room,
seeing it from the opposite side this time.
Turn left
and carefully do a standing jump to the ledge you see, landing her just next to
the column. About halfway down the ledge there’s a jump switch on the wall, you
might have seen this already (it was barely shown in the water
pump cutscene, among other things). Pulling it down lowers a second
painting in Art Gallery 2, which we’ll get back to in due time.
Right now
we have far more important things to do, such as claiming that beautiful blue
diamond. Walk to the end of the ledge and, standing directly next to the
elevated tile with the column, do a so-called semi-banana jump (i.e. a long
running jump with a sharp angle, in this case to the left). If all goes
well she should land just inside the open alcove. Great job! You’re now free to
claim your prize: the Blue Diamond (which
naturally happens to be the first out of the four underworld shapes you’re
looking for).
Drop down
to the floor and we’re done with all the business that needs doing in (and
in regards to) the water pump room. You’ll still need to go upstairs again
though. I did tell you that you were done with the water pump business and I
meant every word of it: you’re also officially done with the right wing of the
first floor. What this basically means is that this time around you’re going
left.
On the
right-hand side you’ll find the Floating Platforms Chamber (creatively
named after the four semi-floating platforms taking up most of the space in this
room). There are two keyholes on the wall to the right: one blue and one
yellow. We already have one key, but so far no luck on the other one.
Notice the
sloped floor leading down to the platforms. Everything has a reason and this is
no exception. Line Lara up across from one of the platforms (doesn’t matter
which one), standing at the highest point of the floor (just where it
starts going downwards). Do a running jump towards the nearest platform,
pressing Action in the very last moment to grab the edge of it.
Pull up and
hop across to the next platform. Walk to the edge and from there on a simple
standing jump should be enough to land her on the N ledge. Go through
the crawlspace, finding a pedestal holding the Tantalum
Key on the other side. Return outside, drop down to the floor and
make good use of your two keys. The painting high up on the wall lowers,
revealing a secret alcove with a very useful pickup resting safely on a
pedestal.
We need to
get up to that alcove and the first step on the road is going back up to the
floating platforms. Same procedure as last time. However, instead of making
your way over to the ledge with the crawlspace turn around and standjump with a
grab to reach the nearby window sill.
This
requires another semi-banana jump, not quite as difficult as the last time
though. Position Lara as close to the open alcove as possible and do a long
running jump with a sharp right angle (and a slight tap of Action). Once
there you can retrieve the second underworld shape: the Green Triangle.
Stand at
the edge and look down onto the floating platforms. Position Lara across from
one of them, walk backwards twice and do a standing leap into thin air. With
some fortune and good skills put to use she’ll land just onto a platform. From there
you can safely drop down to the floor, not a slice of health lost.
Turn N/W
and head through the doorway to the next room. In here you’ll find a spectre
swirling between two mirrors. The room itself doesn’t hold anything of greater
interest so just continue through the next doorway. Turn right and go to the
wall with the ghoul painting, passing a closed portcullis on your right-hand
side.
When you
reach the wall you’ll find not just one, but two paintings. Look at the hands
of the ghouls in the paintings- don’t they just seem to form around something?
Well, I thought so and if you turn to look at the pillar opposite of the two
paintings you’ll find a jump switch. Pull it to hear the sound of a portcullis
rising very close to where you stand- you’re free to explore the next area.
Of course
the portcullis slams down behind Lara the moment she enters the room, so
there’s no way but forwards from here on. The portcullis behind you won’t rise
again until you’re done with a couple of trials, so we’ll focus on gaining
access to the area beyond the portcullis across the room.
As you
might have figured out already the demon pedestals and diamonds have everything
to do with it. For each demon you have two receptacles, but only one of those
two receptacles can be used and your task is to find the right one. Get it
right and the portcullis across the room will rise. One single mistake and Lara
won’t make it out of this room alive.
NOTE: Before getting started, remember that you must not under
any circumstance save the game halfway through the puzzle. This is also
mentioned in the readme file added to the level folder.
Flanking
the portcullis you have two blue faces. Look at their eyes. Now have a close
look at the demons, or rather: their eyes. They’re all looking towards either
the left or the right wall. The best way of seeing where each demon is looking
is to view them in profile (i.e. from the side). Push the
pedestal up against the wall that the belonging demon is looking at. The
pattern is as follows (when standing at the back of
the room looking towards the portcullis with the
blue faces):
1- left
2- right
3- right
4- left
Head
through the open portcullis and all you’re left facing is a lava pool
running around the corner. The chequered tiles in the pool are of the kind that will sink around
half a second after you step onto them, so apparently you’ll need to move
quickly. To add a bit of comfort I can say that it’s not all that difficult,
once you know where to start off and what tiles to use.
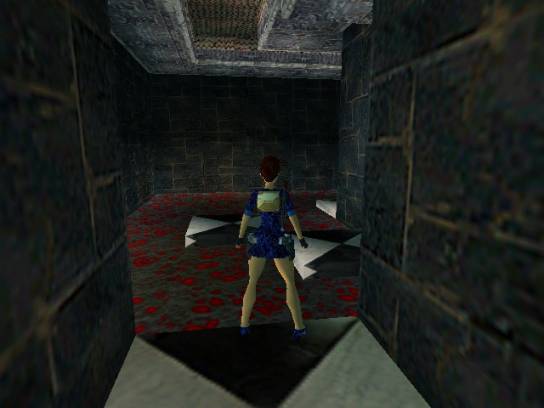
Position
Lara approximately as shown in the screenshot below:

Sideflip
right with a slight left angle and immediately standjump to the next tile. From
there run straight ahead and jump to tile # 3. Upon landing run with a sharp
left angle to the edge and jump to the fourth tile (which is right
at the corner).
From the
corner tile hop to the tile diagonally across from you, making sure to steer
Lara a bit left in mid-air Quickly veer left, go to the edge and leap with a
quick tap of Ctrl into the alcove in the wall ahead. Congratulations, you made
it!
Of course
you have to get back as well, but that’s a different story. First of all grab
the Rancid Meat from the pedestal and a camera shot shows a portcullis
rising in a familiar location.
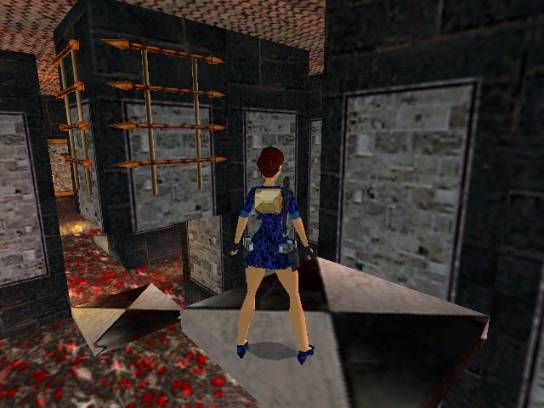
Now for the
getting back part. Stand approximately in the position shown in THIS SCREENSHOT:
Standjump
to tile # 7 (the last one you hit before
jumping into the alcove earlier) and
immediately standjump to the tile just at the corner. Ideally you need to land approximately
a step away from the leftmost corner, which will most easily allow you to do a
standing jump to the next tile.
The moment
Lara lands run with a very sharp right angle and jump at the end to land at the
fourth tile. A running jump is too long to reach the second-to-last tile, so a
standing jump will do. Finally runjump to the last tile and immediately
sideflip right to land on safe grounds. Phew!
Save your
game and head back out to the room with the demons and diamonds. There’s that
portcullis you saw rising earlier, you’re officially free to go.
Head back
up the stairs on the left, through the room with the spectre, to the Floating
Platforms Chamber. Go right and up the sloped floor, turn right
again and you’ll see a doorway. That’s where we’re going next, so head down the
stairs and follow the whitish ramp to the room at the bottom.
In this
room there’s a white demon and a red one, the latter has a hook attached to his
forehead and stands on what appears to be a treadmill of sorts. Stand in front
of him and stick the rancid meat onto the hook. Apparently starved the red
demon starts running in a futile attempt of reaching the meat and a painting
lowers in a different room, revealing an alcove with a tempting red glow to it.
That’s in a
room we haven’t visited yet, but we’ll get back to that a little later. There’s
still one more thing that needs to be done first. Go up the stairs S/W
and you’re back in Art Gallery 2. Turn right and you’ll
find the two hidden alcoves revealed by some jump switches you pulled earlier.
The rightmost alcove contained (as you surely remember) the Demon Dollar
that you found before, but the left alcove still remains unexplored. Up until
now that is.
About
halfway down the passage look up to see some alcoves high on the wall. You
can’t reach these yet, so just be patient and keep going forwards. Soon enough
a fly-by camera is triggered, giving you a good view of a large hall with more
of those sinkable chequered tiles littered around a lava pool. And just when you
thought you were done with the hard stuff…..
Actually
it’s not really as difficult as it looks. It just takes a lot of patience and a
bit of precision, toppled with a dash of good timing. First things first: there
are three tiles you need to focus on right now. Two of them are in plain view,
the third one around the far left corner.
Walk to the
edge, save the game and do a standing jump to land on the first tile. Keep
running, jump and roll in mid-air to land Lara on the second tile facing the
passage she came from. Immediately sideflip right to the final tile and once
there keep jumping straight up and down while pressing Action. This way the
tile won’t sink and she should eventually grab a ladder up on the wall above.
Climb
around two corners to the right and go all the way to the top. Backflip to land
on another tile- only that this time the tile won’t sink. Quite the contrary in
fact: it rises, enabling Lara to turn around and do a long running jump into a
passage in the wall.
To her
immediate right there is a button and a sign on the wall saying “Expert’s
Challenge Only”, with an arrow pointing back towards the lava hall. It will
take you to the only secret this level has to offer, but beware: it’s not
called an Expert’s Challenge for nothing. This is by far the hardest task in
the game (way worse than the arduous task
of retrieving the rancid meat) and not for
the faint of heart. Consider yourself duly warned.
For a full
description on how to complete the Expert’s Challenge refer to Appendix
A at the bottom of this walkthrough and return to this part
once you’re done. The rest of the level follows below.
Follow the
passage around, hop across the gap with the chain and claim the Copper Key
from the pedestal. Climb the chain down to the ground and look around. Remember
the high alcoves I told you to notice upon entering the lava hall? Well, now
you’ve just been up there and you’re once more back in the passage behind the
lowered painting in Art Gallery 2.
From Art
Gallery 2 go N/W and follow the passage to a room with
some paintings on the right wall and a mirror suspended by a pole. We’ll be
back here in a little bit, so just leave the room and continue W. In the
next room you’ll find something called “Demonica Divinorum Rays”, bound to
“induce hypnosis in the feeble-minded” (evidently so).
Continue to
the next room which contains a power generator of sorts. First of all head into
the alcove in the right wall to retrieve the Red
Square. Only one underworld shape to go.
The power generator seems sadly inactive, so go over to the N wall to
find a button. You can’t access the button due to the glass case surrounding
it, but you do have a key in your inventory. Use that in the keyhole and voila:
button available for use.
Pressing
the button gets that generator going and somewhere in a different room a ray of
light is reflected off the mirror to hit a demon’s eye in one of the paintings.
A second painting lowers to reveal the final underworld shape.
Go back
past the hypnotized demon and through the doorway across the room. From the
hallway outside head left and left again to reach the room you saw in the
previous cutscene. Climb into the centre alcove of the right wall and collect
the Yellow Star.
Drop down
to the floor and have a look at the paintings again. Doesn’t that painting at
the bottom look oddly familiar? Press the button at the back of the torchlight
right of the painting, a third ray of light shoots out and you can pick up the Manna from
Heaven from the pedestal that was hidden
behind the bottom painting.
That’s
about all we need to do here and now we have the four underworld shapes as
well. Leave the room, head S and go back to Art Gallery 2.
Continue S to the far wall, go left and enter Art Gallery 1.
Keep heading S and turn right into the Millinery corridor. At
long last you’re ready to place the underworld shapes in their rightful places,
gaining you entrance to the Millinery.
Head down
the passage and just past the ghoul painting a load screen pops up. Enter the
next room and spend some time marvelling at the beauty of the Millinery
itself and all the amusing items displayed in it (I just love
those little demons cleaning the floor).
Go to the
far right side and through the open doorway. Head around the wall ahead (doesn’t
matter on which side) and pick up the Thinking
Cap from the pedestal. We’re not
quite done yet though, so return the way you came and have a last look at the Millinery
before leaving (halfway down the hall and through the doorway on the
left-hand side).
Head
through the hallway and you’re back where you started. Go straight ahead and
down the stairs to the construction site where Demon Smalls is waiting. Stand
behind him, go to the inventory and select the Thinking Cap. Press Enter and
Lara hands the cap to him. You have successfully completed the mission, so feel
free to sit back and enjoy the final cutscene.
APPENDIX A- THE EXPERT’S
CHALLENGE
If you
choose to go through with the challenge, do so at your own risk. Push the
button and a glass door opens out in the lava hall. Do a running jump back to
the tile you came from and look around the right corner to find the door you
just opened.
First of
all position Lara something remotely like THIS:
Do a
running jump with a sharp right angle to land on the first gilded slope, just
past the door you opened.
If Lara
lands on the slope facing upwards: simply backflip twice to bounce across the
second slope and land on the third one. Jump forwards from the third slope,
angling her to the right and pressing Action so that she’ll grab the ladder on
the wall.
If, on the
other hand, she lands on the first slope facing down towards the lava: jump to
the second slope and then towards the third, but roll in mid-air before landing
on the third slope. From here jump with a right angle towards the ladder as
described above.
Position
Lara as far to the left as possible and three climbs down from the top of the
ladder. Backflip to land on a fourth slope (you have to land on the
slope facing downwards), jump to a chequered tile, then to
the next one and jump with a sharp angle to land Lara on yet another slope.
Follow up with another jump to a slope and with a left angle to the very last
one. From there backflip to a safe ledge.
You’re all
but done yet, but now the prize is within reach: the medal you’re looking for
is located on a pedestal to the far right. Do a running jump to the white
platform near the left wall and you’re ready for the real challenge.
Reaching
that pedestal at the far end of the room looks so easy and yet: if there’s any
word that can be used to describe the challenge that lies before you, “easy”
would not even come close to being one of them. If you’re getting cold feet you
can climb out of this through the passage in the left wall. If not: well, all
the best of luck.
Precision
is the key here, which explains why it’s so difficult. It’s often a matter of
luck as much as skill.
The first
and easiest part is to do a standing jump to the first chequered tile and then
a running jump to the second. Be careful to avoid the burner on your left-hand side. Sideflip left
to the third chequered tile. Now the going really gets tough: you need to reach
the slope to your left, but there’s a burner
in front of it. You might have to apply a few of those
jumping-straight-up-and-down-moves while waiting for the burner to stop before sideflipping left to the
slope.
Again
there’s a difference between landing face-down and face-up. If you land facing
upwards you simply need to backflip to land on the chequered tile you just came
from. If you land facing downwards you’ll have to jump and then apply a mid-air
roll to land facing the slope you just bounced off.
You need to
backflip again to land on chequered tile # 2, this so that you’ll be able to
jump back to tile # 3 with enough room to do a running jump to tile # 4.
Unfortunately there’s a burner in
front of the latter as well, so this requires quite a bit of timing and
truckloads of luck.
Once you’ve
reached tile # 4 swerve right and jump to the final slope. Jump forwards again
and Lara should have landed safely on the platform with the pedestal. If you’ve
reached this point you can give yourself a huge pat on the back, save your game
and pick up the Expert’s Platinum Medal.
Ok, you
have successfully completed the challenge and claimed the prize. Now what?
Well, for starters you have to get back to the white platform the same way you
came. The comfort is that it’s not nearly as difficult as what you’ve just been
through. The two burners that gave you such a hard time before have both been
deactivated.
Stand on
the left side of the pedestal facing the last slope you jumped from. Do a
running jump to the chequered tile in the corner, veer left and jump to the
slope behind the inactive burner. Jump to land on the next chequered tile, hop
to the third one (angling Lara slightly
right in mid-air) and do a
running jump to the last chequered tile. Immediately standjump to the safe
platform.
You have
officially completed the Expert’s Challenge. Climb up into the passage in the
wall ahead, head up the long flight of stairs and once you reach the top, drop
down into the passage below. At this point you should find Lara back by the
button that enabled you to access the Expert’s Challenge. From here on you can
just return to the part of the walkthrough where you left off for the challenge
and continue from there.