FOLKLORIST DIARY – THE FORGOTTEN TREASURE
Level set by Leoc1995
Walkthrough by Treeble
Support the creator by subscribing to his YouTube channel. The author has provided video walkthroughs for the entire series, you will find relevant links at the beginning of each level.
LEVEL 1: NIGHT IN VENICE
→ A video walkthrough provided by the author is available here: part 1 and part 2.
Step forward to have the double doors open for you. Get the small medipack behind the lamppost to the right of the stairs, then pull out the block on the left side towards the lever by the windows. It opens the gate right below. Inside, mind the gnashing teeth as you run towards a dry dock. Pull up to the ledge above and throw the lever near the small door to open it and head downstairs.
Be careful with the shattered glass shards at the bottom and quickly find a safe position to deal with the mercenary shooting at you from a vantage point. Walk up to the crate in the middle of the area and jump to the ledge where his dead body lies. Make a mental note of the closed gate just above the fence in the alley to the left (for much later), then proceed to throw the lever in the back. Before going back to the dry dock, enter the dark room past the crate, walk among the glass shards and pull the lever by the plant. It reveals a path behind a painting on the opposite corner of the room, which, in turn, houses a lever to open the cathedral.
Retrace your steps to the dry dock. Jump over the slope to the canals past the open doors and immediately swim to the platform on the right. As you pull out of water a camera angle will show you an out of reach lever. Get the large medipack and then deal with the mercenary from here. You can find a small medipack and some uzi clips on the platforms surrounding this canal.
Swim through the tunnel below the barricade to emerge in a warehouse. As you collect several goodies scattered across the room, at some point the camera will show you a lead bar just behind a window — we'll get to it soon. Push the lever on the opposite side to open a door next to a sign labeled The Tree of Wealth. Get back into the canal, fill your lungs and swim into the underwater passage next to the gondola. Pull the underwater lever right in front of you and swim past the column to find the open gate. Quickly swim around the large tree trunk to find an opening on its back side, near the bottom, where you'll find SECRET #1: magnum rounds.
Get out of water as you get a nice panoramic shot of said Tree of Wealth. Run around the perimeter of the room and into the open house, with the burning fireplace, then notice a crawlspace at the top of the right-hand wall. Facing the wall below the crawlspace, backflip onto the fireplace and bounce off to grab the edge and pull up. Past another pair of gnashing teeth, drop to the bottom of the room with the burning pillars and take the small medipack near the painting, then activate the two levers here. One opens a door in the ledge you just were, and the other one opens your way back to the fireplace, from where a mercenary starts to chase you.
Bounce off the fireplace to the upper ledge again and go into that open door. The lever within puts out the flames on the pillars, so you can jump across to the crevice in the back. Shimmy until you can pull up and go through the open gate. From the rooftop, if you look left you can see the top of the tree, but don't bother going there just yet. Hop across to the opening on the opposite rooftop and go downstairs to a landing with two levers. One opens your way back into the warehouse, and the next one opens another door near the rooftop, so head back upstairs to find a new opening straight ahead.
You are now on the awnings and ledges above the first canal. Your goal is to jump across to the opposite side to throw that lever we'd seen when first entering the canal. Save before each jump and you should have no problems whatsoever — at some point you need to jump sideways onto a sloped rooftop, grab the edge and shimmy to the end before backflipping to the awning. The lever at the end opens the double doors immediately below; safety drop and head inside.
Ah, Venetian Violins. In this narrow canal, drop into the water and pull the underwater lever just beneath the entrance, then swim to the opposite end. Just before the bend, climb out of water and jump across the two floating crates for supplies. Go round the bend and climb onto the platform by the gondola. A camera shot will show you yet a second lead bar behind a closed gate. Go into the alley and up the rocky mound to climb to the top of the crates and onto a ledge above. Hop across the awnings to a rooftop near the canal and make an angled running jump towards the awning closer to the glassed hallway crossing the canal.
A running jump will get you to the opposite side, from where you can drop to the ledge with the lever below. It opens a door atop the awning you jumped from, so go back through the alleyway to the rooftop again. Don't go inside just yet: instead, hop across the awnings around the perimeter to a small alcove with a lever. It opens the double doors below, drop into water and climb onto the platform near the gondola. Jump to the floating crate and then do a running jump over the fence to land inside the dock. Pull out of water and approach the gates to have them open, granting you passage to the first LEAD BAR.
Once again go through the alleyway in order to reach the awnings and rooftops, but this time go through that small door open near the glassed hallway. Cross said hallway, get some uzi clips and hop into the windowsill. Jump across the awnings and ledges to a lever way in the back to open that one door by the rocky mound in the alleyway. Dive into the canal and swim back there. Once you cross the threshold, the door locks you in.
Jump into water and swim underneath the fence, but quickly get out of water (preferably on the platform on the right side) as a mercenary will be taking cheap shots at you. Running free on the opposite platform is his pet lion. Near the merc's deady body, pull into a landing above and jump over the balustrade to slide down onto the opposite side of the rooftop below. Another couple of lions require your attention, afterwards you can jump into water and swim underneath the closed doors on the left.
Inside, pull up onto the left side and climb onto the crate. You need to do a precise running jump with late grab to the empty space between crates on the upper level. Notice the roof shape and jump across to the other side where you have more room to do so and then again to the lever near the lamp. Go through the open doors and gun down a lion, then climb to the top of the ledge at the end. From the highest tip of the jutting platform, do a running jump towards a crack in the building and shimmy to the left until you can pull up. Jump to the awning, to the rooftop, and finally into the open windowsill to enter the building. Gather the magnum rounds and pull the lever by the fire.
Safety drop and again climb up to the edge at the end. This time, go into the gap between slopes and, just before the step, backflip at an angle to the lower sloped rooftop. Bounce to grab the edge of the higher one and shimmy to the right towards the open door. From the door threshold, do a running jump to the opposite side of the room (if you fall down, you can't climb back up) and run below the beams to an opening in the wall. Jump inside for SECRET #2: magnum rounds. Safety drop, get the small medipack in the windowsill and head into another warehouse.
Get the uzi clips on top of the central crates and keep working your way up towards the LEAD BAR by the window (yes, the one we'd seen much earlier on!). Once you get it, a trapdoor opens and a mercenary starts shooting at you, so safety drop to the floor and handle the situation. Follow the underwater passage below the trapdoor and you'll be back at the fenced canal, swim beneath the fence again to fight another lion, then go up the small flight of stairs. Open the double doors and you'll find yourself right back at the junction between the first two canals. Take the doors on the right to the first canal.
Swim all the way to the end and into the underwater passage leading to the Tree of Wealth. Now we want to get on top of that tree, so climb out of water and into the room with the fireplace, bounce off the slope into the crawlspace and repeat the burning pillars routine. From the very edge of the rooftop, face the small medipack and do a long running jump to grab the edge. From either side of the tree, use the gap in the balustrade to jump over and get to the very top. Be careful not to drop onto the block of gold; you want to land on the slightly deeper spot. Face the gold block and turn your lead bars into TWO GOLD BARS.
Drop back into water and swim towards the ledge closest to the dry dock and jump inside. From the upper ledge, go into the small door and down to the room with the crate surrounded by glass shards. Remember that one gate in the alleyway? It's open, so get onto the ledge where the merc was and do an angled running jump inside for SECRET #3: a small medipack and ammo. We're done with this half of the level, time to finally explore the cathedral, so head up to the dry dock and through the gnashing teeth traps.
The entrance is now guarded by two lions. Once they're done for, head inside the massive cathedral. As Lara's soothing theme plays, proceed to the opening in the left side of the central staircase to find a lever on a supporting column. If you go to the top of the staircase you'll notice a writing on the wall: The price of passage is 3 bars of gold. We're still short of one, so let's go fetch it.
On the opposite side of the last lever is the open painting, climb inside to find yourself in a massive warehouse. Gun down the mercenary, then start your ascent starting at the SW corner. You'll notice a door on your way up, and there's a large medipack atop the first hanging crate. Jump towards the lever on the opposite side to open the door, but don't rush back. Grab the shotgun shells on the second hanging crate and jump back to the crates on the NW corner. Walk towards the edge and notice a small recess in the wall between this and the previous stack of crates. At the bottom of said recess is a slightly shorter stack of crates. From the corner, line up to this stack and run off the edge (or roll) to land on top of it and then claim SECRET #4: shotgun shells.
Climb to the now open door in the SW corner of the warehouse and you'll find yourself at the second floor of the cathedral. Use the hanging chandelier to get to the other side, then hop to the first of two smaller ones and onto a piece of wood jutting out of the wall leading to the open door. Outside, use the rooftops and ledges to go around the room and back inside the cathedral from the other side. Jump towards the slope and turn around to face the door, notice a small crack on the wall next to it and do an angled running jump to grab it, then shimmy and pull up to find a lever behind the small crate.
Safety drop to the cathedral floor and up the large central staircase, go left to find the open painting next to some burners and a pushable block. Throw the lever behind the painting to put out the burners and move the block over them, all the way to the end, so you can pull up onto a taller stack of crates. On the wooden beams, head West towards the open doorway on the right hand side and, again, use the outdoor rooftops and balconies (one of which is inhabited by a mercenary) to come around to the other side of the cathedral. Before heading back inside, you can shimmy past the crack for some shotgun shells.
Use the crate next to the opening to reach the topmost level of the cathedral and navigate the beams past the painting in the middle of the room. Grab the crevice and shimmy left to proceed towards the largest of paintings above the central staircase. Keep following the beams to the opening above said painting where the final GOLD BAR rests. To get back down safely, do a running jump towards the last beam (beyond the opening where the last bar was) and from its tip you can grab a small crack in the wooden beams ahead. Drop to the beam below, then onto the crates, to a small gap near the grates and, finally, safe and sound to the ground floor.
Head up the central staircase and place the three gold bars to create a massive hole on the floor. Drop inside and save your game, as during the slide you need to jump over shards of glass that might make short work of you. At the bottom, swim through the tunnel to finish this level.
[ * * * ]
LEVEL 2: THE LOST SHIPWRECK
→ A video walkthrough provided by the author is available here: part 1 and part 2.
Swim towards the open area and loop around to find a place you can climb out of water above the crates. Use the flat spots to line up for a long jump towards the lever on the opposite side, then activate it before shimmying on the crevice to the left. From the floating crate, jump towards the large medipack by the skeleton and you'll hear two bats shrieking your way. Enter the open door and save your game.
If you look left, you'll notice a boulder eager to roll, and, if you look right, you'll see shattered glass at the bottom of the slope. Slide and hop over the shards and, a few steps later, roll to grab the ledge and drop safely as the boulder flies over your head. Grab the bundles of ammo and pull up through the hole in the ceiling. A lever placed behind the headless statue opens a nearby door, while the other door requires a key.
Explore the two dormitories to the left — the doors open upon approach, for your convenience — to find a handful of supplies, then go back and up the opening at the top end of the hallway. At the top of the stairs, just as you step on the incline, a boulder rolls down, so quickly back away and wait for it to roll by. Slide to the next room, get magnum rounds from the skeleton and pull the lever atop the crates, squeezing through the tight gaps in the glass to make your way back down through the hole and to the previous room.
Not only has the door near the lever opened, but the statue is nowhere to be seen... Enter the next hallway and once you step on the omega symbol on the floor, keep doing running jumps towards the open door in the back before it closes on your face. Get the large medipack from the lower crates, then work your way to the top to spot some uzi clips and a GOLD KEY. The omega plate opens the door, so you can go back and use the newly found key to open that last door.
Get the UZIS from the skeleton and pull up into the opening on the wall. The camera will show a lever surrounded by three statues — you know what's about to happen, right? Grab the supplies from center of the room and head towards said lever to deal with the three statues. For your trouble, you can loot MAGNUMS and ammo from their bodies. Now, pull that lever to raise two trapdoors and head to one of the corners in the opposite side of the room, grab the crevice and shimmy over the trapdoor to a lever. Do the same on the other side: with both levers down, the exit door opens.
Kill two bats and go through the open door. Retrieve the shotgun shells from the skeleton and pull out the metallic block from the second alcove in the left hand wall for an exit. Drop through the hole that was hidden and pick up a small medipack from another unlucky person. There are several points of interest here, but for now follow the corridor to the left.
Run past the out-of-reach lever and drop into a hole. Don't pull the block below just yet, instead, drop to the rusty floor and loop around the stack of wooden crates to find a hidden lever. Throw it to open a door elsewhere, then proceed into the next corridor.
Enter the doorway to the right. In the back, you'll see a pair of double doors closed with a writing on the wall stating we need to locate four levers to open them. Get the magnum rounds from one of the nearby bunks, return to the corridor and go to the library at the end to kill a rat. Make sure the exit door is open, but don't go out this way just yet. Instead, retrace your steps all the way back to the hole near the high lever and pull the lower block once. As you've just blocked your own way into the previous area, we need to find another way to the corner library, so climb out of the hole and follow the corridor to the opposite end now. Ignore the chandeliers and get safely to the bottom using the stack of wooden crates in the corner.
Run all the way back to that block and push it into the hole through which you'd originally dropped in. And yes, this means we have to go back the long way round again. From the stack of crates, jump to the chandelier to get onto the ledge, then return to the high lever and drag a second block over the one below. The lever opens a door just to the side.
Climb into the new passage and drop in the small pit ahead of you to locate another pushable block on the right side: push it. Get back out and loop around the left wall to find that you can now clear the passage with the shattered glass pit, thanks to the block you've just pushed. This room contains SECRET #5, get the supplies hidden behind the wooden crates and return to that last door we worked so hard to open.
This time, climb the shaft on the back side to the top and throw the lever at the top to open a door near the chandeliers. Run past the railings for the room with the chandeliers and hop across to the open door. In the back wall, use either of the bunks near the fire extinguisher to climb through a hole in the ceiling, kill three bats and locate the first lever in the back. When you drop back down the hole, a statue will be waiting for you bearing another pair of MAGNUMS as a gift.
Carefully drop to the bottom of the room with the chandeliers, where you can walk through the shattered glass in the center for shotgun shells. Go up the small staircase and through that first door we opened. You come to a hub with quite a few side passages. We will explore them in a counter-clockwise order, so head through the doorway on the right hand wall first. In the room at the end, kill three rats, get the small medipack and uzi clips and then throw the second lever.
Return to the previous room and head through the next doorway, past the curtain between the two pillars. Dive into the water pit and stick to the right hand wall to locate a rusty metallic corner with an underwater lever. Stick to the right hand wall and you'll locate the open trapdoor in the next corner.
The double doors ahead of you open upon approach, granting you access to a majestic library guarded by two centaur statues. Run to the back end and use the small ascent on the floor to get on top of the bookcases. Use the chandeliers to hop across, grabbing shotgun shells on your way to the small medipack on the left balcony. Go to the other balcony and save your game in front of the lever: it opens a door on the opposite wall for a very brief amount of time, requiring you to do a series of running jumps without ever losing your momentum. (Lara's a bit sluggish in TR1, so this could take a few tries and quick loading upon failure might mitigate the frustration.)
On the other side, throw the lever and get the shotgun shells near the window but don't cross back to the library just yet. In the next, big chamber, use the chandeliers right in front of you to reach a ledge in the back wall to get uzi clips. Now, drop into the water and climb out into that alcove with the third lever. Almost done! We now have a timed run before we can get back to the library.
To return, pull the underwater lever and swim towards the floating wooden crates in the back corner. Quickly climb, jump to the ledge in the back and quickly hop on to the sliding pillar before it retracts to get to the landing beneath the entrance. Pull the block across the flat floor towards the edge and climb through the gap to the floor above. Return to the open window to the library and land on the bookcase to prevent health loss as you get down to ground floor.
As you retrace your steps to the entrance, one of the centaur statues will come to life. Drop into the water pit and swim back to the previous area by sticking to the right-hand wall. One last passage in that hub remains (well, there's another one, but that one requires a key we don't have yet). As you run to the end of this new corridor, the camera angle changes but don't be hasty as there is a pit of shattered glass below.
What you need to do is use the opposing slopes to keep bouncing back and forth as you steer towards the flat spot in the back. This raises a trapdoor near the entrance, so reverse the strategy to land on it. Make haste because it's timed, and jump to the crates in the back. Jump into the breach on the wall and carefully clear the three swinging axes. Walk through the shattered glass towards the magnum rounds and make a mental note of the writing on the wall: II, IV, VII, X.
Upstairs, get the shotgun shells and approach the lever near the windows. The sunken area just outside gives you a glimpse of numbered unwater levers — you must pull only the ones indicated by the writing on the wall. To get there, activate the nearby switch and race to the timed trapdoor in the far corner. Your oxygen supply should last just enough to activate the four levers and get out, so save your game as you fall into the water.
The levers are numbered from the right to the left, with odd numbers at the top row and even ones at the bottom row. Levers II and IV are easily identified, but the markings for levers VII and X have rotten away (at any rate, you want the second to last on the top row and the last one on the bottom row, counting from the right). Quickly turn around from the X lever and swim through the open trapdoor near the windows. Get out of water and you'll have found the fourth and final lever.
Time to return to those double doors. Drop through the hole and find another one on the floor just behind the lever by the windows. From the crates, do a long running jump to the crate in the middle of the shards and through the upper corridor to return to the room with chandeliers. Go through the corner library and enter the far doorway to find the open doors and get the GOLD KEY.
As soon as you lay your hands on it, another couple of statues strike — kill 'em and loot 'em for more MAGNUMS. Inside the room where you got the key, locate the pushable block in the back right corner and pull it out once, that way you can use it as a stepping stone to get on the stack of wooden crates near the door to get SECRET #6: magnum rounds. Retrace your steps into the door in the chandelier room to open that locked door with the newly acquired key.
Inside, the camera angle will change to show you can climb out through a hole in the ceiling. Kill the bats in the fancy dining room, get some supplies behind the harp, and throw the lever near the crates to open a trapdoor in the room below. Drop through it for a long fall. It's a safe one, however keep an eye on your health bar as another statue will be waiting for you at the bottom. Quickly get out of the water and kill it for another set of MAGNUMS.
Run to the right of the next room, climbing onto the single block in the corner. The lever opens the exit door, but, as you'd expect, it's timed. Quickly hop over the crates to get there. In the next area, with a huge pit of shattered glass in the center, the first thing that'll catch Lara's eye is a Mona Lisa painting. Ignore it for now and throw the lever on the opposite wall.
Enter the storage room, walking through the glass traps, and climb through the hole above the crates to find another lever. This moves a sliding pillar in the room with the painting, but don't worry as this one is not timed. Get back there and use said pillar to reach the higher walkway and get to the opposite side using the chandeliers. Into the next room, with several wooden crates, mind the two centaurs!
Get the large medipack from the stack opposite the entrance and head to the left hand corner to find a lever atop the highest stack, near a gap in the wall. Throw the lever then climb into said gap to find the open door. Kill two rats inside and throw another lever to open two doors on the previous walkways, one of which is a shortcut and is just to your right. Hop into the other one and a bird's eye view will give you a hint of where to go: the top.
On the far right corner is a stack of crates you can climb on, from there take a running jump towards the hanging crate in the center. Turn around and locate another pair of numbered levers just behind you. These will raise trapdoors for a brief amount of time, so throw them in order and use the hanging crate to reach a small side alcove, then shimmy all the way to the left, past both sets of trapdoors, before they collapse. At the end, climb up and use another hanging crate to reach the next lever.
This one raises a trapdoor which you can use to reach the top of the room. Keep jumping across the alcoves around the perimeter to get above the numbered levers. From there, do an angled running jump to the final alcove, where the lever that opens the double doors at the bottom is. Safely drop down and cross the doors, where three rats made a nest around a GOLD KEY.
An inscription on the wall says: Mona Lisa knows and hides the way! I = North, II = South, III = West, IV = East. Return through the double doors and loop around the right to locate the room with the Mona Lisa painting: a lock has magically appeared on it, so use your key to open the trapdoor in the shattered glass pit and carefully jump into it.
Swim into a small looping room with moving walls. When you get to the II marking on the floor, turn around and swim backwards towards the I wall to find a hidden passage behind it. Use the air pocket to fill your lungs and carefully swim past the three swinging axes. Right after the third one, swim into the passage to the left to climb out into a small chamber where you'll find SECRET #7: a small medipack and uzi clips, as well as another look at Mona Lisa's smirk.
Get back underwater and swim into the passage past the blades. You can climb out in the next air pocket for some shotgun shells. Back underwater, the markings on the floor provide you guidance for the upcoming maze: III, I, III, III, II. Every time you get to a junction with a metal plate on the floor, you need to refer to the markings and follow the proper direction indicated by the hints we were given earlier on. That Compass in your inventory finally has an use!
The way through is West, North, West, West, South. So, from the first plate, swim left and left again, then take the first right and straight past the first pair of side passages, taking a right on the second junction. Follow that passage to end up in a large underwater cave.
Get out of the water on the other end to find yourself at the entrance to a secluded temple. Grab the uzi clips and gun down the centaur. Jump from the top of the corner of the alcove to the pillar on the left hand wall, then towards the crack just above the doors and shimmy to the right, then climb up to find a lever. The doors open, granting you entrance to the next level...
[ * * * ]
LEVEL 3: LARA'S DELIRIUM
→ A video walkthrough provided by the author is available here: part 1 and part 2.
Step forward into a massive temple area and stand on the omega tile between the two centaurs to open the double doors in front of you. In the next room, find the four pressure plates required to open the door: one is in the corner to the left of the entrance, the second and third ones are on the path from the open doors towards the closed ones, and the last one requires a bit of gymnastics. To the right of the entrance you'll notice a few slopes, jump towards the wall so you can bounce off the highest point to grab the edge of the next slope, then pull up and backflip onto the walkway above. Jump around the perimeter of the room to find the last omega plate in the far corner, then safety drop and into the doors.
Lara will look at a wall clock. It's broken, but it provides a vital clue for later puzzles (clock hands pointing to III and XI). The ledge in the middle of the room has two plates, each opening a side passage. Facing the clock, stand on the leftmost first and run through the door on the left side of the room. Time your stride past the swinging axes and spike pit combo to throw the lever in the back, get the SHOTGUN and goodies as you hear the trotting centaur in the previous room, then get back there and deal with it.
The rightmost tile opens the other door for a short amount of time, so rush inside and repeat the routine to get to the lever in the back. This second lever opens a door in the first massive area, so step on the nearby omega plate to open the exit door and backtrack a bit to find the newly opened doors. As you enter the caved-in area, immediately do an U-turn towards the left-hand wall to find an alcove you can jump in to find SECRET #8: bundles of ammo.
Jump on the half-pillar near you and notice the keylock behind it, but for now do a running jump to the flat surface with a column to your left, then jump over the slope immediately behind it to reach the walkway supported by the columns. You'll notice another clock by the double doors, and the pressure plate opens them for a tight timed run, so save your game before stepping on it. You need to do a running jump towards the ledge near the slope, then quickly hop across the flat bits to get to the door in time.
The next set of doors opens as you approach and you'll find yourself back in the first room. Squeeze past the pillars to the right and grab the edge of the slope to shimmy towards the left. When you reach the checkered tiles, pull up and jump to the ledge on the opposite side you came from. Squeeze past the pillars all the way to the end to find the lever that will open this set of double doors.
The slopes inside might suggest a boulder trap is incoming. Well, turns out that's indeed the case, so reverse roll and grab the edge as boulders fly over your head. Head back inside and take the side passage and down the steps to find some supplies and a lever that opens a door nearby. Return to the upper ledge and safety drop to enter the newly opened door. Run past the closed double doors and up the small flight of stairs to another side passage. Throw the lever to reveal a mirror portal behind a door in the previous room and go through it.
Go right, towards the clock, and jump into the nook behind the column for SECRET #9: shotgun shells. U-turn around the tall structure and climb it to the top to reach an area resembling fabled Floating Islands. As you might have guessed, red means no no, so work your way across by stepping only on the green tiles. When you get to a longer platform, grab the edge and shimmy across to the next safe tile, from which you can reach a break-away tile and a larger floating island.
Your goal is to get the key between the two pillars, but you can't do so until you lower the drawbridge in the back, so for now head towards the left side where a friendly sign says SAVE. Do a running jump to grab the edge of this wall and run down the steps, then hop towards the next isle. When you climb onto the first taller block, turn around and do a running jump to grab the edge of the mirror portal wall, then pull up through it.
As your eyes deceive you, deal with the situation and throw the lever in the back to open another door elsewhere. Return through the mirror and jump towards the last floating island you were on. Do a running jump towards the next one, skip over the red tile and save your game as you only get one chance to clear the row of break-away tiles leading to the open door.
Inside, throw the lever in the back and turn around for yet another bad omen. When you're in the clear, step on the pressure plate to open the next door and enter the hallway. Get the goodies as you run down the hall towards another pressure plate which lowers a drawbridge. Throw the lever on the left before you work your way across the green tiles on the parallel islands towards the floating structure in the back. Just past the door threshold is a panel for a timed run; to clear it, you must use the top of the sloped pillars for a simple jumping sequence.
Jump to the flat spot in the floating slope ahead of you then to a long running jump to retrace your steps back the floating islands all the way to the large one before the save sign. Jump around the perimeter to work your way to the GOLD KEY, which lowers that last drawbridge near the mirror portal, so retrace your steps back there and cross back to the temple. Down the steps you'll find yourself in a familiar room, where a centaur now roams free. Remember that keylock we spotted earlier? To get back there, cross the two double doors ahead of you and go right to the caved-in area.
As you enter, you stumble upon a huge empty pit. Climb down safely to the bottom and throw the lever hidden behind the pillar in the North wall to open a door for a secret later, then climb back up and enter the massive next room. At the top of the central staircase is a locked door barring your way to the water control lever. Use the tall mounds around the perimeter of the room (you'll spot some goodies in a distant alcove in the corner, that's another secret for later) to reach the upper ledge, then run around the perimeter, getting the shells opposite an ankh just out of reach, all the way to shimmy on a crevice to the lever just above the door.
Safety drop to the ground below and pull the lever inside twice, as per the writing on the wall, to flood the previous area. Backtrack a bit and jump into the water, you can now swim to the end of the passage behind the small door on the right where you'll find SECRET #10: a small medipack and magnum rounds. Swim back and pull out of the water on the ledge near said door. Get the shotgun shells and throw the lever at the end of the passage to open the double underwater doors, then swim inside.
As you surface on the other side, a centaur might be sniping at you from a vantage point, so quickly deal with it. Get the clips on the edge of the empty pit and jump to the broken pillar in the corner to reach the upper ledge where the centaur was. Carefully approach the doorway as a boulder just might get the best of you, and draw your weapons to deal with another duel-wielding statue. Claim their MAGNUMS before dropping down through the hole in the dark corner to a small series of steps, which lead to the next lever.
Retrace your steps back up and cross the door to find yourself again in the upper walkways of the room leading to the water control lever. Don't drop down yet though, let's go claim those goodies in the alcove, so run around the perimeter again until the corner after the unreachable ankh, grab the edge and shimmy all the way to the corner, so that you're hanging just above the bottom of the V declive below. Drop and grab the edge immediately below and pull up to find SECRET #11: a small medipack and magnum rounds.
Slide down to the ground floor and throw the water control lever once to shift the water between pits. Use the mounds again to get to the upper walkways of this room and cross the door right in front of you. The pit just below us is now dry, but the one behind the ram statues in the adjacent room is flooded, allowing us to swim through a crack the size of a crawlspace to another room with a warning SAVE sign.
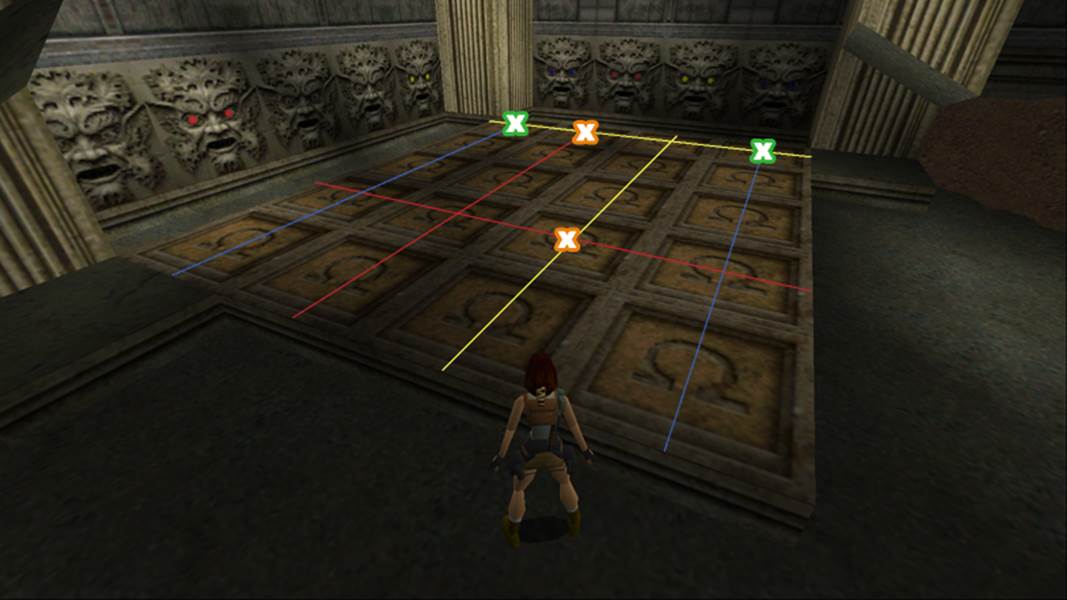
Same time of all clocks, the writing on the wall says. Remember? 11:15. There are five tiles with this time stamp, one on each row, and you must not step on any other tiles. Jump into the open door and climb up using the sand blocks to the top of the room, where another headless statue protects the long sought-after ANKH with a pair of MAGNUMS. A shortcut opens nearby, granting you a quick way back to the rooms above the flood pits. Run past the doorway with the boulder again to find the receptacle for your ankh — it might be a good idea to save your game before inserting it, as two boulders will immediately roll through the doors once they open.
Grab the crevice on the left-hand wall and shimmy until you can pull up right in front of a gauntlet of traps. Time your movements carefully to get across in one piece and save your game after each successful segment to mitigate potential frustration. At the end, throw the lever and drop down to the double doors below. Run around the perimeter of the room to pull up in the gap of the broken column and, from there, do a running jump to the ledge above the clock. Leap to the other end and jump to the gap of the next column to open the exit doors.
From the topmost tip of sand, pull yourself onto the ledge above and run past the decorations to find a lever on the right end, just above the double doors they'll open. You'll hear a centaur rushing in, so quickly make your way down safely to have room to dodge its attacks. Get the goodies by the pile of sand in the next room and pull up to the room above.
The central doors require another ankh, so head towards the doorway in the back and be prepared for three boulders. When it's safe, run up and pull up to the top of the pillar to climb into another mirror portal. In the middle of the floating islands you'll see the ANKH, plus another statue with a pair of MAGNUMS. Getting the ankh lowers a drawbridge in the area, jump bast the double axe trap and again shimmy past the red tiles to pull up in the far safe tile. Negotiate the break-away floor tiles to cross the portal back to reality.
Get the uzi clips at your feet and the small medipack in the back, drop through the hole and you'll notice the boulders you dodged a few moments ago. Go insert the ankh and slide into darkness...
[ * * * ]
LEVEL 4: OUT OF TUNE
→ A video walkthrough provided by the author is available here: part 1 and part 2.
Grab the goodies as the double doors open, revealing another expansive and impressive area. Run towards the intersection, where you'll spot a pool, with a closed underwater door, and two cerulean statues guarding a huge pair of doors. Climb the ledge on the right hand side of the door and move towards the pillar near the pool to pull back a block at its bottom, giving you a way up to the tall ledge in the intersection.
You see two doors now, one of which reads 3 levers for the secrets. Near the edge, locate a block in the corner and pull it towards the tall pillar, then climb to the wooden walkways above. Jump towards the huge chandelier in the center and then to the walkways on the opposite side, shimmy past the crack (noticing a sequence of symbols on the ledge) and then do a long running jump to the ledge in the back. Around the perimeter you will find the secret lever #1. Still on the walkways, return to the chandelier and jump towards the shortest of the intersections, where you'll notice a lot of gears and a row of five levers.
Counting them from left to right, the omega symbols in each sequence tell you which levers to push.
First door (γ Ω Ω Ω γ — up, down, down, down, up): staying on the wooden walkways, find the open door on the left side near where you climbed up. After the short flight of stairs, do a sharp U-turn left to find secret lever #2, then approach the SAVE sign and do as it says, before dropping through the mirror portal.
In this white chamber, the floating platforms ahead of you switch from left to right as you jump the gaps, so you need to predict your jumps towards the empty spaces on the opposite sides, forcing the platforms to switch to your landing position. At the end, save before pulling the lever as the room is going to amp things up. Not only jumping will shift the platforms from side to side, but the door behind the starting position of the white chamber is on a tight timer! Use a different slot to make quick saves whenever you deem you've made good time and keep at it.
As you cross the door, make an U-turn left to spot a chamber housing secret lever #3, and a camera hint should show the doors opening. The writing on the wall poses you the next puzzle RISE OF THE _ _ _ _ RAIDER. This is a nod to the 2015 game in our beloved franchise, so the answer is pretty much a given. Approach the huge board with letters and jump to the safe spot on the left then, in order, spell out the missing word — any wrong steps and you'll fall to your doom.
From the second safe spot in the board, jump towards five pushable TNT crates. Drop to the walkway below and look at the underside of each of the five floating platforms to know where each TNT crate needs to be placed. When all five are in position, a trapdoor is raised and you can hop towards the first MACHINE COG in the back. Use the newly raised trapdoor by the board with letters to return to the entrance and cross the double doors to return to the main chamber.
Turn right to enter the secret doors and climb the crates to pull up and get the stacks of goodies by the window for SECRETS #12 and #13 (a twofer, how generous!). Climb to the wooden walkways to return to the five levers amd open the next door.
Second door (? Ω γ γ Ω — down, down, up, up, down): just to the right of the first door. Save before crossing the door threshold, as you will have to dodge four boulders in a narrow space While the first boulder rolls towards you, wait for a second one to pass you by, then go to where the latter one came from to dodge the first boulder, but quickly be ready to retreat and repeat the same pattern for the next couple of boulders.
Jump over the lava and to the slope in the back, then slide down a bit before jumping towards the crate. Grab the crevice in the wall and shimmy to pull up on another slope, hop to the next slope and bounce to a break-away tile, quickly jumping to the safe walkway in front of you. Grab the opening on the left hand wall for the next sequence of slopes and jumps, then, from the break-away tiles, jump to the alcove in the corner. Do a running jump to the next pillar, minding your head, and shimmy to pull up to an area where a panther lurks in the shadows.
Go down the sandy path to find a room where an IRON KEY sits near the window. The receptacle is just on the other side of the window, on the upper wooden walkways of the main hall; take the side door for a shortcut and follow the walkways to insert the key and open a set of double doors that you'll find by following the walkways further around the left wall.
Run up the ramp and down the other side, get some goodies before pulling up to face another panther. At the top of the staircase, cross the giant mirror portal into a white room. As recommended by the author, save your game before stepping on the next warp tile. You'll be immediately sliding down towards a lava pit, so quickly jump and grab the slope dead ahead of you and don't hesitate as you rush to avoid the boulders hot on your heels. After clearing the last boulder rolling from the side, veer off the path of the boulders coming from the back to catch your breath.
Get the next MACHINE COG from the block in next lava pit and cross the mirror portal to be sent back to the main hall. Make your way safely down to the walkways by using the cracks on the far pillar on the right side, then loop around to return to the row of levers.
Third door (γ Ω Ω Ω Ω — up, down, down, down, down): loop around the pillar again and find the door just beneath the wooden walkways; drop safely to the ground floor and climb inside. As you pull up you'll find yourself in a mirrored room. Although the TR1 engine doesn't support reflections, it shouldn't be difficult to deduce your position. The skull tiles on the ceiling naturally mean instant death, so carefully navigate to the opposite side and pull up through the opening in the ceiling.
In the next room, proceed through the opening right in front of you and save your game before leaping towards the lava pit. You need to activate three levers while going around the room in a clockwise direction, but be warned that only the rocky bits are safe to stay on; the sand slopes lead you straight into lava. When you come full circle, grab the uzi clips and save your game before dropping to the room below.
This is a breeding chamber, you'll have to deal with several headless gunners after retrieving the MACHINE COG from the plinth. They don't all come alive at the same time, but try to deal with them quickly and effectively (the worse is still to come, so I'd suggest saving up on uzi ammo and still hoard as many medipacks as possible).
When things finally quiet down, climb the flat blocks in each of the corners of the room to find two levers plus a few goodies, then go through the exit door to return to the main hall. Climb to the wooden walkways once more to open the underwater door now.
Fourth door (Ω Ω γ Ω γ — down, down, up, down, up): swim through the door and pull up to see a clue on the wall with symbols of chess pieces. Make a mental note of the letter combinations: CA for the horse, TO for the rook, and RA for the bishop. Step on the omega tile nearby and save your game before swimming through the next door. Just around the bend, make a hard turn right and quickly swim away from the three underwater boulders.
Pull the underwater lever and swim through the next opening to find an air pocket before it's too late. The door at the bottom reads One lever per symbol. You can pull them in any order, but it's important that you only pull the correct ones. Some of the markings have eroded away, such as the rook (T–) and the bishop (–A), but the CA lever in the horse room is readily identifiable.
After pulling the three levers, swim through the door and pull up onto the wooden ledges above the tunnel threshold. Skip over the crates to a lever in an alcove and save your game for a tight timed run. After pushing the lever, you need to hopscotch to the farthest crate in order to do a running jump (do so slightly at an angle, as Lara might bump her head on the ceiling) towards the sliding pillars over the pool. With a bit of luck, you should be able to make your way all the way around to the safe ledge in the back, where you can shimmy to the opposite corner for some uzi clips.
Run up the winding ramp to face another board of omega symbols and two doors. You must step only on the correct two tiles to open each of the coded doors. For the orange door, you want to step on the tiles where the red and yellow gazes meet; for the green door, where the blue and yellow gazes meet. You can step outside the board at any time, but touching any other omega tile will reset the puzzle.
Behind each door is a lever, and inside the double doors you can jump over the balustrades to find the last MACHINE COG. On the opposite side, locate and pull the block once, then move it to the side to reveal a second block. Push this one in to find yourself back in the main hall. Climb to the row of levers one last time, but this time stop at the cogs and fill the missing spots with the four cogs in your possession.
The massive double doors below finally open. Run up the ramp and throw the lever at the top to open the exit doors and proceed to the next level.
[ * * * ]
LEVEL 5: RESONANCE
→ A video walkthrough provided by the author is available here.
Cross the double doors and slide into a room with four atlantean crawlers frozen in place. Grab the small medipack then run up to the topmost of the steps: two crawlers come to life, but they don't dare come this far so you can safely take them out with your pistols as you jump sideways to dodge their projectiles.
Jump over the spikes and throw the lever, and surely enough the other two crawlers come alive. Don't try a running jump back, but instead drop down and walk through the spikes to pull up safely. Just past the next door you'll inevitably notice the boulder hanging overhead. Quickly run to the end and veer to either side past the doorway.
Look down at the lava pit to spot a safe tile, from which you can do a running jump to SECRET #14: ammo. That was the last secret in this series. Use the same safe tile to get back on walkway and get the shotgun shells in the back. This might be a good time to make the Shotgun your default weapon, three (relatively close) shots kill flying and crawling atlanteans alike. Two winged atlanteans hatch out of the eggs in the back, slide down the side passage to the left when you're in the clear.
Grab the crevice on the wall to the left to shimmy until you can stand up, and do a series of running jumps over the pillars around the room to get to the lever near the centaur statue — as you'd expect, it comes alive when you drop down to the floor below. Cross the door and gun down the two headless gunners inside. There are three levers spread on various sides of the many pillars in this room, throw all three to open the trapdoor in the corner and pull yourself up.
Save your game. To dodge the boulder you can see in the distance, don't back off but instead run as fast as you can and wait by the step: the boulder will fly over your head. Follow the winding pathways and cross the double doors which open as you approach, gather the small medipack on the right and pull the lever. Safety drop to the bridge below at the cost of minimal health loss and cross the door.
Save your game. In addition to the swinging axes, dart traps and spikes ahead of you, the moment you cross the very second axe you will trigger a boulder, so step aside to let it roll by. After the last axe, get the large medipack to your right before approaching the lightning sphere in the next room.
Save your game. You must step on all five omega tiles while steering clear from the lightning strikes the boulder emit every other second. The lightning strikes are random, but the author notes you can quickly jump backwards after stepping on each tile to prevent being hit. Past the doors, get the ammo near the burning plate and goodies in an alcove beyond the centaur statue. Through the archway, go upstairs and work your way up the slope via the slightly flatter spots. From the pillar, jump to the sandy ledges behind you to go around and pull up to the taller ledge. The boulder will roll down as soon as you pull up, so do so near the wall so you have time to back off and grab the edge again, shimmy left and pull up safely. Do a running jump (without grab) towards the lever up in the spike pit and open the set of double doors near the centaur statue.
Retrace your steps and surprise, surprise: the centaur comes to life. In the next room, you'll hear the manic shrieks of a winged atlantean above. Kill it straight away for some silence. Fall into the water and swim through the slit in the wall to emerge on the upper walkway, where the last enemy was. On the left, shimmy past the cracked column to pull up into the doorway, then head towards the next egg — which hatches and throws another winged atlantean your way —, and pull the lever behind the sloped block on the right.
Safety drop and cross the door and jump beyond the dart trap. Be careful, as the darkness conceals a deadly pit, so approach the edge and hop over the pillars. Down some steps, you'll see a series of pillars surrounding a scorching hot lava pit. Start by doing a running jump at an angle with late grab to reach the second pillar attached to the left wall. Drop onto the tile at lava level and keep working your way upwards until the camera shows you a boulder ready to crush your dreams.
Jump to the tile below the boulder and sprint down the slope as it rolls behind you, timing your jump right to get to the next set of pillars. Past the threshold, another boulder tries to surprise you, hop back to safety and wait for your turn and follow the walkway to an ornate tile, similar to the ones atop the pillars. Do a running jump to the first tall pillar attached to the left hand wall jump across the tall pillars to a lever resting on a ledge in the back. Backtrack to the entrance and hop through the open door over the dark pit.
Gun down the next two headless gunners and pull the lever on the ledge at the end to open a side door to a beautiful garden with centaur statues. If you explore the underwater side passages, you'll find shells and a small medipack. Before moving up, step on the omega tile below the centaur statue in the center of the area, then find the low block in the SE corner to pull up to a slope and backflip to reach the walkway above.
Step on the remaining four omega tiles below the centaur statues, but be aware that one centaur will burst out of its shelling, so quickly backflip to keep a safe distance. Through the door, you will arrive to a room with many pillars and some crawlers conspicuously frozen in place. Don't worry just yet: they'll only come alive on your way back. Follow the only possible path, collecting a few supplies along your way to the next lever. Be careful when you see some spikes in the distance, as a boulder will roll down the sandy slope, and then shortly after a swinging axe and another boulder hidden behind corners.
With the lever down, retrace your steps back slowly to deal with the two crawlers away from the traps they just might push you into. The door on the other end of the walkways is now open, and the centaur statue closest to it joins the party. Open the door with a nearby lever, gathering more supplies before moving inside, where three headless gunners await.
In the side chamber, get more supplies and, facing the door beyond the centaur statues, pull up to an opening on the right hand wall and hop across the pillars to the lever hidden behind the pyramid-like pillar to open your way to the first showdown.
Save your game and get ready to face the flying goddess of the headless, who relies on the aid of a couple of centaurs as well. When they're all done for, climb up the steps to the top of the structure where another centaur had been waiting. Use the pillars and ledges around the perimeter of the room to reach another lever and safety drop to the floor to enter the double doors.
Slide down to a last gauntlet. The camera switches to a 2D angle for a moment, but all you need to do is run forward as you time your jumps past the giant hammer — no time to hesitate — and grab the next slope. Quickly navigate the row of break-away tiles. From the safe pillar in the lava pit, jump to the omega tile in the sloped pillar ahead of you and backflip to safety. The exit door is open, jump inside and cross the mirror portal to finish the level.
[ * * * ]
LEVEL 6: THE FORGOTTEN TREASURE
→ A video walkthrough provided by the author is available here.
Retrieve the goodies scattered around the room, then move the pushable block towards the gap below the out-of-reach lever. It opens the nearby double doors to the great treasure chamber, run straight ahead to stumble upon the MYSTICAL GEM.
Once you get it, you'll set off a series of earthquakes which shake some debris off the ceiling. Save your game as you head through the next doors. Jump from the end of the slide to land on the platform where the atlantean abomination is, surrounded by four lightning spheres in an arena. Draw your Uzis and fill the creature with lead, hoping not to be pushed off the sides while doing your best to say in the safe zones outside the range of the spheres. You'll use a lot (a lot) of medipacks in this fight, but you should have more than enough inventory for this battle.
When the creature stops moving, be careful as the exploding bits might still kill you. Once nothing remains, jump through the exit doors and save your game. What follows is a straightforward, but exhilarating sequence of traps which require you to always be on the move. Beyond the sliding lava traps, expect a series of break-away tiles over lava combined with slopes and swinging axes. You might want to make quicksaves (in different slots, just in case things go south) to break down the sequence into smaller, more manageable bits.
At the two spots where the camera shifts position, you want to run towards the camera to proceed. In the first instance, quickly throw the lever and escape the side door, and, in the second one, after falling down a hole, you'll find yourself being chased by lava while you time your jumps through gnashing teeth traps. A handful of traps later, grab the crevice in the wall and shimmy to another pair of break-away tiles: backflip twice to land on a safe spot where you can catch your breath.
Still, more traps await. Navigate the next series of break-away tiles with simple acrobatic jumps. At the top, another save sign — lovely! Slide into the next room and be mindful of lava traps coming from both sides as a boulder rolls from behind, and spike pits in front of you... Time your jumps until you slide and fall into a water filled cavern. Don't drown with you blood, they say. Just follow the winding path until you can finally breathe again
Get out of the water as Lara's soothing theme plays, then safely walk amidst the spikes and run up the slope to finish this level. What a rush!
[ * * * ]
LEVEL 7: EPILOGUE
Just keep moving. Work your way through upwards, until you find yourself back in Venetian soil. Inside the warehouse, simply follow the opening doors to reach the end of this marvelous adventure.